
Using the Netflix stack with Spring boot: Ribbon
- October 18th, 2016
- 7 minute read
- Eureka Netflix REST Spring Spring boot Spring cloud
In my last article I gave a basic introduction into the concepts of a service oriented architecture (SOA) and microservices. I also made a small example about a service registry and how Netflix is involved into microservices with tools like Eureka. However, the story was quite unfinished, since we only made it possible for microservices to register themselves on the registry, but the ones consuming the microservices have nothing to do with the service registry… yet.
Meet Ribbon
Ribbon is an interceptor that goes well with Eureka. It allows you to look up the hostname/IP of a service and does stuff like client-side load balancing for you as well. Now the only question is, what does Spring have to do with that? Well, if you followed my article about consuming a REST service, you should be familiar with RestTemplate already. When using the Eureka Discovery dependency, you can use the @LoadBalanced annotation to set up a RestTemplate using the Ribbon interceptor.
Setting up our application
In case you didn’t follow my article about Eureka, I suggest you download the code from GitHub. If you have both projects (the service registry and the service itself) imported in your IDE it’s time to create our next project, the consumer.
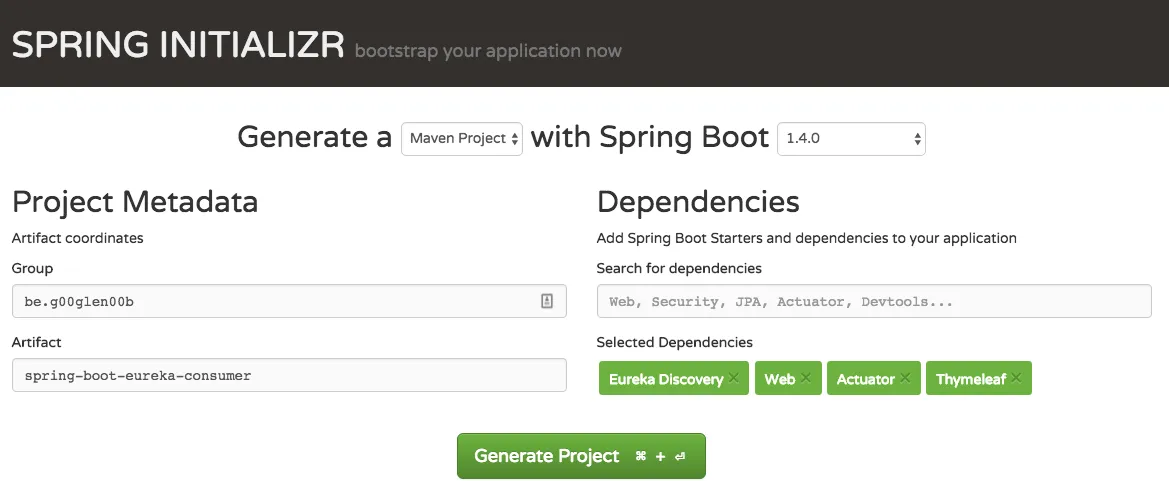
Open the Spring Initializr, and add both the Web, Eureka Discovery, Thymeleaf and Actuator dependencies.
Configuring Eureka
The first step we’re going to configure is how to set up the Eureka discovery. First of all open application.properties (or application.yml) and add the following properties:
# application.properties
eureka.client.healthcheck.enabled=true
eureka.client.serviceUrl.defaultZone=http://localhost:8761/eureka/
eureka.instance.statusPageUrlPath=/info
eureka.instance.healthCheckUrlPath=/health
# application.yml
eureka:
  client:
    healthcheck:
      enabled: true
    service-url:
      default-zone: http://localhost:8761/eureka/
  instance:
    status-page-url-path: /info
    health-check-url-path: /health
This should look quite familiar, because this is the same configuration we applied to set up our service itself. The health check and status page URLs are provided by the actuator, so we don’t have to do anything for that (except adding the actuator as a dependency).
We also have to give the application a name, since it will be used to register itself on Eureka with that name. Yes that’s right, the service registry is not only limited to services, but applications can register themself on Eureka as well.
To give it a name we use the spring.application.name property:
# application.properties
spring.application.name=task-app
Or in YAML:
# application.yml
spring:
  application:
    name: task-app
And finally, we also have to enable the Eureka discovery by adding the @EnableEurekaClient annotation to our main class like this:
@SpringBootApplication
@EnableEurekaClient
public class SpringBootEurekaConsumerApplication {

    public static void main(String[] args) {
        SpringApplication.run(SpringBootEurekaConsumerApplication.class, args);
    }
}
Adding the DTO
Now, because we will consume the task service we wrote earlier, we’ll have to use the same “format” as the API, so we’ll use the same DTO. To make it easier for myself I’ll just copy the code from the microservice itself.
public class TaskDTO {
    private Long id;
    private String task;
    private boolean completed;

    public TaskDTO() {
    }

    public TaskDTO(String task, boolean completed) {
        this(null, task, completed);
    }

    public TaskDTO(Long id, String task, boolean completed) {
        this.id = id;
        this.task = task;
        this.completed = completed;
    }

    public Long getId() {
        return id;
    }

    public String getTask() {
        return task;
    }
    public void setTask(String task) {
        this.task = task;
    }

    public boolean isCompleted() {
        return completed;
    }
    public void setCompleted(boolean completed) {
        this.completed = completed;
    }
}
Creating the HTML
Out of laziness I will recycle the HTML from an article I made earlier. Create a file called tasks.html inside the src/main/resources/templates folder with the following content:
<!DOCTYPE html>
<html lang="en" xmlns="http://www.w3.org/1999/xhtml" xmlns:th="http://www.thymeleaf.org">
<head>
  <link rel="stylesheet" href="//fonts.googleapis.com/css?family=Raleway:400,300,600" />
  <link rel="stylesheet" href="//cdnjs.cloudflare.com/ajax/libs/normalize/4.0.0/normalize.min.css" />
  <link rel="stylesheet" href="//cdnjs.cloudflare.com/ajax/libs/skeleton/2.0.4/skeleton.min.css" />
  <title>Task application</title>
</head>
<body>
  <div class="container">
    <h1>My tasks</h1>
    <div th:each="task : ${tasks}">
      <input type="checkbox" name="completed" th:checked="${task.completed}" disabled />
      <span th:text="${task.task}"></span>
    </div>
  </div>
</body>
</html>
I’m using checkboxes here but disabled them because I didn’t implement the API calls yet to update tasks. Anyhow, I’m using Thymeleaf here as a template engine. However, the default settings are a bit strict, so open application.properties (or application.yml) and set the following properties:
# application.properties
spring.thymeleaf.cache=false
spring.thymeleaf.mode=LEGACYHTML5
# application.yml
spring:
  thymeleaf:
    cache: false
    mode: LEGACYHTML5
The LEGACYHTML5 mode allows you to write things like <br> without properly closing the elements. So if you didn’t use this mode, you would have to write <br />. The same applies to attributes. In the HTML above I’ve disabled all checkboxes using the disabled property. Without LEGACYHTML5 you would have to write disabled="disabled".
However, choosing this mode requires you to add an additional dependency to your Maven descriptor called nekohtml:
<dependency>
    <groupId>net.sourceforge.nekohtml</groupId>
    <artifactId>nekohtml</artifactId>
    <version>1.9.22</version>
    <scope>runtime</scope>
</dependency>
Calling the REST API
Before we start writing our service, we have to set up a RestTemplate. If you used Spring cloud before, you might know that a RestTemplate was automatically created for you, however, since the Brixton release of Spring cloud, this is no longer true. When using Eureka Discovery, you’ll still have to create a RestTemplate.
So let’s do that by opening the main class and creating a bean:
@Bean
@LoadBalanced
public RestTemplate restTemplate() {
    return new RestTemplate();
}
Now the next step is to create our service and autowire the RestTemplate:
@Service
public class TaskServiceImpl {
    @Autowired
    private RestTemplate restTemplate;
}
Now, to use RestTemplate with generic types like List<TaskDTO>, you’ll have to use ParameterizedTypeReference. For our example it doesn’t really matter whether or not you use an array or a list, but for demonstration I’ll use ParameterizedTypeReference. To use it, create an anonymous inner class and extend from this class like this:
private static class ListOfTaskDTO extends ParameterizedTypeReference<List<TaskDTO>> { }

Now you can use it with `RestTemplate` like this:

public List<TaskDTO> findAll() {
    return restTemplate.exchange("http://task-service/api/tasks", HttpMethod.GET, null, new ListOfTaskDTO()).getBody();
}
As you can see, I’m not using a real URL reference here, but I’m using the task-service name to refer to the service that is registered on Eureka with this name. This makes it very easy since nobody really needs to know where the microservice is located except the service registry.
Using the service
Now, the final step is to create a new controller and use the service within it:
@Controller
@RequestMapping("/")
public class TaskController {
    @Autowired
    private TaskServiceImpl service;

    @RequestMapping(method = RequestMethod.GET)
    public ModelAndView findAll() {
        return new ModelAndView("tasks", "tasks", service.findAll());
    }
}
Now you can run the application, but make sure you run the registry and the service as well. Also make sure they all have a different port so they can be ran simultaneous. You can change the port by overriding the server.port property, or by setting the SERVER_PORT environment variable.
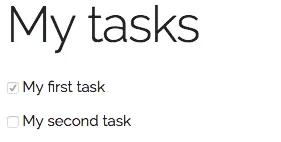
Testing it out
If you open your application (I hosted it on port 8082, so for me it’s http://localhost:8082), you’ll see our task service is successfully being called:
Now, to see if load balancing works fine, you could run the task service twice, but again, make sure they run on a different port. If you run the service twice and go to the Eureka dashboard, both instances should be listed:

Now to make sure it’s being load balanced, you could open up your service and add some logging. Now refresh the application a few times and you’ll see that the log appears on both instances, ideally around 50% of the time.

For me both instances showed the log statements the same amount of times, which means the client side load balancing is doing a fine job. This also demonstrate how easily horizontal scaling became with Eureka. Run a few more instances of your service and that should be it.
It also allows you to decouple your services even more. It doesn’t matter what port your microservice runs on, or where it runs, as long as both the application and the microservice look at the same service registry, it’s all OK.
Achievement: Used the powers of Netflix
If you’re seeing this, then it means you successfully managed to make it through this tutorial. As usual, the code can be found on GitHub.