
Last time, I tested a simple Node.js application I wrote with AVA. While my initial experience with AVA was great, it’s probably still worth it to compare it with other testing frameworks. Another testing framework I seem to hear a lot about is tape. One of the main advantages of tape is that it produces its output according to TAP or the Test Anything Protocol. Let’s see how we can write our tests!
Setting up
To use tape, we need a few dependencies. Obviously, we’ll need tape itself. But since tape produces TAP-based outputs, we’ll also install a TAP-based reporter, in this case faucet. This makes it easier to read the output.
npm install --save-dev tape faucet
To make it easy to run the tests, I’m also going to write an npm script. Normally, you could run your tests like this:
tape test/**/*.js
Additionally, if you want to use faucet as well, you use:
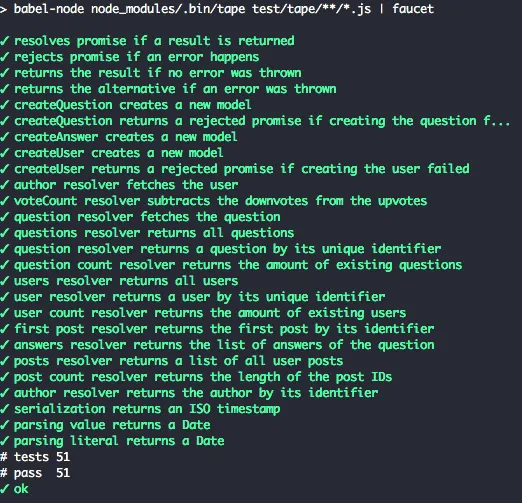
tape test/**/*.js | faucet
However, since I used Babel to transpile my code, we’ll need to transpile it as well when executing tape:
babel-node node_modules/.bin/tape test/tape/**/*.js | faucet
Compared to AVA, which allows us to use Babel out-of-the-box, this is a bit less pretty.
Writing our first test
Just like last time, I’m going to start testing by writing tests for the helpers I wrote. One of the helpers returns an alternative value if the operation that it executed fails. The code I wrote looks like this:
const returnOnError = (operation, alternative) => {
  try {
    return operation();
  } catch (e) {
    return alternative;
  }
};
To properly test this, I need to write two tests:
- A test to see if the result of the operation is used.
- Another test to see if the alternative is used when the operation failed.
import test from 'tape';
import {returnOnError} from '../../src/helpers';

test('returns the result if no error was thrown', t => {
  t.equal(returnOnError(() => 'foo', 'bar'), 'foo');
  t.end();
});

test('returns the alternative if an error was thrown', t => {
  t.equal(returnOnError(() => {throw 'Foo'}, 'bar'), 'bar');
  t.end();
});
The code I wrote is very similar to AVA. We write our tests within a test() block. Within that block, we can write assertions using the callback value (t). In this case, I used the t.equal() assertion to make sure that the value is either foo or bar. A difference with AVA is that you have to explicitely end your test (t.end()). Alternatively, you can also start your test by telling how many assertions are expected. The latter can be done by writing t.plan(1), which means that one assertion would be expected in that specific test.
Testing promises
Unlike many testing frameworks, tape does not require an additional setup if you use promises. If you write assertions within a promise, tape will wait until you call t.end(). Alternatively, you can use blue-tape to integrate even more with promises. If you use blue-tape and you return a promise, it automatically invokes t.end() when a promise completes.
In this tutorial, I’ll use tape in stead of blue-tape, and manually call the t.end() function as within my other tests. Let’s demonstrate that by writing tests for my next helper. My promisify helper converts a Mongoose query to a promise, as you can see in the code below:
const promisify = query => new Promise((resolve, reject) => {
  query.exec((err, data) => {
    if (err) reject(err);
    else resolve(data);
  });
});
Just like before, I have to write two tests to make this work:
- A test to verify that the promise is resolved when the query is executed.
- Another test to verify that the promise is rejected when an error is returned.
However, before we can write some tests, there is an issue. The code we have right now expects us to send a Mongoose query, which we don’t have. To make this work, we’ll have to stub this query object using a framework like Sinon.js. Just like last time, we’ll install that using npm:
npm install --save-dev sinon
Now we can stub that exec() function properly within our tests:
test('resolves promise if a result is returned', t => {
  const exec = sinon.stub();
  promisify({exec}).then(result => {
    t.equal(result, 'foo');
    t.end();
  });
  exec.callArgWith(0, null, 'foo');
});

test('rejects promise if an error happens', t => {
  const exec = sinon.stub();
  promisify({exec}).then(null, err => {
    t.equal(err, 'error');
    t.end();
  });
  exec.callArgWith(0, 'error');
});
Working with imports
When developing applications, you won’t write everything in one single file. Rather than that, you’ll separate your code into small chunks and use imports to use that functionality across your application.
When writing unit tests, you don’t want to test all imported functionality within your test. The logic behind that is that you want to keep the scope of your tests as small as possible and test one thing at a time. This means that, just like before, we want to create stubs of our imported logic. An important thing to know is that imports are singletons, meaning that if you import it into file A and in file B, both will get the same instance.
This means that, if we import a dependency in our test, we can stub some functions of it and when we execute our logic within our tests, it will call those stubs, rather than the actual implementation.
For example, let’s say we want to write a unit test for the author resolver of Post:
const resolvers = {
  author: post => promisify(User.findById(post.authorId))
};
This code depends on the User model, and calls the findById() function. So, if we import the User model in our test, and stub the findById function, we can write clean tests:
test('author resolver fetches the user', t => {
  const exec = sinon.stub();
  const user = {id: 1, name: 'Foo'};
  const findUser = UserModel.findById = sinon.stub().returns({exec});
  Post.author({authorId: 1}).then(result => {
    t.is(result, user);
    t.is(findUser.lastCall.args[0], 1);
    t.end();
  });
  exec.callArgWith(0, null, user);
});
With Sinon.js, we can not only invoke arguments passed to a stub, but we can also retrieve the arguments and write assertions against it. That allows us to use findUser.lastCall.args[0] to see if it matches the authorId.
Testing it out
To test it out, you can call the npm script:
npm test
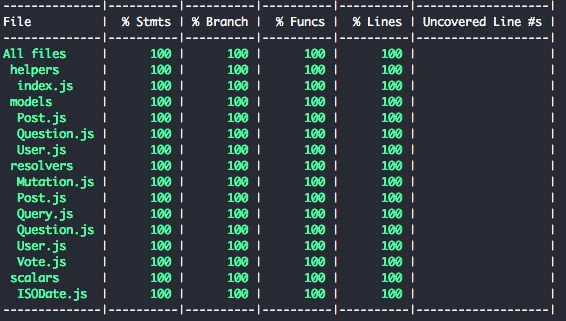
Additionally, if we want to see a coverage report, we can install tools like nyc:
npm install --save-dev nyc
And then we can run it like this:
npx nyc npm test
Summarized
In summary, tape is a great testing framework. It doesn’t use the global namespace, it uses a generic protocol for reporting (TAP) and it’s quite small. The downside of it, due to it being so small is that it isn’t exactly feature-rich but comes with a feature-rich ecosystem in stead. That does mean you have to rely on third party dependencies sometimes though, and that some things are a bit more difficult to set up.
When compared with AVA, both share a lot of similarities. This makes sense, since the syntax of AVA is inspired by tape. One of the differences is that AVA’s based upon parallelism, while tape isn’t. AVA comes with Babel out-of-the-box, while with tape you’ll have to call the Babel transpiler by yourself, or you have to use the babel-tape-runner. The latter, as far as I’m aware, doesn’t work with the new Babel 7 yet though.
Another difference is that AVA comes with promise-support, while with tape you don’t necessarily need it, but if you want, you can get a similar feature by using blue-tape.
The last difference I want to mention is that tape is slightly less opinionated than AVA. While AVA does certain things by default (like ignoring helpers), tape doesn’t.
With that, I’m going to wrap up this article. As usual, you can find the code on GitHub.