
Producing REST API's with Spring
- September 6th, 2016
- 10 minute read
- REST Spring Spring boot Spring MVC Web Web services
In the past couple of weeks I’ve written a few simple applications using Spring boot. With Spring MVC it’s also quite easy to serve REST API’s. In this article I’ll show you how to create such a REST API and how to consume one using RestTemplate.
Setting up the project
In this case we’re going to have a special project which can’t be easily@ generated with the Spring Initializr. I’m going to create a multi-module Maven project called spring-boot-rest with two modules called spring-boot-rest-impl and spring-boot-rest-client.
So, first create your parent project which will contain all the modules. Important here is that the packaging should be pom and that the parent should be the following:
<parent>
    <groupId>org.springframework.boot</groupId>
    <artifactId>spring-boot-starter-parent</artifactId>
    <version>1.3.3.RELEASE</version>
    <relativePath/> <!-- lookup parent from repository -->
</parent>
Since we cannot use the Spring boot starter as the parent in our modules (because this project will be the parent), we make it so that the root/parent module has the Spring boot starter as its own parent. Now add a module called spring-boot-rest-impl and add the following dependencies:
<dependencies>
    <dependency>
        <groupId>org.springframework.boot</groupId>
        <artifactId>spring-boot-starter-data-jpa</artifactId>
    </dependency>
    <dependency>
        <groupId>org.springframework.boot</groupId>
        <artifactId>spring-boot-starter-web</artifactId>
    </dependency>
    <dependency>
        <groupId>org.hsqldb</groupId>
        <artifactId>hsqldb</artifactId>
        <scope>runtime</scope>
    </dependency>
</dependencies>
Also, add the following plugin:
<build>
    <plugins>
        <plugin>
            <groupId>org.springframework.boot</groupId>
            <artifactId>spring-boot-maven-plugin</artifactId>
        </plugin>
    </plugins>
</build>
Now do the same for the spring-boot-rest-client project, but use the following dependencies in stead:
<dependencies>
    <dependency>
        <groupId>org.springframework.boot</groupId>
        <artifactId>spring-boot-starter-thymeleaf</artifactId>
    </dependency>
    <dependency>
        <groupId>org.springframework.boot</groupId>
        <artifactId>spring-boot-starter-web</artifactId>
    </dependency>
</dependencies>
Data model
The first step I’m going to take is to create the entity, the schema and some mock-data. The application I will be writing is a simple todo/task list application. So the entity will be something like this:
@Entity
@Table(name = "task")
public class Task {
    @Id
    @GeneratedValue(strategy = GenerationType.IDENTITY)
    @Column(name = "id")
    private Long id;
    @Column(name = "description")
    private String description;
    @Column(name = "completed")
    private boolean completed;

    public Task(Long id, String description, boolean completed) {
        this.id = id;
        this.description = description;
        this.completed = completed;
    }

    public Task() {
    }

    public Long getId() {
        return id;
    }

    public String getDescription() {
        return description;
    }
    public void setDescription(String description) {
        this.description = description;
    }

    public boolean isCompleted() {
        return completed;
    }
    public void setCompleted(boolean completed) {
        this.completed = completed;
    }
}
Nothing special here, just some plain JPA. Note that I wrote two constructors. A default no-argument constructor, and another constructor that initializes all fields. Now, to create the table and insert some data I’m going to add two files within the src/main/resources folder.
The first file is schema.sql, which will automatically be executed on startup:
CREATE TABLE task (
  id          INTEGER IDENTITY PRIMARY KEY,
  description VARCHAR(64) NOT NULL,
  completed   BIT NOT NULL);
The other file should be called data.sql:
INSERT INTO task (description, completed) VALUES
  ('Setting up our application', 1),
  ('Handling our form', 0);
There’s one issue with this setup. By default, Spring boot will let Hibernate create the schema if you’re using an in memory database like HSQLDB. To be honest, I don’t really like that setup. When you create your schema based on your entities, you’re assuming that your entities are correctly mapped. And honestly, there are usually some mistakes. To fix this, you open application.yml (or application.properties) and enter:
spring:
  jpa:
    hibernate:
      ddl-auto: none
Creating the repository
Creating a repository using Spring Data is super-easy. Just create an interface and make it extend from JpaRepository:
public interface TaskRepository extends JpaRepository<Task, Long> {
}
Creating a service
In our REST service we’re not going to expose our entities, because there might be some differences between our data model and what we wish to expose (or using a different structure). That’s why I also made a service, which is the proper place for any logic between the controller and the repository. In this case, the service will look like this:
@Service
public class TaskServiceImpl {
    @Autowired
    private TaskRepository repository;

    public List<TaskDTO> findAll() {
        return repository.findAll().stream()
            .map(entity -> new TaskDTO(entity.getId(), entity.getDescription(), entity.isCompleted()))
            .collect(Collectors.toList());
    }

    @Transactional
    public TaskDTO create(TaskDTO task) {
        Task newTask = new Task();
        newTask.setDescription(task.getDescription());
        newTask.setCompleted(task.isCompleted());
        Task savedTask = repository.saveAndFlush(newTask);
        return new TaskDTO(savedTask.getId(), savedTask.getDescription(), savedTask.isCompleted());
    }

    @Transactional
    public TaskDTO update(Long id, TaskDTO task) {
        Task entity = findOneSafe(id);
        entity.setDescription(task.getDescription());
        entity.setCompleted(task.isCompleted());
        return new TaskDTO(entity.getId(), entity.getDescription(), entity.isCompleted());
    }

    @Transactional
    public void delete(Long id) {
        Task task = findOneSafe(id);
        repository.delete(task);
    }

    private Task findOneSafe(Long id) {
        Task task = repository.findOne(id);
        if (task == null) {
            throw new TaskNotFoundException();
        } else {
            return task;
        }
    }
}
Most of these methods are quite self-explanatory. In the findAll() method we retrieve all Task entities and use Java 8 streams + lambda’s to convert them to DTO’s. In the create method we create a new Task entity and set the properties equal to the incoming DTO. After saving the entity we convert the saved entity back to a DTO and that’s what we will send to the consumer. The update method is similar to that, but instead of creating a new entity, we retrieve an attached entity from the repository itself. You don’t have to save those, since JPA/Hibernate does this automatically at the end of each transaction.
Finally, the delete() method is the most simple one, and just uses the repository to delete the entity. You might ask why I don’t use the delete by ID function, well that’s because I like to provide the consumer with a proper error message if he’s trying to delete something that doesn’t exist. When you delete by ID, you don’t actually know if you actually deleted something. If it didn’t exist, it will just do nothing, similar to how a SQL query behaves.
Now, obviously we also have to define the TaskDTO itself. This one looks quite similar to the entity, but I won’t be using the JPA annotations here:
public class TaskDTO {
    private Long id;
    private String description;
    private boolean completed;

    public TaskDTO() {
    }

    public TaskDTO(Long id, String description, boolean completed) {
        this.id = id;
        this.description = description;
        this.completed = completed;
    }

    public Long getId() {
        return id;
    }

    public String getDescription() {
        return description;
    }
    public void setDescription(String description) {
        this.description = description;
    }

    public boolean isCompleted() {
        return completed;
    }
    public void setCompleted(boolean completed) {
        this.completed = completed;
    }
}
Creating the controller
Creating a REST API in Spring is similar to creating a MVC application with Spring. You start of with a controller. In this case, you should map the controller with the annotation @RestController. The difference between this annotation and @Controller is that it will automatically add the @ResponseBody annotation as well, which means the return values of each method will actually be served as the response of your API.
The controller itself is quite easy, all it does it simply propagating some calls to the service:
@RestController
@RequestMapping("/api/tasks")
public class TaskController {
    @Autowired
    private TaskServiceImpl service;

    @RequestMapping(method = RequestMethod.GET)
    public List<TaskDTO> findAll() {
        return service.findAll();
    }

    @RequestMapping(method = RequestMethod.POST)
    public TaskDTO create(@RequestBody TaskDTO dto) {
        return service.create(dto);
    }

    @RequestMapping(value = "/{id}", method = RequestMethod.PUT)
    public TaskDTO update(@PathVariable Long id, @RequestBody TaskDTO dto) {
        return service.update(id, dto);
    }

    @RequestMapping(value = "/{id}", method = RequestMethod.DELETE)
    public void delete(@PathVariable Long id) {
        service.delete(id);
    }
}
Testing the REST API
If you did all that, you can now test the API. Run the application and open a REST client. I will be using Postman.
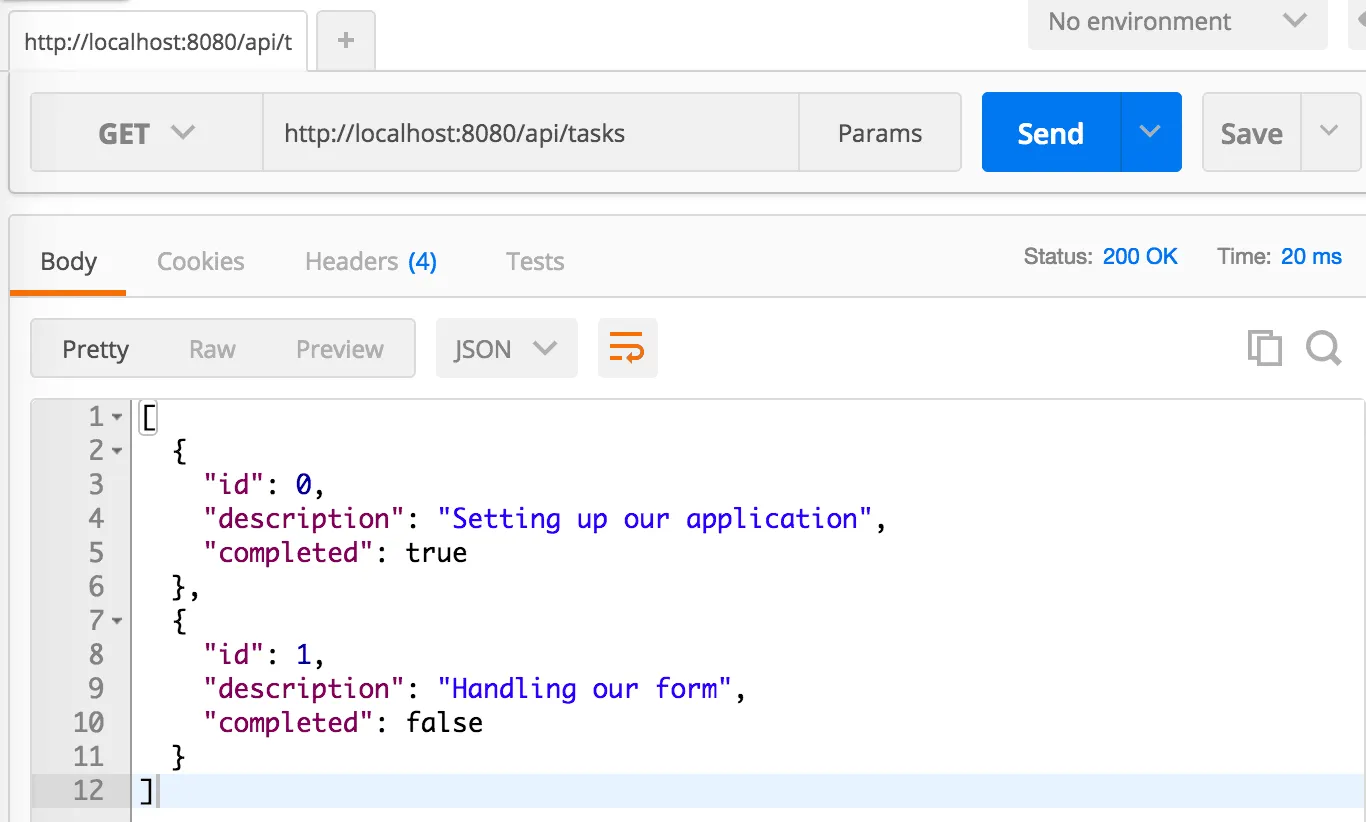
Now, if you send a GET request to http://localhost:8080/api/tasks, you’ll see that you get a list of two tasks. Which is correct, since we inserted two records in our database when we created data.sql.
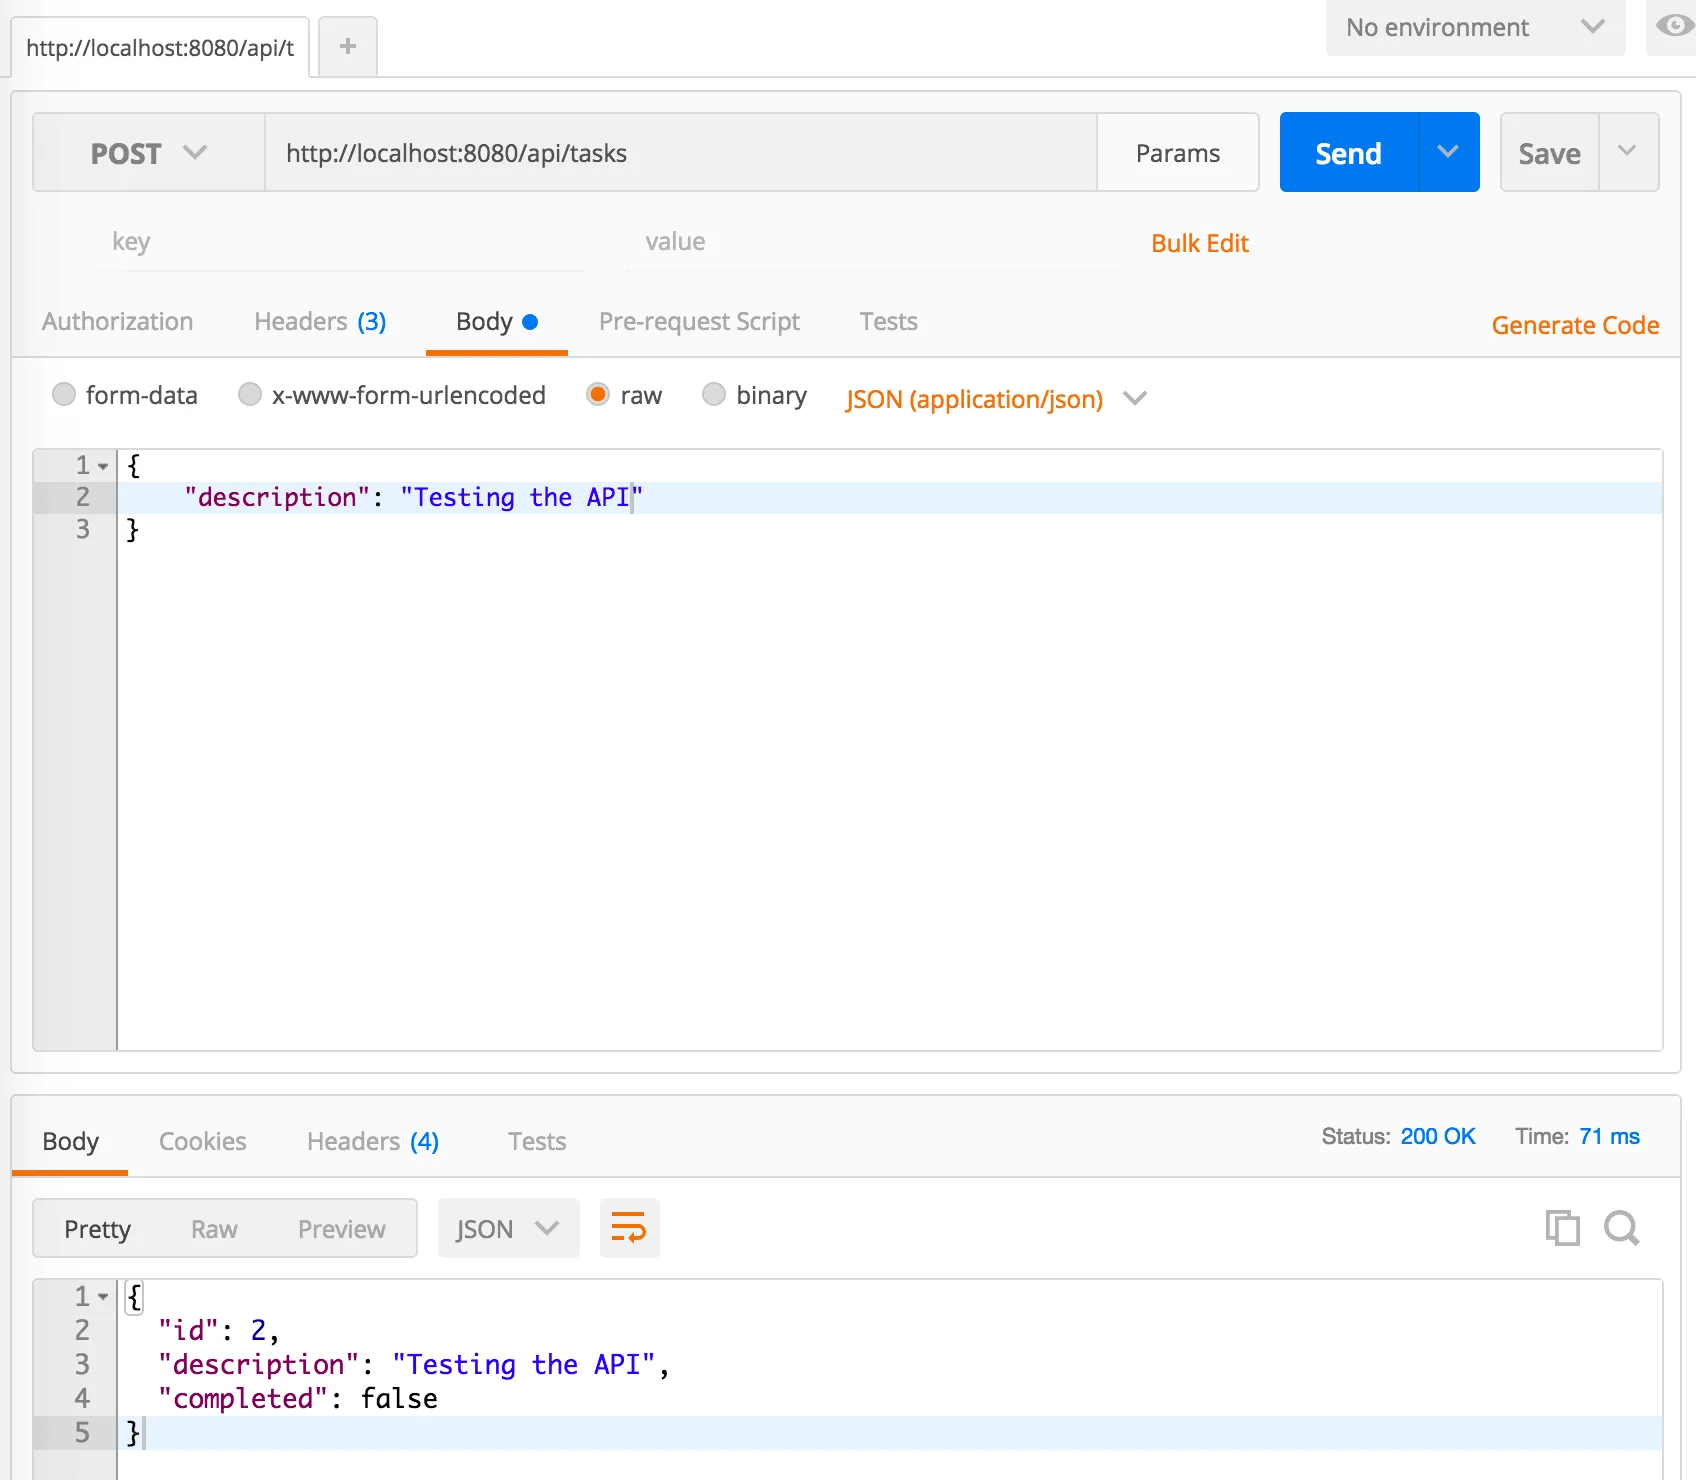
Now, change the method to POST and provide the details of a new task by writing some JSON inside the request body, for example:
{
  "description": "Testing the new REST API"
}
If you send that to the server, you’ll see that you get an almost identically looking DTO as a response. Except this one has an ID (and a "completed" property, though we can provide that as well).
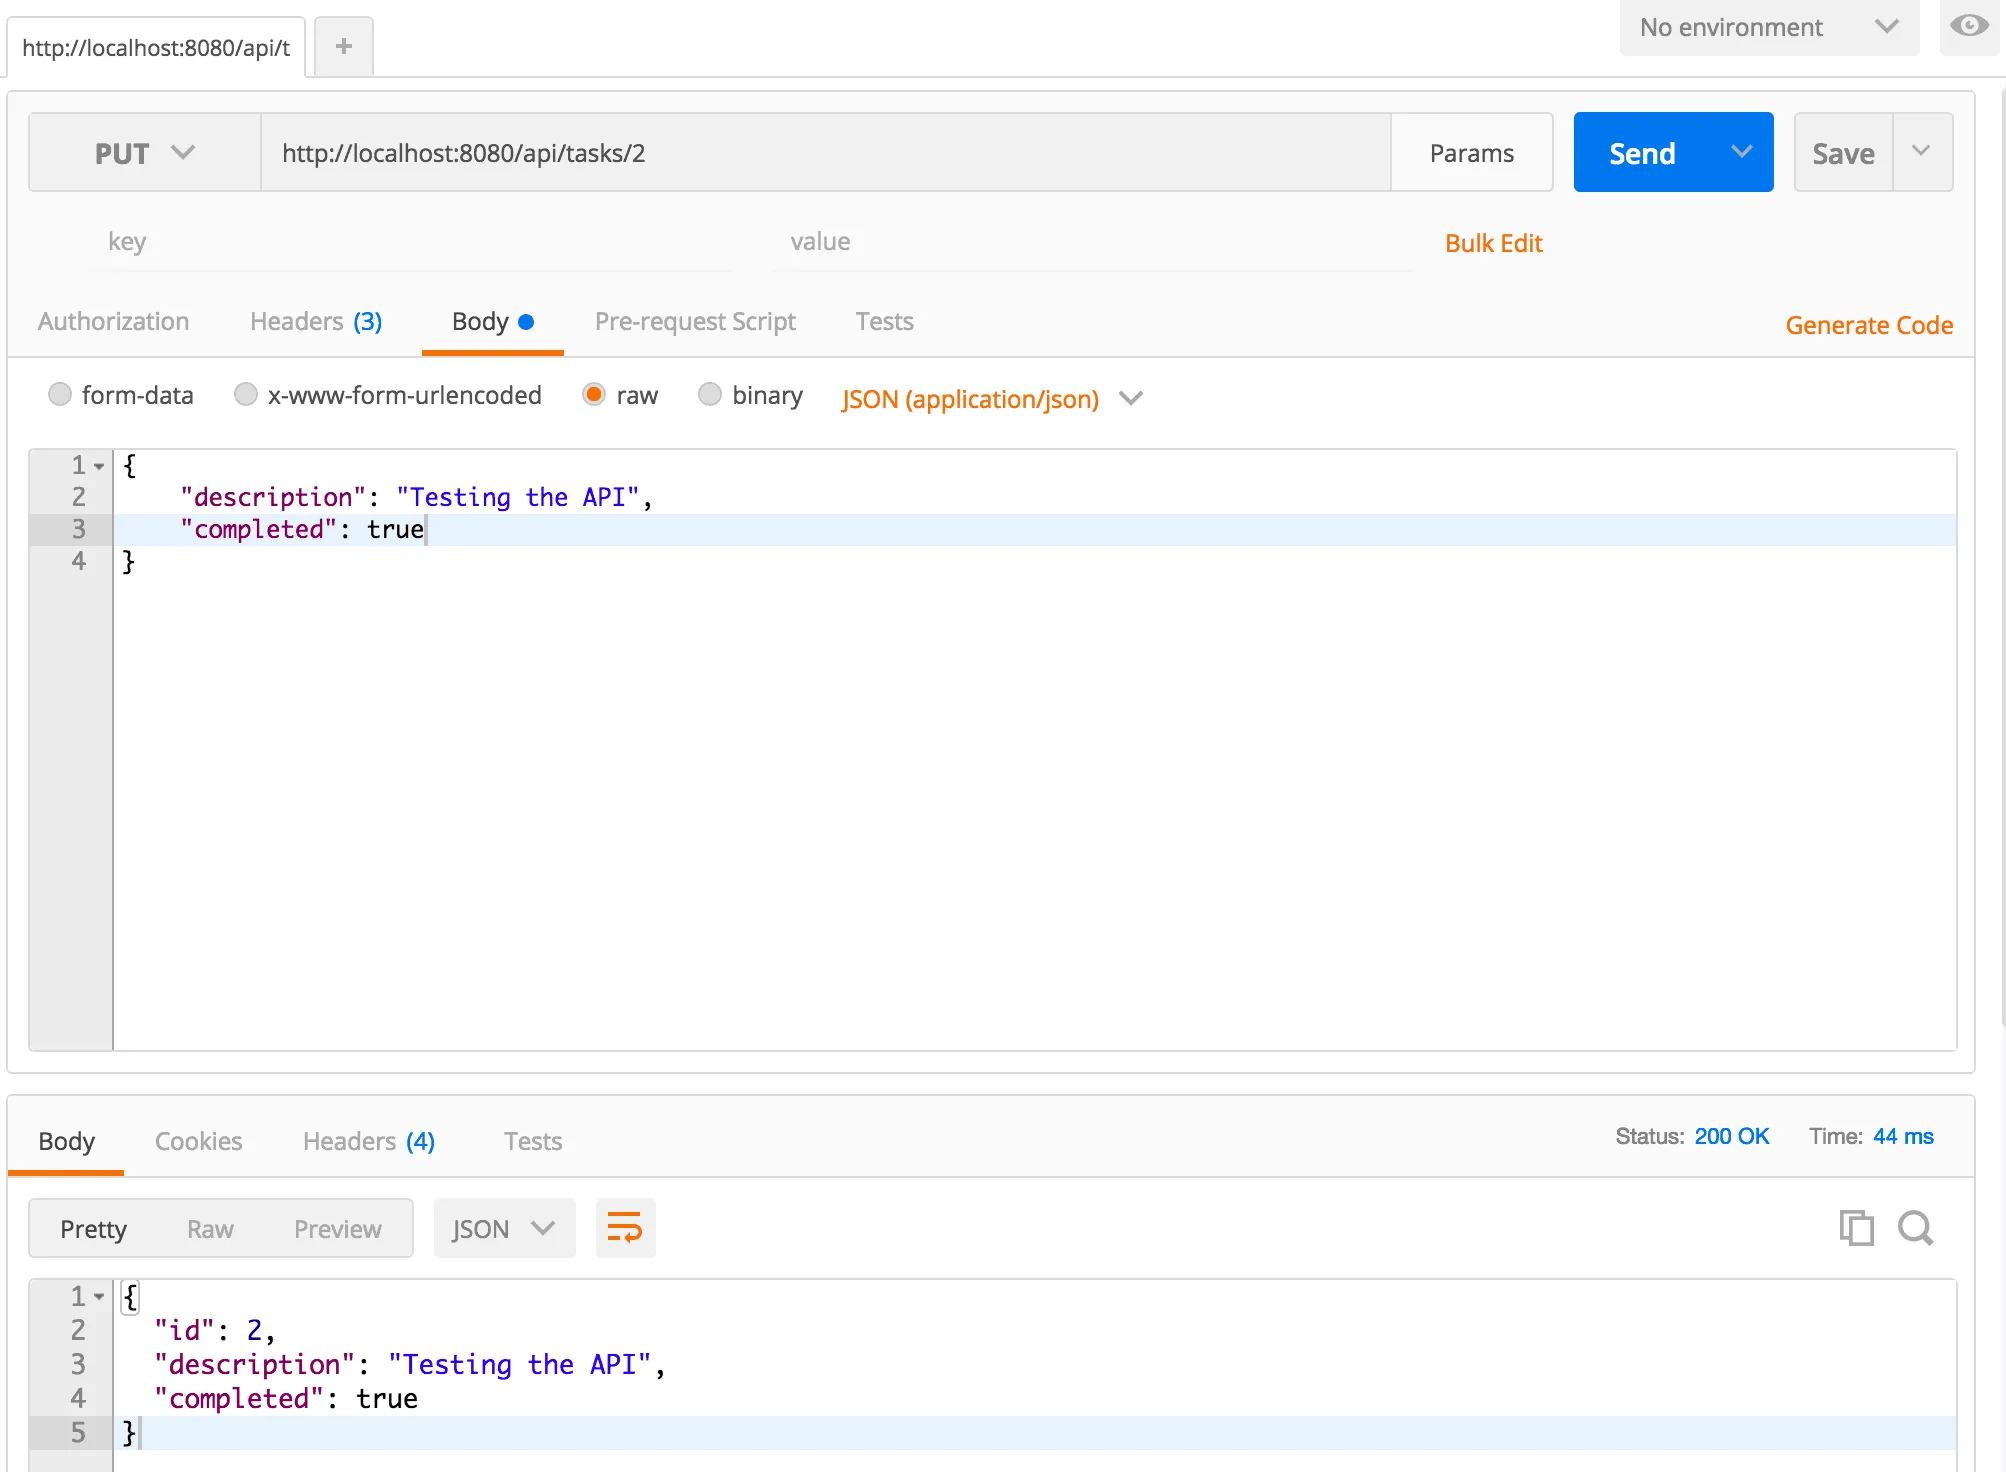
Now, let’s use that ID and change the HTTP method to PUT and put the ID after the current path, for example http://localhost:8080/api/tasks/2. If you would change the request body now, for example into:
{
  "description": "Testing the new REST API",
  "completed": true
}
You’ll see that our task is now updated.
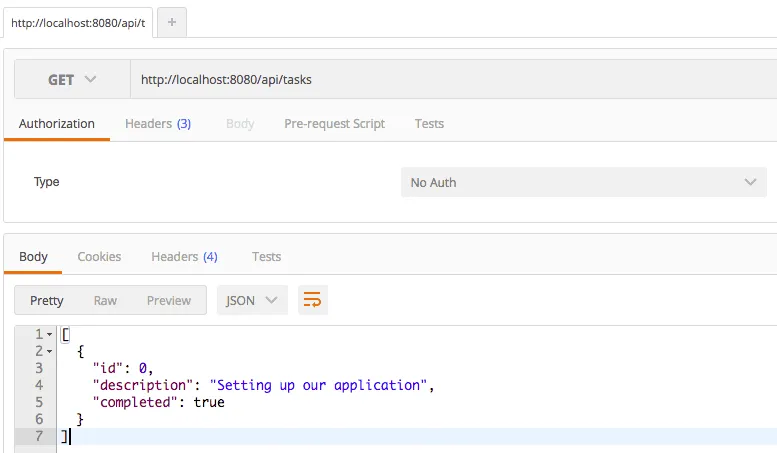
The last request we can test is the DELETE request. Again, change the HTTP method and execute the request. We actually didn’t return anything in our controller so the response is going to be blank. However, if we return to the first request we’ve sent to retrieve all tasks, you’ll see that the task we had earlier is now gone.
Input validation
There is one issue with this API though. For example, if we would create a new task by sending this:
{
  "description": ""
}
You’ll see that that will work as well. I don’t think that adding tasks without a description should be allowed. To fix that, we can apply some input validations. The first step is to open the TaskController, to look for the methods containing a @RequestBody (because that’s what we’re going to validate) and to add the @Valid annotation to it, like this:
@RequestMapping(method = RequestMethod.POST)
public TaskDTO create(@Valid @RequestBody TaskDTO dto) {
    return service.create(dto);
}

@RequestMapping(value = "/{id}", method = RequestMethod.PUT)
public TaskDTO update(@PathVariable Long id, @Valid @RequestBody TaskDTO dto) {
    return service.update(id, dto);
}
Now, open TaskDTO and add the @Size and @NotNull annotations, for example:
@NotNull
@Size(min = 1, max = 64)
private String description;
The reason why I also configured the max length is because that’s the maximum length the field could be in the database.
Now, if you run the application again, and try to send an empty description again, you’ll get a 400 Bad request, with a result like this:
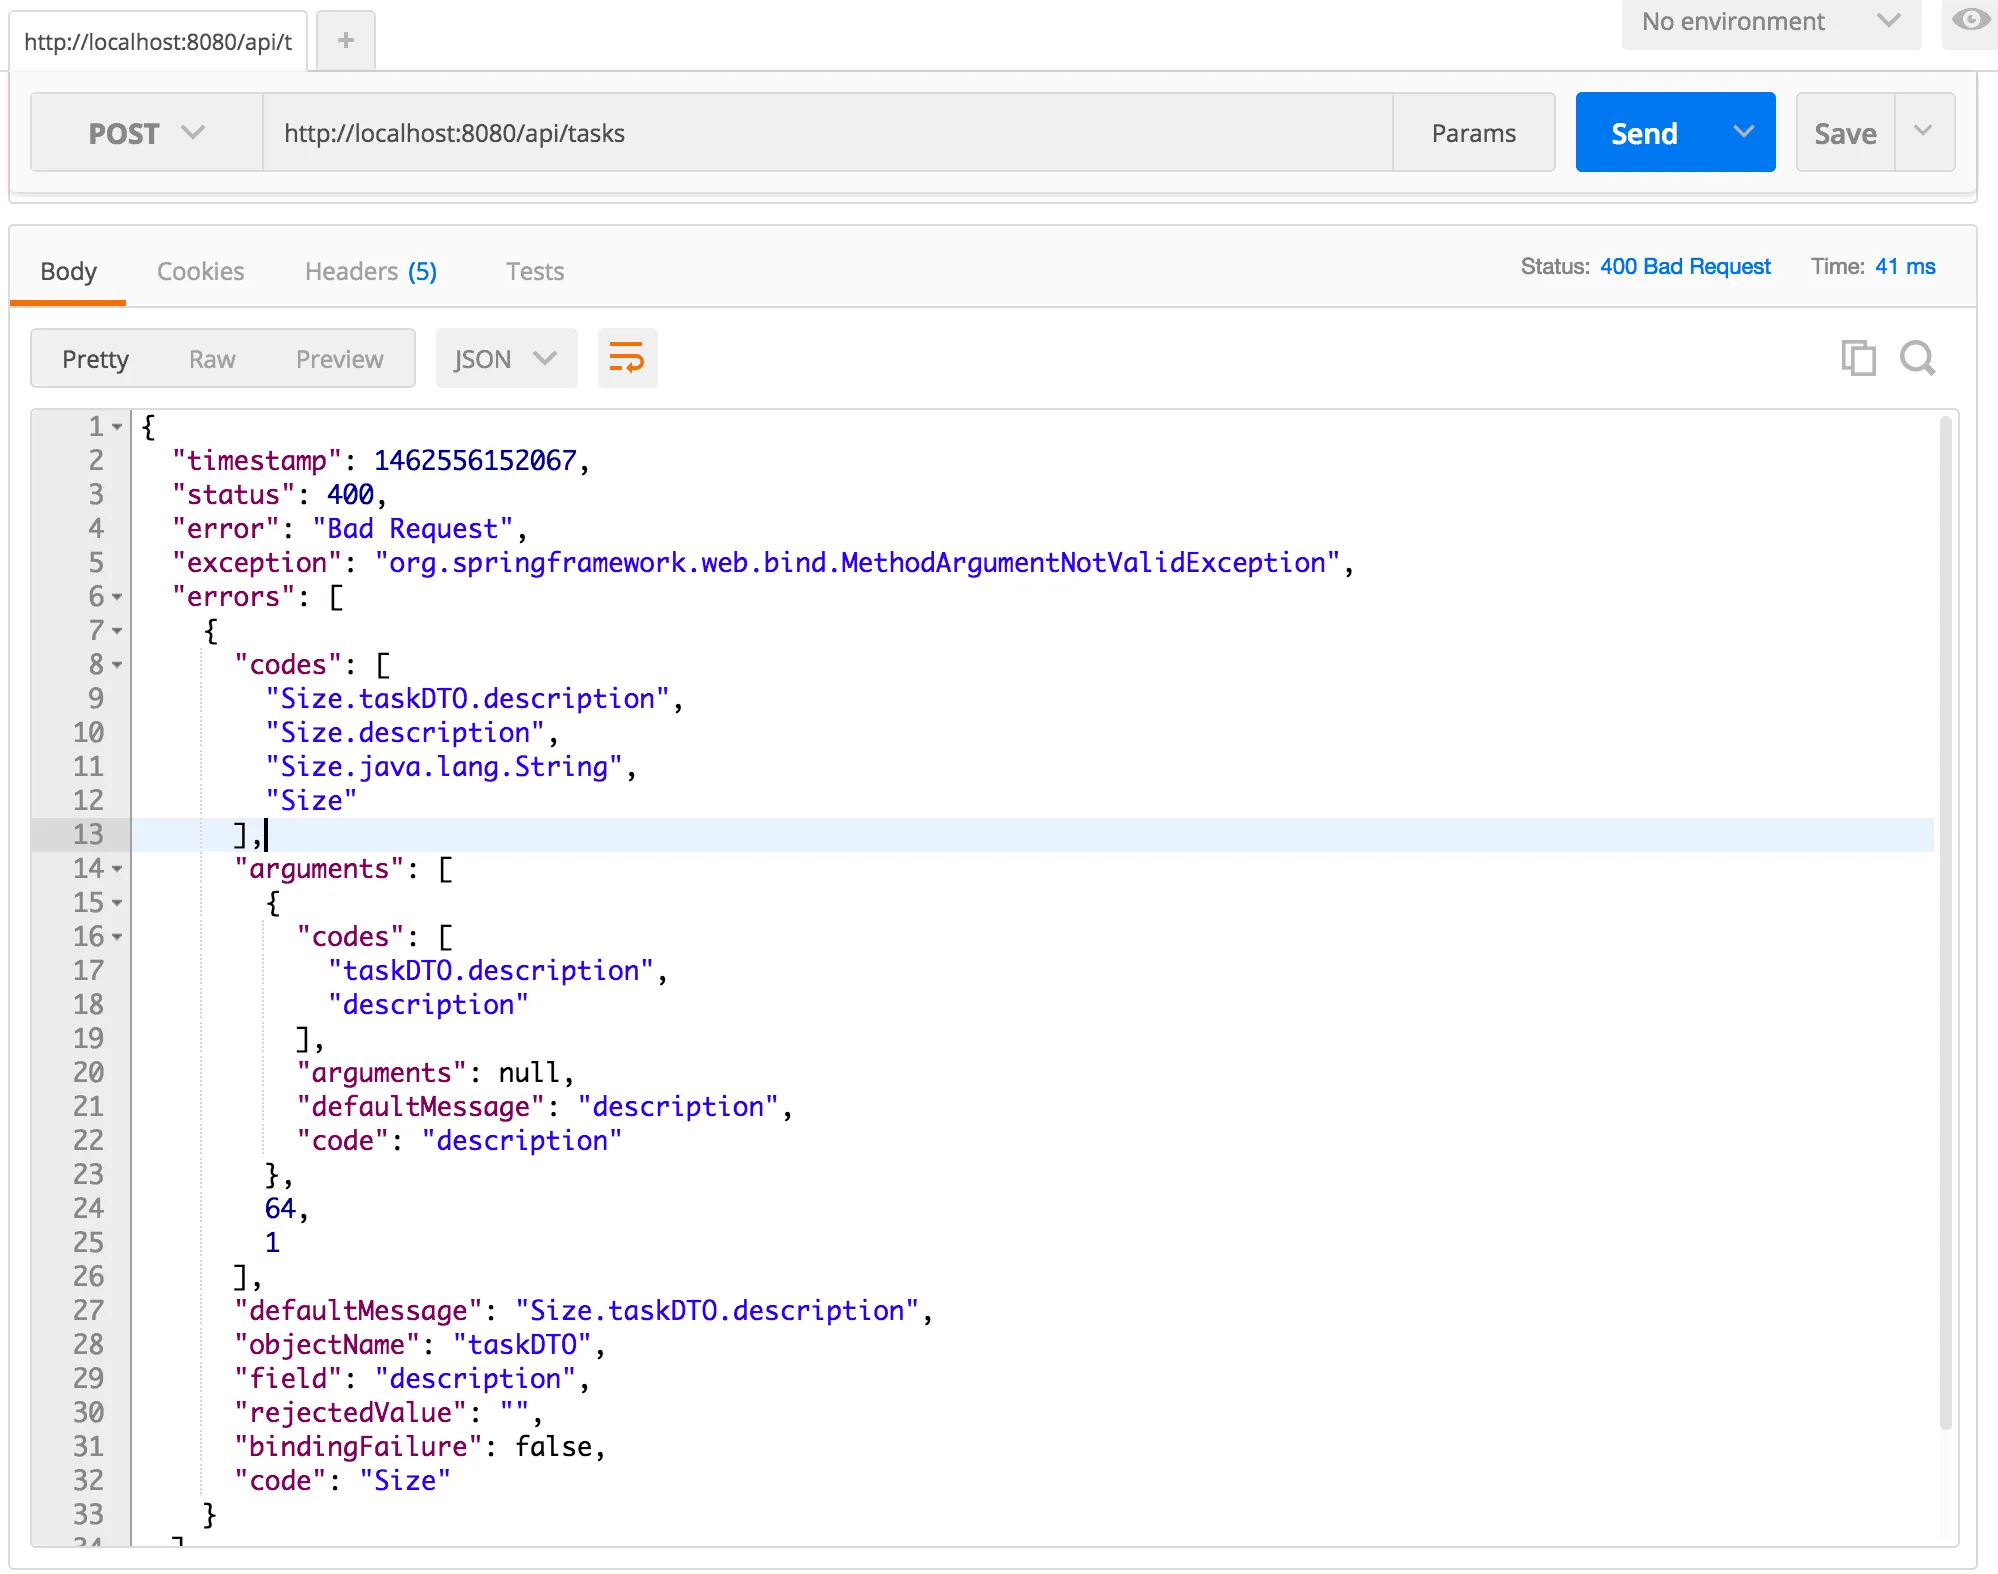
Exception handling
While this is pretty nice already, the error message is a bit bulky. We can change that though. If we take a look at the error response, we see that it originates from an exception called MethodArgumentNotValidException. With Spring we can easily create an exception handler that handles these cases, but before we do that, we’re going to create a DTO holding the message, for example:
public class MessageDTO {
    private String message;

    public MessageDTO(String message) {
        this.message = message;
    }

    public MessageDTO() {
    }

    public String getMessage() {
        return message;
    }
    public void setMessage(String message) {
        this.message = message;
    }
}
The next step is to use Spring internationalization to provide the messages. Open application.yml (or application.properties) and add the following properties:
spring:
  messages:
    basename: messages/messages
    encoding: UTF-8
Now we can implement the exception handler. To do this, add the following method to the TaskController.
@ResponseStatus(HttpStatus.BAD_REQUEST)
@ExceptionHandler(MethodArgumentNotValidException.class)
public MessageDTO handleValidationException(MethodArgumentNotValidException ex) {
    Locale locale = LocaleContextHolder.getLocale();
    String code = ex.getBindingResult().getFieldError().getDefaultMessage();
    return new MessageDTO(messageSource.getMessage(code, null, locale));
}
You will also have to autowire the MessageSource:
@Autowired
private MessageSource messageSource;
What happens in this exception handler is that we’re retrieving the default message from the validation error, so we can use it as the code to be used for looking up the message within the MessageSource. To determine the locale we use the LocaleContextHolder, a threadlocal storage of the locale for the current session.
Now we have to do two more things, first of all we have to set the default message for the validation annotations:
@NotNull(message = "NotNull.taskDTO.description")
@Size(min = 1, max = 64, message = "Size.taskDTO.description")
private String description;
We could actually use the defaults, but this way it’s easier to understand. Now to finish this we also have to provide some proper messages. Create a file called messages.properties inside the src/main/resources/messages folder and add the following properties:
NotNull.taskDTO.description=The description is a required field. Size.taskDTO.description=The description should be between 1 and 64 characters.
That should do it! Run the application again and test if the new exception handler does the job. If you run the same request, you’ll now get a more interesting error message.

With that, I’m going to end the first part of this tutorial. In the next part we’ll create a consumer for the REST API we just wrote.
Achievement: Produced a REST API with Spring
If you’re seeing this, then it means you successfully managed to make it through this tutorial. Make sure to read the follow-up article about consuming a REST API soon. As usual, the code can be found on GitHub.