
So far, I’ve written several tutorials about using Gatsby. What they have in common, is that they all depend on certain Gatsby plugins. In this tutorial, I’ll explore the options you have when creating your own Gatsby plugin.
Setting up a project
To create a new project, I’ll use npm init to set up the initial project folder. This process will ask a few questions about the name of your project. The guidelines contain a naming convention you should follow.
Additionally, the process will also ask which main script you want to use. Gatsby plugins don’t need a main script, so you can create an empty index.js and add the following content to that file:
// no-opThis is also suggested within the official guidelines.
Setting up Babel

Additionally, I suggest using Babel to transpile your source code. This allows you to use the newest ECMAScript features, while still making sure that everything works on Node.js.
The dependencies I’ll install to make my project work with Babel are:
npm install --save-dev @babel/cli @babel/core @babel/plugin-transform-runtime @babel/preset-envTo make the runtime plugin work, you also have to install the following dependency:
npm install --save @babel/runtimeBe aware that you have to install this dependency using --save instead of --save-dev.
To make Babel work, you have to configure which plugins and presets you want to use, and which platform you’re targeting. To do this, I’ll create a new file called .babelrc:
{
  "presets": [
    [
      "@babel/preset-env",
      {
        "targets": {
          "node": true
        }
      }
    ]
  ],
  "plugins": [
    "@babel/plugin-transform-runtime"
  ],
  "only": ["src/", "test/"]
}
Additionally, I want to add two npm scripts to transpile my source code. One to actually build it, and another one to build as soon as I change something within my code. To do this, I’ll add the following to my package.json:
"scripts": {
  "build": "babel src --out-dir ./ --source-maps",
  "watch": "babel src --out-dir ./ --source-maps --watch"
},
I also defined Gatsby as a peer dependency. This means that the plugin itself doesn’t depend on Gatsby, but that it’s meant to be used with Gatsby. To add peer dependencies, I added the following to my package.json:
"peerDependencies": {
  "gatsby": ">2.0.0"
}
Setting up ESLint
Once Babel is set up, I want to make sure that the code within the plugin is properly written. I’ll use ESLint to check my code. To use ESLint, I’ll install the following dependencies:
npm install --save-dev babel-eslint eslint eslint-plugin-babelESLint can be configured as well, to allow certain features. In this case, I want to use the recommended code style with ES6 and JSX. To do that, I have to create a .eslintrc file with the following contents:
{
  "root": true,
  "extends": ["eslint:recommended"],
  "plugins": ["babel"],
  "env": {
    "es6": true,
    "node": true
  },
  "parser": "babel-eslint",
  "parserOptions": {
    "ecmaVersion": 2017,
    "sourceType": "module",
    "ecmaFeatures": {
      "jsx": true
    }
  }
}
To check the code style, I added another npm script to my package.json:
"scripts": {
  "lint": "eslint --ext js ./ --cache"
}
Working with prettier

Not only do I want to guarantee that the code is written properly, but I also want to make sure that everyone uses the same code formatting. To enforce this, I installed Prettier:
npm install --save-dev prettierJust like Babel and ESLint, this requires some configuration to set up the code formatting for your project. This configuration can be placed within .prettierrc:
{
  "semi": true,
  "singleQuote": true,
  "printWidth": 80,
  "tabWidth": 2,
  "bracketSpacing": false
}
I also added an npm script to package.json to format code:
"scripts": {
  "format": "prettier --write 'src/*.js'"
}
Setting up Jest
The final part about setting up a project is to add a library for testing. In this example, I’ll use Jest to write tests. To use Jest, I installed the following dependency:
npm install --save-dev jestJest uses global variables (like test, jest, describe, …). To make sure that ESLint doesn’t complain about these, I added a specific ESLint configuration file for my tests within test/.eslintrc:
{
  "env": {
    "jest": true
  }
}
I also added another npm script to run my tests:
"scripts": {
  "test": "jest --color"
}
Jest also allows you to configure certain features. In this case, I wanted to collect some coverage information so that I could import these within my CI environment.
To do this, I added the following to my package.json:
"jest": {
  "collectCoverage": true
}
Writing the plugin
Now that we’ve set up a project, we can actually start writing some code. In this example, I’ll use the code I wrote for an earlier tutorial to show an estimated reading time for any node that contains content.
To do this, I installed the reading-time library:
npm install --save reading-timeThe next part is the structure. The structure of a Gatsby plugin is similar to a normal Gatsby project. It relies on certain APIs defined within files called gatsby-node.js, gatsby-ssr.js and gatsby-browser.js.
This plugin will add some information to existing Gatsby nodes. This means that we have to extend the Node API, and thus, I’ll create a src/gatsby-node.js file.
The reason why I didn’t add this in the root folder is because Babel will put the transpiled version there.
Within the Node API, I need the onCreateNode hook to execute some logic for each node.
The code I wrote is the following:
import readingTime from 'reading-time';

export function onCreateNode({node, actions}) {
  const {createNodeField} = actions;
  if (node.content != null) {
    createNodeField({
      node,
      name: 'readingTime',
      value: readingTime(node.content)
    });
  }
}
This code will check if the node contains a property called content. If it exists, it will use the createNodeField action to add a field called readingTime to the node. This field will use the reading-time library to add an estimated reading time.
That’s pretty much everything we need for this plugin, so let’s add some tests.
Writing tests with Jest
Now that we’ve implemented our plugin, we can write some tests. To do this, I created a file called test/gatsby-node.test.js.
To set up some tests, I’m going to mock the reading-time library using jest.doMock():
jest.doMock('reading-time', () => content => ({
  text: '5 min read',
  content: content
}));
Within the mock, we’re returning a text field and also a content field containing the original content. While the latter isn’t necessary, it makes testing easier because now we can verify what we’ve sent to the readingTime() function.
The next step is to actually import the onCreateNode() function. It’s necessary to do this after you created your mocked modules. Otherwise, the real module is injected rather than the mock.
We can import the onCreateNode() function like this:
const {onCreateNode} = require('../src/gatsby-node');Now we’re ready to write some tests. While the plugin is quite simple, we can write two tests:
- When a node is created, verify that a field is created when the node contains content.
- If a node is created without content, verify that no field is created.
To make the first test work, I’ll use jest.fn() to create a dummy createNodeField() action:
test('adds readingTime field for nodes with content', () => {
  const node = {content: 'foo'};
  const createNodeField = jest.fn();
  const actions = {createNodeField};

  onCreateNode({node, actions});

  // TODO: Write test...
});
Now we can use createNodeField.mock.calls to verify what was sent to it:
expect(createNodeField.mock.calls.length).toBe(1);
expect(createNodeField.mock.calls[0][0].node).toBe(node);
expect(createNodeField.mock.calls[0][0].name).toBe('readingTime');
expect(createNodeField.mock.calls[0][0].value.text).toBe('5 min read');
expect(createNodeField.mock.calls[0][0].value.content).toBe('foo');
The second test will look very similar, except that we now have to make sure that createNodeField() wasn’t called:
test('does not add readingTime field if there is no content', () => {
  const node = {};
  const createNodeField = jest.fn();
  const actions = {createNodeField};

  onCreateNode({node, actions});

  expect(createNodeField.mock.calls.length).toBe(0);
});
Testing it out
With our code, building tools and tests done, we can test things out. First of all, we can use the following scripts to check our code is well-formatted:
npm run format
npm run lint
After that, we can see if our tests succeed:
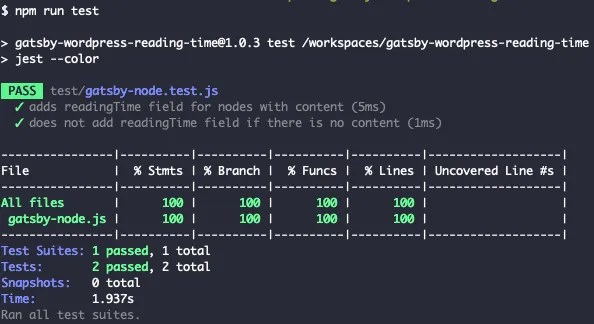
npm run testNormally, all tests should pass and you should have a coverage of 100%, as seen in the screenshot below.
Once done, you can build your code:
npm run buildThis will generate a file called gatsby-node.js within the root directory of the project. Since I don’t want to include this file within version control, I added it to my .gitignore:
gatsby-*
!src/**
!test/**
This basically says to ignore any file starting with “gatsby-”, except the ones within the src and test folders.
However, since I do want to include this file when publishing to the npm registry, I also added a file called .npmignore. If no .npmignore is present, npm will follow the rules specified within .gitignore to decide which files to publish.
So, by creating an .npmignore with the following contents, we overrule .gitignore:
src/Now we can push our plugin to the npm registry by using the following command:
npm publishIf you want to make sure it appears on the Gatsby website as well, you have to include the keywords “gatsby” and “gatsby-plugin” within your package.json.
"keywords": [
  "gatsby",
  "gatsby-plugin"
],
Once done, it can take up to 24 hours to completely appear on the Gatsby website.
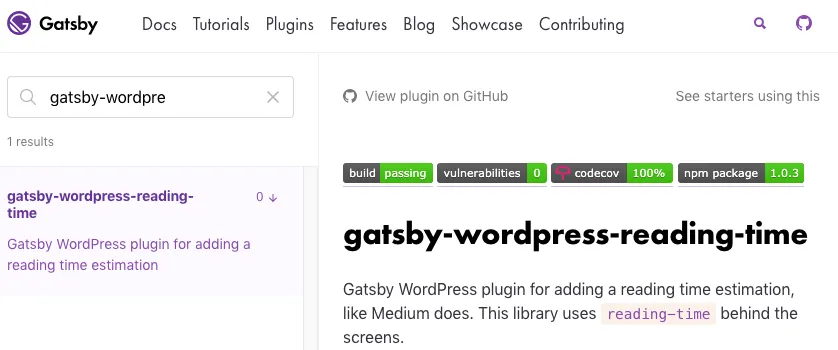
There you have it, you’re now able to extend the ecosystem of Gatsby by writing your own plugins! If you’re interested in an example, you can check out gatsby-wordpress-reading-time.