
When handling input of a user, validation is a common task. In fact, it’s so common, that there’s even a specification for it called JSR 303 bean validation and JSR-380 which contains version 2 of the same specification. With Spring, we can utilize this specification to the fullest extent, and make validation an easier task.
Setting up a project
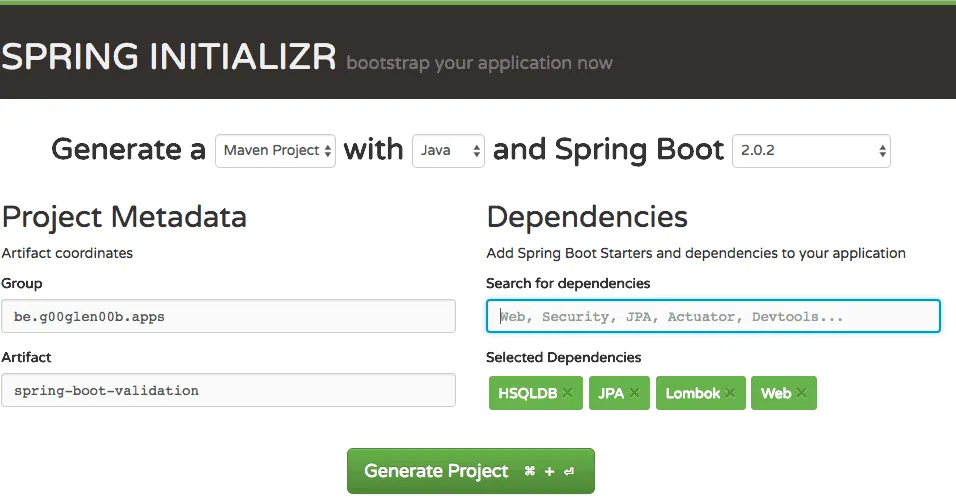
To set up a Spring project with bean validation, you don’t really need anything specific except the core framework. But since I’ll be using it in a web application/REST API, I’ll add a few dependencies anyways, like HSQLDB, JPA, Lombok and Web. To do this, I’ll use the Spring Initializr to get my project.
After that, you can start adding validation annotations to your model. I’ll personally use the following model:
@Entity
@Data
@NoArgsConstructor
@AllArgsConstructor
public class User {
    @Id
    @GeneratedValue(strategy = GenerationType.IDENTITY)
    private Long id;
    private String lastName;
    private String middleName;
    private String firstName;
    private LocalDate dateOfBirth;
    private Integer siblings;
}

@Data
@NoArgsConstructor
@AllArgsConstructor
public class UserInput {
    private String lastName;
    private String middleName;
    private String firstName;
    private LocalDate dateOfBirth;
    private Integer siblings;
}
Note: The annotations @Data, @NoArgsConstructor and @AllArgsConstructor are part of the Project Lombok framework. If you don’t want to use this, you can generate, getters, setters and constructors by yourself.
I’m also going to write a simple REST API to create new posts:
@RestController
@RequestMapping("/api/user")
@AllArgsConstructor
public class UserController {
    private UserRepository repository;

    @PostMapping
    @Transactional
    public User save(@RequestBody UserInput user) {
        return repository.saveAndFlush(new User(
            null,
            user.getLastName(),
            user.getMiddleName(),
            user.getFirstName(),
            user.getDateOfBirth(),
            user.getSiblings()));
    }
}
Working with validation annotations
Hey, that rhymes, so it must be good, right? Anyways, even though our API works now, it’s not really dummy-proof. I can add users without providing any information, or I could add a user that is born in the future, or a negative amount of siblings… this isn’t really great, so let’s improve that!
First of all, both firstName, lastName, dateOfBirth and siblings should be required to fill in. Only the middleName can be left empty. To do this, we can use the @NotNull annotation:
@NotNull
private String lastName;
@NotNull
private String firstName;
@NotNull
private LocalDate dateOfBirth;
@NotNull
private Integer siblings;
Additionally to that, I want to limit the lastName, middleName and firstName fields to a certain amount of characters, because I limited them in my database to 60 characters. We can do that using the @Size annotation, which allows you to pass both a min and max property:
@NotNull
@Size(min = 1, max = 60)
private String lastName;
@Size(max = 60)
private String middleName;
@NotNull
@Size(min = 1, max = 60)
private String firstName;
By adding the min property, we can also prevent people from passing empty strings as their last- or first name. The next step is that we also want to prevent people from adding a negative amount of siblings. For these types of checks we can use the @Min annotation:
@NotNull
@Min(0)
private Integer siblings;
However, if you’re using the bean validation 2.0 API, you can make that even more readable by using the @PositiveOrZero annotation:
@NotNull
@PositiveOrZero
private Integer siblings;
Finally, we also want to make sure that the given date of birth lies in the past, not in the future. Since the 2.0 bean validation API, we have access to the @Past annotation which can be used in combination with the Java 8 time API like this:
@NotNull
@Past
private LocalDate dateOfBirth;
Making it work
Right now, these validations don’t really do anything. If you would run the application, it would result in the same output as before. To solve this, we need to add the @Valid annotation to the parameters we’d like to be validated. In my case, that would be the request body itself:
@PostMapping
@Transactional
public User save(@RequestBody @Valid UserInput user) {
    return repository.saveAndFlush(new User(
        null,
        user.getLastName(),
        user.getMiddleName(),
        user.getFirstName(),
        user.getDateOfBirth(),
        user.getSiblings()));
}
If you run the application now, you’ll see that you can no longer add invalid objects. For example, let’s say that I forgot to pass my first name, then I’ll get the following response:
{
  "timestamp": "2018-06-07T13:40:58.353+0000",
  "status": 400,
  "error": "Bad Request",
  "errors": [
    {
      "codes": [
        "NotNull.userInput.firstName",
        "NotNull.firstName",
        "NotNull.java.lang.String",
        "NotNull"
      ],
      "arguments": [
        {
          "codes": [
            "userInput.firstName",
            "firstName"
          ],
          "arguments": null,
          "defaultMessage": "firstName",
          "code": "firstName"
        }
      ],
      "defaultMessage": "must not be null",
      "objectName": "userInput",
      "field": "firstName",
      "rejectedValue": null,
      "bindingFailure": false,
      "code": "NotNull"
    }
  ],
  "message": "Validation failed for object='userInput'. Error count: 1",
  "path": "/api/user"
}
So, as you can see, we get a (very) detailed error message describing that the first name should not be null.
Changing the message
As you can see in the defaultMessage property, the error message is “must not be null”. If you want to change this, you can add a message property to the specific annotation, for example:
@NotNull(message = "First name is a required field")
@Size(min = 1, max = 60, message = "First name cannot be longer than 60 characters")
private String firstName;
If you would run the application again, and see the response, you’ll see that the defaultMessage has changed.
Now, if you prefer using message bundles (messages.properties), well, then I’ve some good news for you because we can do that as well!
First of all, let’s create a messages.properties file in src/main/resources and add the following properties:
user.firstName.notNull=First name is a required field
user.firstName.size=First name cannot be longer than 60 characters
The next step is to change the message property of each annotation like this:
@NotNull(message = "{user.firstName.notNull}")
@Size(min = 1, max = 60, message = "{user.firstName.size}")
private String firstName;
And finally, we have to register our own LocalValidatorFactoryBean that is linked to the MessageSource. This new bean has to be placed in any configuration file, or in your main class. If you would forget to do this, you’ll see that the message is simply {user.firstName.notNull}, which isn’t exactly what we want.
@Bean
public LocalValidatorFactoryBean validator(MessageSource messageSource) {
    LocalValidatorFactoryBean validatorFactoryBean = new LocalValidatorFactoryBean();
    validatorFactoryBean.setValidationMessageSource(messageSource);
    return validatorFactoryBean;
}
Now, if we run the application again, we’ll see the error message appear. But wait, we’re not done yet! One thing I don’t like yet is that we’ve now hardcoded the amount (60 characters) in two places, both in the @Size annotation and the message property.
With the bean validation API, we can use substitutions for certain properties within our messages. For example:
user.firstName.size=First name cannot be longer than {max} characters
Now we only have the “60” in one place, great!
Adding custom validations
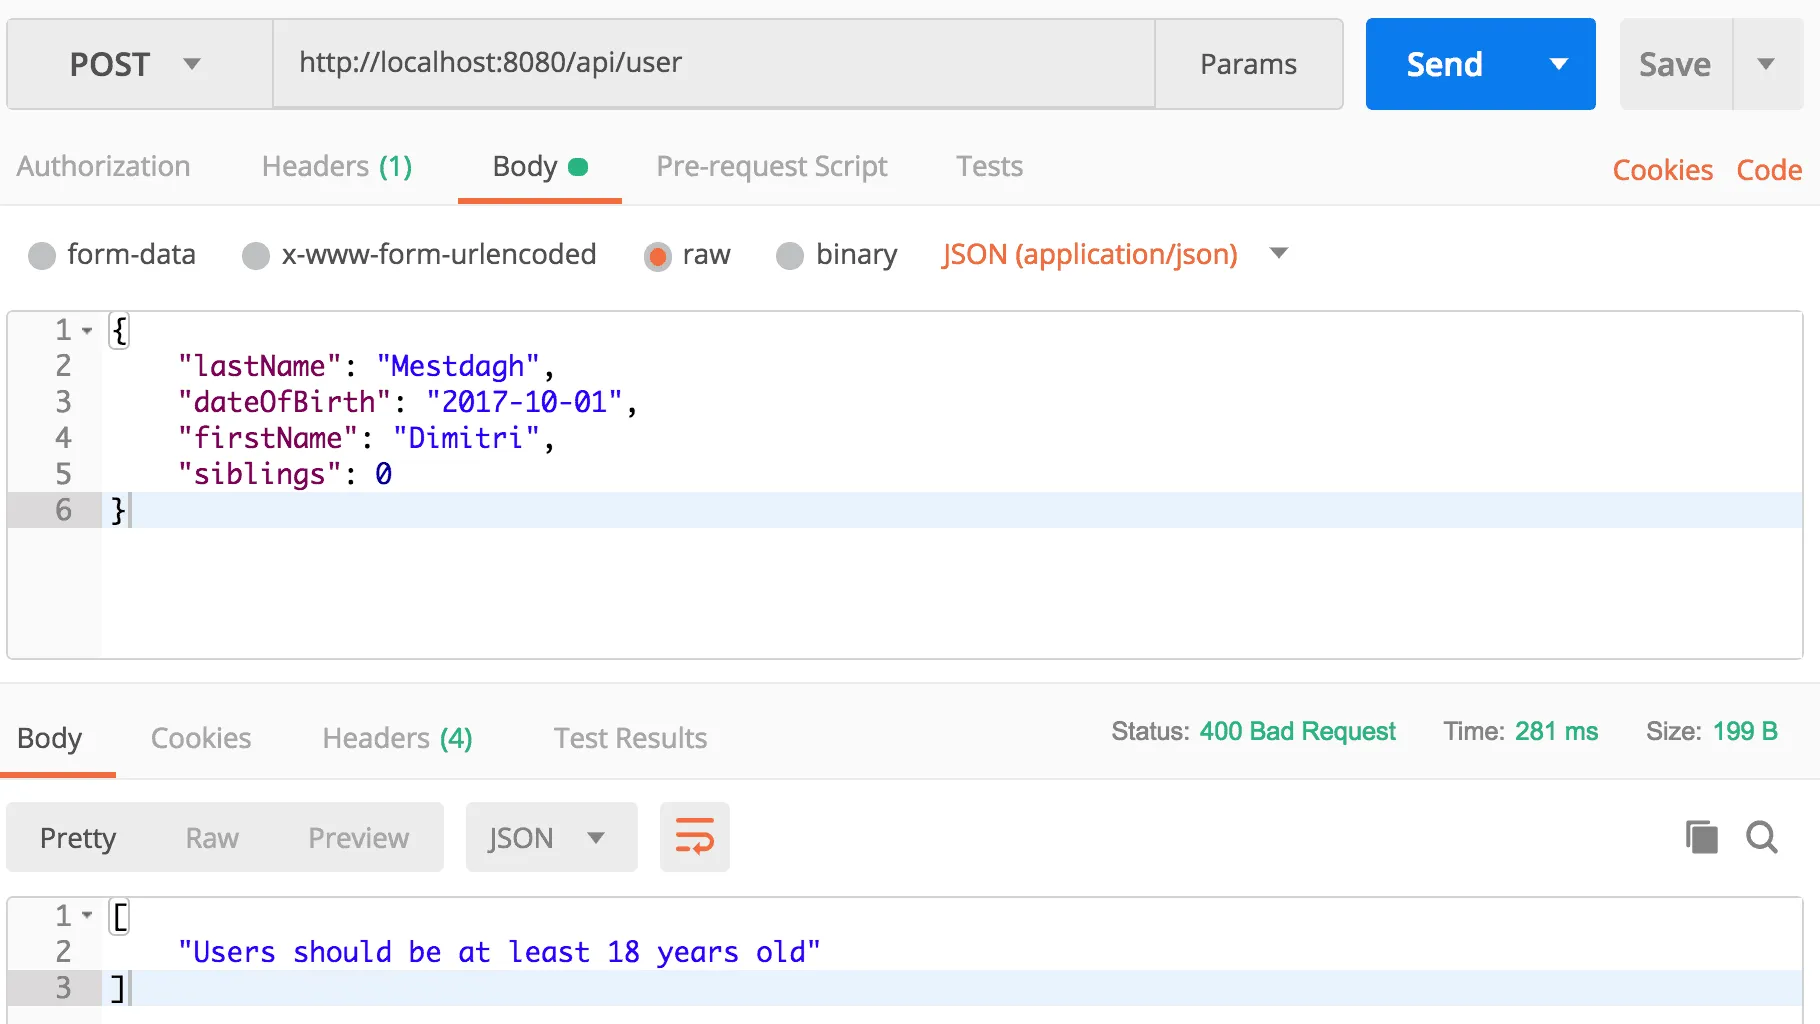
While there are many built-in validations already, sometimes, there isn’t an annotation that’s doing exactly what you want. But no worries, what isn’t there can be made! For example, let’s say that our users have to be at least 18 years old (no, it’s not what you’re thinking), so let’s create our own, @Adult annotation:
@Documented
@Retention(RUNTIME)
@Target({FIELD, ANNOTATION_TYPE, PARAMETER})
@Constraint(validatedBy = AdultValidator.class)
public @interface Adult {
    String message() default "{adult}";
    Class<?>[] groups() default { };
    Class<? extends Payload>[] payload() default { };
}
Now, to make this annotation work, we also have to write our business logic in a class called AdultValidator, which we pass to the @Constraint annotation as you can see above.
@Component
public class AdultValidator implements ConstraintValidator<Adult, LocalDate> {
    private static final int ADULT_AGE = 18;

    @Override
    public boolean isValid(LocalDate dateOfBirth, ConstraintValidatorContext constraintValidatorContext) {
        return dateOfBirth != null && LocalDate.now().minusYears(ADULT_AGE).isAfter(dateOfBirth);
    }
}
As you can see, the implementation of a constraint validator isn’t that difficult, you return a boolean and there you go. In this case, I used the Java 8 time API to see whether or not the given date is at least 18 years ago.
What’s nice about this is that we can use dependency injection within these validators as well, so you could even make a database call to validate it.
Also, if you want to pass parameters from your annotation to the validator (like the min and max properties of @Size), you can also override the initialize method of ConstraintValidator.
Now we can just add the annotation to our dateOfBirth field and we’re done!
@NotNull
@Past
@Adult
private LocalDate dateOfBirth;
Additionally to what we’ve seen, you can also put constraints on class level, just do exactly the same thing as we’ve done now, but make sure that you adjust the @Target annotation properly.
Changing the error structure
One thing that might bother you is how bulky the error message is. If you prefer to have only the error message and nothing else, you can write your own exception handler:
@ResponseStatus(HttpStatus.BAD_REQUEST)
@ExceptionHandler(MethodArgumentNotValidException.class)
public List<String> handleValidationExceptions(MethodArgumentNotValidException ex) {
    return ex.getBindingResult()
        .getAllErrors().stream()
        .map(ObjectError::getDefaultMessage)
        .collect(Collectors.toList());
}
Writing an exception handler can be done by creating a new method within the controller using the @ExceptionHandler annotation. If you want to apply this logic to all controllers, you should create a new class annotated with the @ControllerAdvice. Other than that, the code is pretty self-explanatory, from the binding result we retrieve a list of all errors, which we’ll use the Java 8 stream API with to obtain the error messages, and to return a new list.
With this, we’ve seen pretty much everything there is to tell about validating beans with Spring and the bean validation API. As usual, the complete code example can be found on GitHub.