
Earlier, we’ve seen how we can use the gatsby-source-wordpress plugin to retrieve blog posts using the WordPress API. In this tutorial, we’ll explore another possible source of information that Gatsby can use, such as JSON.
Setting up a project
To create a project with Gatsby, we can use the Gatsby CLI. Using the CLI, we can create a new project with the default template by using the following command:
npm install -g gatsby-cli
gatsby new my-json-blog
Once that’s done, our project will contain the gatsby-source-filesystem plugin. This plugin allows us to use the filesystem as a data source for Gatsby.
Additionally, we have to install the gatsby-transformer-json plugin. After that, we’re able to parse the JSON information and put it within the GraphQL API.
npm install gatsby-transformer-json --save
When we installed all plugins, it’s time to open gatsby-config.js to configure these plugins.
Within this configuration file, we see that the gatsby-source-filesystem plugin is already configured to serve images from ${__dirname}/src/images. We can leave this as-is, and add a new “gatsby-source-filesystem” plugin to our configuration:
{
  resolve: `gatsby-source-filesystem`,
  options: {
    name: `images`,
    path: `${__dirname}/src/images`,
  },
},
{
  resolve: `gatsby-source-filesystem`,
  options: {
    name: `graveyard`,
    path: `${__dirname}/src/data/`,
  }
},
Like the other plugin, we can provide a name and a path. In my example, I’ll use src/data to store the JSON data. The JSON file I’ll use is graveyard.json from the Google Graveyard website.
If we would run the application like this, nothing will happen. That’s because Gatsby doesn’t know what to do with this JSON file. To solve that, we can add gatsby-transformer-json to the graveyard configuration:
{
  resolve: `gatsby-source-filesystem`,
  options: {
    name: `images`,
    path: `${__dirname}/src/images`,
    plugins: [
      `gatsby-transformer-sharp`,
      `gatsby-plugin-sharp`,
    ]
  },
},
{
  resolve: `gatsby-source-filesystem`,
  options: {
    name: `graveyard`,
    path: `${__dirname}/src/data/`,
    plugins: [
      `gatsby-transformer-json`
    ]
  }
}
As you can see from the code snippet above, I also moved gatsby-transformer-sharp and gatsby-plugin-sharp to the other plugin. These plugins will optimize images, and we should only apply them to data coming from src/images.
Testing things out
If we configured all plugins, we can run our project using the following command:
npm start
Behind the screens, npm start will run the gatsby develop script. This will run a webserver containing our application.
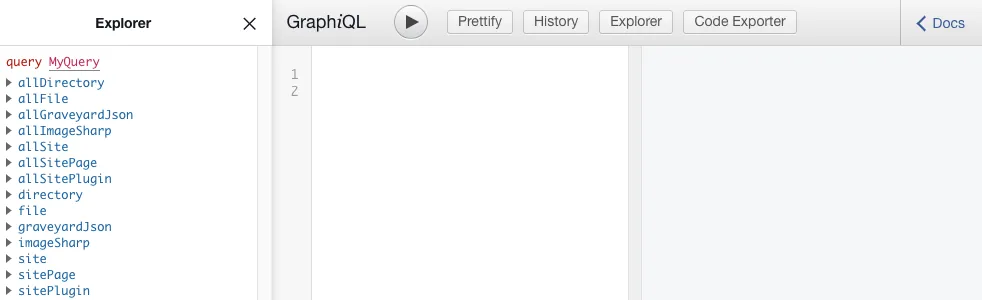
Once built, you’ll see two URLs appear in the logs, being http://localhost:8000 and http://localhost:8000/\_\_graphql. Let’s first open the latter, which contains Graph_i_QL. Graph_i_QL is an interface for testing out your GraphQL queries.
When we open the Graph_i_QL interface, we can see the actions we can invoke. In case you don’t, make sure to click the Explorer button at the top of the window.
Our JSON file is also present within the explorer. If you named your file graveyard.json as I did, then you’ll find an allGraveyardJson and graveyardJson operation.
If we open allGraveyardJson, we can select edges and node to see all fields that were available within our JSON. For example, we can check dateClose, dateOpen, name, … .
Gatsby also recognized that dateClose contained a date, and allows us to format these using the formatting options of Moment.js.
For example, using the following query we can find all entries within our JSON, sorted by the date they were closed:
query {
  allGraveyardJson(sort: {fields: dateClose, order: DESC}) {
    edges {
      node {
        dateClose(formatString: "MMMM Do, YYYY")
        dateOpen(formatString: "MMMM Do, YYYY")
        name
      }
    }
  }
}
Using data within components
Now that we’ve seen the capabilities of the GraphQL API, we can start using these queries within the components.
To do that, let’s open src/pages/index.js and use the useStaticQuery() React hook to fetch our data. If we want to build a clone of Google Graveyard, we need to know the following things:
- The name and description of the product,
- The year it was opened and closed,
- And an estimation about how long ago it was closed.
With the GraphQL API, we can build a query like this:
const {games} = useStaticQuery(graphql`
    {
      games: allGraveyardJson(sort: {fields: dateClose, order: DESC}) {
        edges {
          node {
            name
            closed: dateClose(formatString: "YYYY")
            opened: dateOpen(formatString: "YYYY")
            closedAgo: dateClose(fromNow: true)
            description
          }
        }
      }
    }
  `);
Now, we’re able to create a new Game component to visualize the games. I’ll use React icons to add an icon for each entry:
export const Game = ({opened, closed, closedAgo, name, description}) => (
  <div className="game">
    <div className="grave">
      <GiCrossedBones size={50}/>
      <small>{opened} - {closed}</small>
    </div>
    <div className="info">
      <h2>{name}</h2>
      <p>Killed <time>{closedAgo}</time>, {description}</p>
    </div>
  </div>
);
Additionally, I’m going to create a GameGrid component to loop over all games and show the Game component:
export const GameGrid = ({games, sort}) => (
  <div className="games">
    {games
      .map(({node}) => (
        <Game
          closed={node.closed}
          closedAgo={node.closedAgo}
          opened={node.opened}
          description={node.description}
          name={node.name}
          key={node.name}/>
      ))}
  </div>
);
Finally, we can use the GameGrid component within the IndexPage component:
<Layout>
  <GameGrid games={games.edges}/>
</Layout>
If we apply some CSS and take a look at the other URL that we can find in the console, we can see the final result:

And there you have it, a simple clone of the Google Graveyard, made with Gatsby, GraphQL React and a JSON file.