
Caching is a common operation when developing appllications. Spring provides an abstraction on top of all different caching libraries to make this even easier.

Project setup
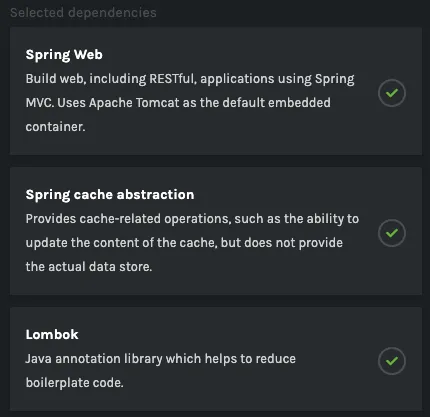
In this example, I will create a simple REST API. So let’s start by opening Spring Initializr, and add the following dependencies:
- Spring Web: This dependency makes it possible to create a REST API. This is optional if you’re not trying to develop a web application.
- Spring cache abstraction: This library contains the cache abstraction we’ve been talking about before.
- Lombok: This library will make it easier for me to write classes as it will generate getters, setters, constructors and so on for me. This is also an optional dependency.
A simple REST API
To be able to set up caching, we need some data to cache first. In this example, I’ll create a task API using the following DTO:
@Getter
@RequiredArgsConstructor
public class TaskDTO {
    private final long id;
    private final String task;
    private final boolean completed;
}
In addition, I created the following facade:
@Slf4j
@Service
public class TaskFacade {

    public List<TaskDTO> findAll() {
        log.info("Retrieving tasks");
        return List.of(
            new TaskDTO(1L, "My first task", true),
            new TaskDTO(2L, "My second task", false));
    }
}
And finally, I’ve set up the following controller to retrieve these “dummy” tasks:
@RestController
@RequestMapping("/api/tasks")
public class TaskController {
    private final TaskFacade taskFacade;

    @GetMapping
    public List<TaskDTO> findAll() {
        return taskFacade.findAll(noCache);
    }
}
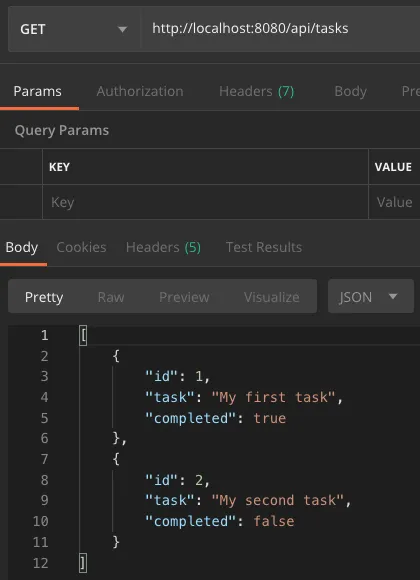
If you surf to http://localhost:8080/api/tasks now, you’ll see that we get a JSON response containing the tasks we defined.
However, we aren’t caching yet. If we refresh the page a few times, you’ll see that the “Retrieving tasks” message keeps appearing in the logs.
Enabling caching
To enable the cache, we first have to add Ehcache 3 as a dependency:
<dependency>
    <groupId>org.ehcache</groupId>
    <artifactId>ehcache</artifactId>
</dependency>
<dependency>
    <groupId>javax.cache</groupId>
    <artifactId>cache-api</artifactId>
</dependency>
To tell Spring that we’re using Ehcache 3, we also have to add the cache-api library, which allows us to use caching libraries that implement JSR-107, such as Ehcache.
Be aware, make sure that you’re using org.ehcache as the group ID for the ehcache library. If you’re using net.sf.ehcache, you’re using Ehcache 2.
The next step is to create a configuration file called ehcache.xml within src/main/resources:
<?xml version="1.0" encoding="UTF-8"?>
<config xmlns='http://www.ehcache.org/v3'>
    <cache alias="tasks">
        <key-type>org.springframework.cache.interceptor.SimpleKey</key-type>
        <value-type>java.util.List</value-type>
        <expiry>
            <ttl unit="minutes">5</ttl>
        </expiry>
        <resources>
            <heap unit="kB">10</heap>
        </resources>
    </cache>
</config>
Within this configuration file, we’re creating a cache called tasks, which will be able to store a List of any type, and will keep it cached for five minutes. Ehcache will store this list onto the heap, with a maximum size of 10kB.
To make sure that Spring boot is picking up this configuration file, you can add the spring.cache.jcache.config property:
spring.cache.jcache.config=classpath:ehcache.xml
Since caching is optional, you’ll also have to explicitly enable caching by using the @EnableCaching annotation. We can put this annotation on top of our main class:
@EnableCaching // Add this
@SpringBootApplication
public class SpringBootEhcacheApplication {

    public static void main(String[] args) {
        SpringApplication.run(SpringBootEhcacheApplication.class, args);
    }
}
Using @Cacheable
Now that we’ve set up caching, we can start using it within our code. First of all, let’s make sure that the result of TaskFacade.findAll() is cached.
To do this, we can use the @Cacheable annotation:
@Cacheable("tasks") // Add this
public List<TaskDTO> findAll() {
    log.info("Retrieving tasks");
    return List.of(
        new TaskDTO(1L, "My first task", true),
        new TaskDTO(2L, "My second task", false));
}
If you restart the application now, and you execute http://localhost:8080/api/tasks a few times, you’ll see that the “Retrieving tasks” message only appears a single time. If you wait five minutes and try again, the cache will expire and the message will appear again.
Conditional caching
While this works great, sometimes, you still want to bypass the cache, and fetch the actual real-time value. In that case, you could use the condition argument of @Cacheable.
@Cacheable(value = "tasks", condition = "!#noCache")
public List<TaskDTO> findAll(boolean noCache) {
    log.info("Retrieving tasks");
    return List.of(
        new TaskDTO(1L, "My first task", true),
        new TaskDTO(2L, "My second task", false));
}
In this example, we’re using the cached value if noCache is false. If you pass true, the cache will be bypassed and the actual implementation will be called again.
Since Spring boot uses the parameters to define the key of the cached value, we have to change the key type within ehcache.xml from org.springframework.cache.interceptor.SimpleKey to java.lang.Boolean.
Using custom keys
As mentioned before, Spring will cache the result of a method based on the parameters that are passed. In the first example, we didn’t have any parameter, and in that case SimpleKey was used.
In the second example, we added a noCache parameter, and thus, the results are cached based on the value of this parameter.
In this case, it’s pretty useless to use the noCache parameter as the key value. So, in stead of that, we could hardcode the key to a constant string:
@Cacheable(value = "tasks", condition = "!#noCache", key = "'ALL'")
public List<TaskDTO> findAll(boolean noCache) {
    log.info("Retrieving tasks");
    return List.of(
        new TaskDTO(1L, "My first task", true),
        new TaskDTO(2L, "My second task", false));
}
In addition, we also have to change the key type again, this time from java.lang.Boolean to java.lang.String.
You don’t have to use a hardcoded value though. Just like the condition parameter, you can use the Spring Expression Language to define a key. For example, you could use !#noCache to invert the boolean value and so on.
Using @CachePut
As we’ve seen, @Cacheable does two things:
- It stores the return value within the cache,
- And it returns a cached value if it’s present.
Usually, that’s all you need. However, in our example, it means that if we set noCache to true, we’re neither using the cache, nor storing new values within the cache.
If we still want to add the result to the cache, even when noCache is true, then we could use the @CachePut annotation:
@Cacheable(value = "tasks", condition = "!#noCache", key = "'ALL'")
@CachePut(value = "tasks", condition = "#noCache", key = "'ALL'")
public List<TaskDTO> findAll(boolean noCache) {
    log.info("Retrieving tasks");
    return List.of(
        new TaskDTO(1L, "My first task", true),
        new TaskDTO(2L, "My second task", false));
}
When you’re using multiple caching annotations, or you’re trying to use the same caching annotation twice, you could also replace it with the @Caching annotation:
@Caching(
    cacheable = @Cacheable(value = "tasks", condition = "!#noCache", key = "'ALL'"),
    put = @CachePut(value = "tasks", condition = "#noCache", key = "'ALL'"))
public List<TaskDTO> findAll(boolean noCache) {
    log.info("Retrieving tasks");
    return List.of(
        new TaskDTO(1L, "My first task", true),
        new TaskDTO(2L, "My second task", false));
}
Using @CacheEvict
In some cases, you want to immediately evict any cached value. For that purpose, we can use the @CacheEvict annotation.
This annotation can be used to either delete a single cached value, or delete all entries within a cache. In our example, we’re caching only a single entry, so both will work fine.
For example:
@CacheEvict(value = "tasks", allEntries = true)
public void clearCache() {
    log.info("Cleared task cache");
}
In addition to this method, I’m also going to create a REST endpoint within TaskController to call this method:
@DeleteMapping("/cache")
public void clearCache() {
    taskFacade.clearCache();
}
If you restart the application now, and call http://localhost:8080/api/tasks/cache using the DELETE method, the cache will be evicted. The first time you call http://localhost:8080/api/tasks afterwards, it will repopulate the cache based on the implementation of the findAll() method.
Adding a cache listener
So far, we’ve been using custom logging to verify that the cache was behaving correctly. Alternatively, you could use a custom CacheEventListener to do this.
For example, let’s create a class called TaskCacheListener:
@Slf4j
public class TaskCacheListener implements CacheEventListener<String, List<TaskDTO>> {
    @Override
    public void onEvent(CacheEvent<? extends String, ? extends List<TaskDTO>> cacheEvent) {
        log.info("Event '{}' fired for key '{}' with value {}", cacheEvent.getType(), cacheEvent.getKey(), cacheEvent.getNewValue());
    }
}
To register this event listener, we have to add the <listeners> section to ehcache.xml as well:
<?xml version="1.0" encoding="UTF-8"?>
<config xmlns='http://www.ehcache.org/v3'>
    <cache alias="tasks">
        <key-type>java.lang.String</key-type>
        <value-type>java.util.List</value-type>
        <expiry>
            <ttl unit="minutes">5</ttl>
        </expiry>
        <listeners>
            <listener>
                <class>be.g00glen00b.apps.springbootehcache.TaskCacheListener</class>
                <event-firing-mode>ASYNCHRONOUS</event-firing-mode>
                <event-ordering-mode>ORDERED</event-ordering-mode>
                <events-to-fire-on>CREATED</events-to-fire-on>
                <events-to-fire-on>REMOVED</events-to-fire-on>
                <events-to-fire-on>EXPIRED</events-to-fire-on>
            </listener>
        </listeners>
        <resources>
            <heap unit="kB">10</heap>
        </resources>
    </cache>
</config>
This configuration will invoke our event listener as soon as:
- CREATED: A cache entry is created (using the
findAll()method). - REMOVED: A cache entry is removed (using the
clearCache()method. - EXPIRED: Called when the time to live of 5 minutes is gone by.
Adjusting the max object graph size
If you’re using caching for complex object structures that are multiple levels deep, you may encounter a warning like this:
Max Object Graph Size reached for the object : ...
This could happen because the maximum object graph size by default is 1000. If the object (or list) you’re trying to cache contains more than 1000 objects, it will throw a warning.
To fix this issue, you have to configure the maximum object graph size. This can be done by using the <heap-store-setting>:
<?xml version="1.0" encoding="UTF-8"?>
<config xmlns='http://www.ehcache.org/v3'>
    <cache alias="tasks">
        <key-type>java.lang.String</key-type>
        <value-type>java.util.List</value-type>
        <expiry>
            <ttl unit="minutes">5</ttl>
        </expiry>
        <listeners>
            <listener>
                <class>be.g00glen00b.apps.springbootehcache.TaskCacheListener</class>
                <event-firing-mode>ASYNCHRONOUS</event-firing-mode>
                <event-ordering-mode>ORDERED</event-ordering-mode>
                <events-to-fire-on>CREATED</events-to-fire-on>
                <events-to-fire-on>REMOVED</events-to-fire-on>
                <events-to-fire-on>EXPIRED</events-to-fire-on>
            </listener>
        </listeners>
        <resources>
            <heap unit="kB">10</heap>
        </resources>
        <heap-store-settings>
            <max-object-graph-size>2000</max-object-graph-size>
            <max-object-size unit="kB">5</max-object-size>
        </heap-store-settings>
    </cache>
</config>
In addition to configuring the object graph size, you can also limit the size of each cached value by setting <max-object-size>.
With that, we’ve covered most things about caching with Ehcache and Spring. If you’re interested in the full code, you can find it on GitHub.