
Securing your REST API with Spring Security
- May 15th, 2015
- 7 minute read
- Spring Spring boot Spring security
In the next couple of weeks I’m going to develop a small idea sharing/voting application, using several common concepts in web development. First of all, I’m going to write and secure a REST API with Spring Security.
To start my project I’m going to use Spring Boot and the Spring Initializr online wizard to set up my project. For my project I’m going to use a simple setup using Spring Data JPA (using an in memory HSQLDB), Spring Web and Spring Security.

After choosing the proper modules, you can generate the project, which should return an archive with a sample project. Import it in your IDE and we’re ready to go.
Persisting data
In this example I’m going to create a simple repository using Spring Data JPA, but before we can do that, we need a model/entity class. In this example I’m going to start of with a model called Idea, having properties like a title, description and the date it was created on:
package be.g00glen00b.model;

import java.util.Date;

import javax.persistence.*;

@Entity
@Table
public class Idea {

  @Id
  @GeneratedValue(strategy = GenerationType.AUTO)
  private long id;

  @Column
  private String title;

  @Column
  private String description;

  @Column
  private Date createdAt;

  public String getTitle() {
    return title;
  }

  public void setTitle(String title) {
    this.title = title;
  }

  public String getDescription() {
    return description;
  }

  public void setDescription(String description) {
    this.description = description;
  }

  public Date getCreatedAt() {
    return createdAt;
  }

  public void setCreatedAt(Date createdAt) {
    this.createdAt = createdAt;
  }

  public long getId() {
    return id;
  }
}
That should do the trick.
A small note, notice that we do not have a setter for the id property. The ID should be immutable, so it should only be set at creation, not while altering the entity.
For creating an entity with an ID you could create a constructor for initializing that field or use the builder pattern.
The next step is the repository, which is quite simple, just create an interface that extends from JpaRepository:
@Repository
public interface IdeaRepository extends JpaRepository<Idea, Long> {

}
Last but not least I’m going to change the application.properties file to automatically create the tables in the in memory database based upon our entities. This makes it a lot easier for development, so you don’t have to create a new schema manually:
spring.jpa.generate-ddl=true
You won’t use this kind of thing in a production environment, so make sure you either remove it or work with Spring profiles so you don’t accidently create new tables in the production environment.
Creating the controller
So far so good. I’m going to skip the part of creating a service and using proper DTO’s here and put all logic inside the REST controller, but in a “real world” example you would probably extend this and use services that provides you some proper DTO’s in stead of entities.
A sample controller would be:
@RestController
@RequestMapping("/api/ideas")
public class IdeaController {
  @Autowired
  private IdeaRepository repository;

  @RequestMapping(method = RequestMethod.GET)
  public List<Idea> findAll() {
    return repository.findAll();
  }

  @RequestMapping(method = RequestMethod.POST)
  public Idea add(@RequestBody Idea idea) {
    Idea model = new Idea();
    model.setCreatedAt(new Date());
    model.setTitle(idea.getTitle());
    model.setDescription(idea.getDescription());
    return repository.saveAndFlush(model);
  }

  @RequestMapping(value = "/{id}", method = RequestMethod.GET)
  public Idea findOne(@PathVariable long id) {
    return repository.findOne(id);
  }

  @RequestMapping(value = "/{id}", method = RequestMethod.PUT)
  public Idea update(@PathVariable long id, @RequestBody Idea idea) {
    Idea model = repository.findOne(id);
    if (model != null) {
      model.setTitle(idea.getTitle());
      model.setDescription(idea.getDescription());
      return repository.saveAndFlush(model);
    }
    return null;
  }

  @RequestMapping(value = "/{id}", method = RequestMethod.DELETE)
  public void delete(@PathVariable long id) {
    repository.delete(id);
  }
}
There’s not a lot of error handling here and it isn’t really a good practice to put all that login inside your controller, but you get the idea.
With Spring Web MVC it’s quite easy to set up a REST API using the @RestController annotation, which is a shorthand for a normal controller (@Controller), but where all returned objects are automatically seen as response body, so you can leave the @ResponseBody annotation.
We have several methods here, for getting all ideas/one idea, for adding new ideas, or for updating/deleting existing ideas.
Testing it out
Actually, this is all code we need to secure the application. If you run the application itself and go to http://localhost:8080/api/ideas, it will prompt you for your username/password. The cool thing about Spring Boot is that a lot of things are set up for you, with spring-security-starter-security for example, your project is already configured with some security measures.
Taking a look at the reference guide (27. Security), you can see that there is already a default user created with username “user” and a random password. To see the password, we have to change some logging levels, so let’s do that by editing application.properties and adding the following line:
logging.level.org.springframework.boot.autoconfigure.security=INFO
Yes indeed, you can configure your logging levels from the same file used for configuring your entire application. Make sure to take a look at the documentation (66. Logging).
If you log in properly, and add a new idea by using a POST request, you’ll see that it works fine.
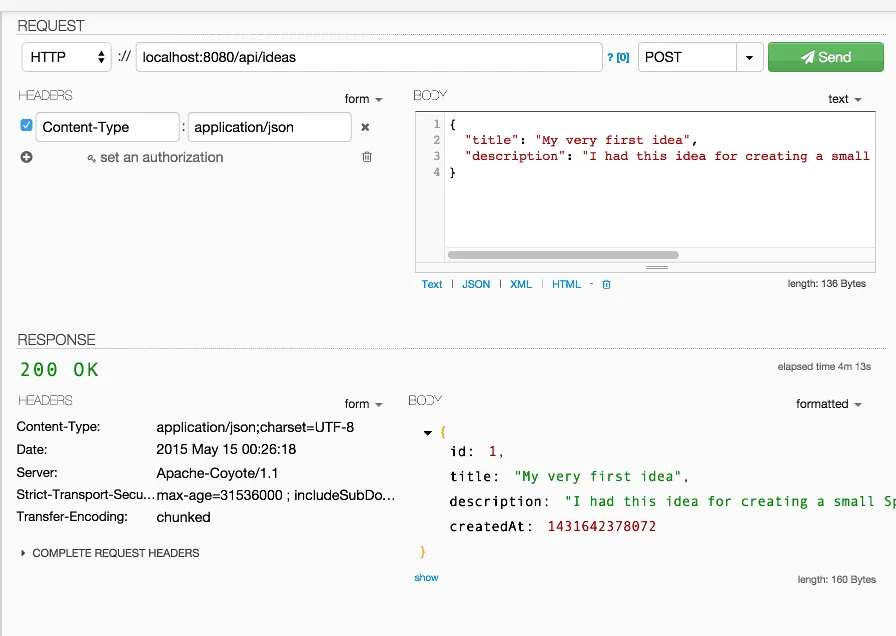
This looks already pretty nice to me!
Securing the REST API
The default settings are already great. It’s certainly better than having to mess around with Spring Security until you finally get a basic example working, now you already have a basic example and now we need to tweak it a bit.
First of all, let’s set the default password to password in stead of a UUID that’s being generated each time. You can do this by setting the following properties:
security.user.name=user
security.user.password=password
You can restart the application now and try it out, you can now log in with using the combination user/password.
The next part is a bit more difficult, but we’ll try it anyways! In stead of securing all actions, I would like to keep the GET requests for everyone (even unauthenticated), while adding, updating or deleting ideas should only be allowed for the user that logged in.
So, in order to do that, we need to write a new class that extends from WebSecurityConfigurerAdapter. We can then override the configure(HttpSecurity http) method, allowing us to work with a builder for configuring the security for each path:
@Configuration
public class SecurityConfig extends WebSecurityConfigurerAdapter {
  @Override
  protected void configure(HttpSecurity http) throws Exception {
    http
      .csrf().disable()
      .authorizeRequests()
        .antMatchers(HttpMethod.POST, "/api/**").authenticated()
        .antMatchers(HttpMethod.PUT, "/api/**").authenticated()
        .antMatchers(HttpMethod.DELETE, "/api/**").authenticated()
        .anyRequest().permitAll()
        .and()
      .httpBasic().and()
      .sessionManagement().sessionCreationPolicy(SessionCreationPolicy.STATELESS);
  }
}
What happens here is that we configure all POST/PUT/DELETE requests for everything beneath /api/** to be allowed only for people that are authenticated. All other requests are permitted by everyone.
Testing it out… again
So, now we changed the configuration quite a bit, so it’s time to test it out. Run your application and try to send a POST request for creating a new idea:
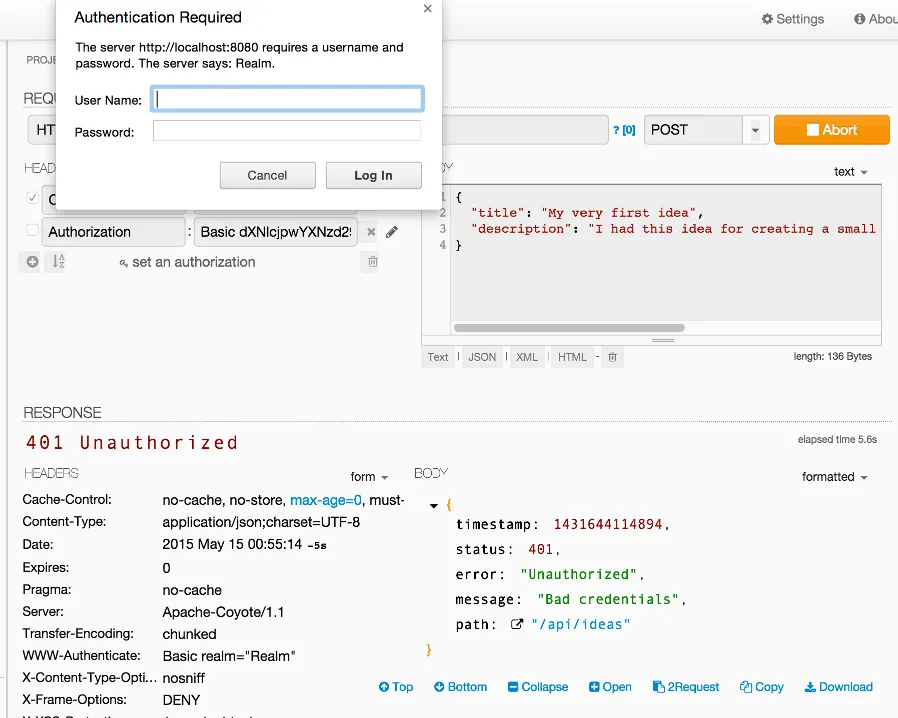
This should give you another prompt, which makes sense because adding is only allowed for authenticated users. So, either enter the prompt or add the following header:
Authorization: Basic dXNlcjpwYXNzd29yZA==
This is the same thing that happens when you enter your credentials, it will add a Base64 encoded string of the username and the password. Since we all have the same username/password now (and not a random password), you can use that in stead for even easier development.
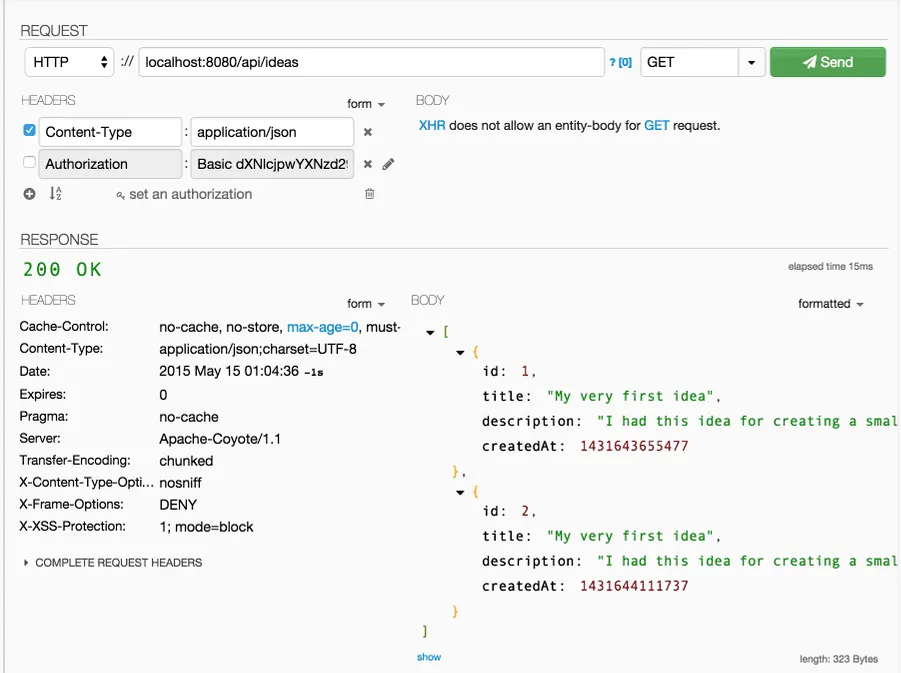
Now let’s try a request that shouldn’t be secured, for example getting a list of all ideas. As you can see in the screenshot below, it works as expected. You can send a request without having the Authentication header and it will still return the proper response.
Achievement: Secured your REST service with Spring Security
If you’re seeing this, then it means you successfully managed to make it through this article. If you’re interested in the full code example, you can find it on GitHub. If you want to try out the code yourself, you can download an archive from GitHub.