
Reactive streams over the network with RSocket
- July 9th, 2019
- 6 minute read
- Project Reactor Reactive programming RSocket Spring boot
RSocket is a protocol that allows you to reactively stream data over the network. One of the benefits of RSocket is that the header of the frame itself is being sent in binary. This reduces the overal network payload and decreases network latency.
Not only does RSocket cover the specification of the protocol itself, but it also provides several implementations. Currently, there are implementations for Java, JavaScript, Go, Kotlin and more. In this tutorial I’ll demonstrate how to use RSocket with Spring boot.

Setting up your producer
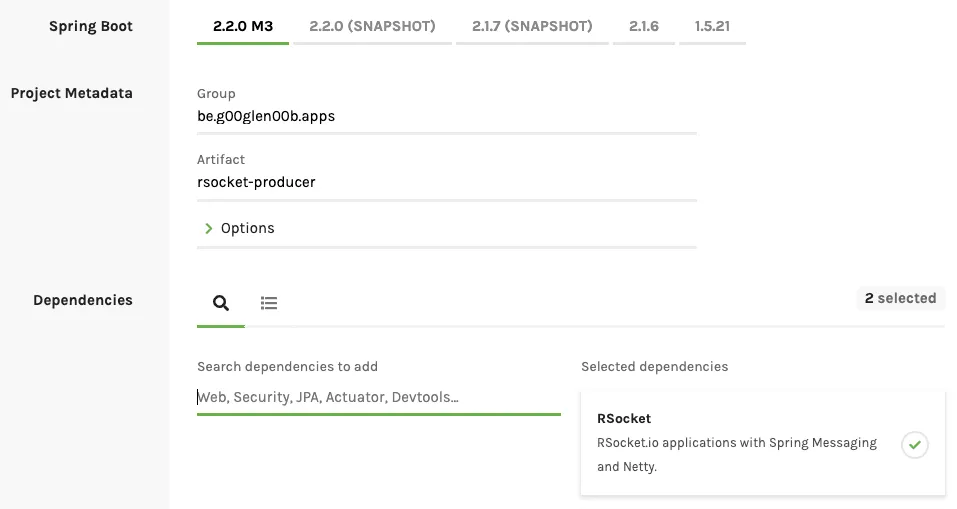
The first step to set up our project is to head over to Spring Initializr and select the RSocket dependency (spring-boot-starter-rsocket). Just like with R2DBC, this feature relies on Spring boot 2.2.x, so make sure to select that as well. Additionally, I’ll use Lombok, but you don’t need it.
If you prefer to set up your project manually, you can do so by adding the following dependency:
<dependency>
    <groupId>org.springframework.boot</groupId>
    <artifactId>spring-boot-starter-rsocket</artifactId>
</dependency>
The next step is to decide on which port you want to run your RSocket server. You can change this by setting the spring.rsocket.server.port property:
spring.rsocket.server.port=8000
In this example, I’ll run the application on port 8000.
Creating a controller
Working with RSocket is similar to working with other messaging protocols, first you have to create a class representing the data you want to transfer (eg. a DTO). For example:
@Getter
@ToString
@RequiredArgsConstructor
public class PersonMessage {
    private final Long id;
    private final String firstname;
    private final String lastname;
}
After that, we can create a controller and define the endpoints we want to provide by using the @MessageMapping annotation:
@Controller
public class PersonController {
    @MessageMapping("findPeople")
    public Flux<PersonMessage> findAll() {
        return Flux.just(
            new PersonMessage(1L, "John", "Doe"),
            new PersonMessage(2L, "Jane", "Doe")
        );
    }
}
Now that we’ve defined our producer, we’re basically ready to send some messages into the world!
Setting up your consumer
Setting up the consumer happens in a similar way. For the consumer you also need a Spring boot project containing the RSocket dependency (spring-boot-starter-rsocket).
The next step is to set up our RSocket client, for example:
@Bean
public Mono<RSocket> rSocket() {
    return RSocketFactory
        .connect()
        .dataMimeType(MediaType.APPLICATION_JSON_VALUE)
        .frameDecoder(PayloadDecoder.ZERO_COPY)
        .transport(TcpClientTransport.create(8000))
        .start()
        .doOnNext(socket -> log.info("🚀 Connected to RSocket"))
        .cache();
}
As you can see in the code above, we’re telling RSocket that we’ll be sending JSON payloads and that we should connect to port 8000. By using PayloadDecoder.ZERO_COPY we tell the RSocket client that the incoming payloads won’t be copied, which will increase the performance as mentioned in the RSocket documentation.
Additionally, we’re using the cache() operator so that the cold observable turns into a hot one, which means that if multiple beans autowire and subscribe to this RSocket reactive stream, the upstream source will only be created once and cached for all other subscribers. The benefit of that is that we’re only creating one RSocket connection.
After that, we should wrap the RSocket instance within Spring’s RSocketRequester, which provides a more fluent API for requesting data from RSocket. To do that, I’m going to create the following method:
@Bean
public Mono<RSocketRequester> rSocketRequester(Mono<RSocket> rSocket, RSocketStrategies strategies) {
    return rSocket
        .map(socket -> RSocketRequester.wrap(socket, MimeTypeUtils.APPLICATION_JSON, strategies))
        .cache();
}
The parameters provided to this method are the RSocket reactive stream we created in our previous method, and RSocketStrategies, which is a bean created by the RSocket autoconfiguration.
The reason we’re wrapping RSocket is because RSocket does support reactive streams, but doesn’t contain the types introduced by Project Reactor, such as Mono and Flux, additionally, we would have to do the mapping to PersonMessage objects by ourselves.
With the wrapper on the other hand, we could write our code like this:
private Flux<PersonMessage> findPeople(RSocketRequester requester) {
    return requester
        .route("findPeople")
        .data(DefaultPayload.create(""))
        .retrieveFlux(PersonMessage.class);
}
Connecting to the consumer
Now that we’ve defined all the building blocks to connect to our RSocket server, we could write an ApplicationRunner that fetches the data. For example:
@Bean
public ApplicationRunner consumer(Mono<RSocketRequester> requester) {
    return args -> requester
        .flatMapMany(this::findPeople)
        .map(PersonMessage::toString)
        .subscribe(log::info);
}
Theoretically, this code should work. One issue with this code is that Spring will kill the application as soon as the main thread is no longer occupied. Considering that we’re using reactive streams, which are non-blocking and asynchronous by nature, the application would be killed before we even obtain a single object.
To solve this issue, we can use a CountDownLatch, set it to 1 entry, and to count down to zero as soon as the the reactive stream is complete.
For example:
@Bean
public ApplicationRunner consumer(Mono<RSocketRequester> requester) {
    return args -> {
        CountDownLatch closeLatch = new CountDownLatch(1);
        requester
            .flatMapMany(this::findPeople)
            .map(PersonMessage::toString)
            .subscribe(log::info, err -> log.error("Something went wrong", err), closeLatch::countDown);
        closeLatch.await();
    };
}
As long as the CountDownLatch doesn’t count down to zero, the application will keep running.
If we run both applications now, we’ll see that the PersonMessage objects appear in the console of the consumer application.
CBOR in stead of JSON
As you’ve seen in the previous section, we’ve set up the RSocket client to work over TCP, and to request and parse the body as JSON. While RSocket defined the structure of the frame (which should be binary), you’re free to send any body you’d like.
Another choice for encoding and decoding objects is the use of CBOR or the Concise Binary Object Representation. CBOR is loosely based on JSON, but provides a more concise format.
To make this work on the consumer-end, we have to change the mediatypes to application/cbor. For example:
@Bean
public Mono<RSocket> rSocket() {
    return RSocketFactory
        .connect()
        .dataMimeType("application/cbor") // This has to change
        .frameDecoder(PayloadDecoder.ZERO_COPY)
        .transport(TcpClientTransport.create(8000))
        .start()
        .doOnNext(socket -> log.info("🚀 Connected to RSocket"))
        .cache();
}
Additionally, we should change the mimetype in the wrapper as well:
@Bean
public Mono<RSocketRequester> rSocketRequester(Mono<RSocket> rSocket, RSocketStrategies strategies) {
    return rSocket
        .map(socket -> RSocketRequester.wrap(socket, MimeTypeUtils.parseMimeType("application/cbor"), strategies))
        .cache();
}
On the producer-end, nothing has to change, since the initial request made by the consumer includes the requested mimetype, and the producer is already setup to support CBOR out of the box.
If you run the application again, you shouldn’t be surprised that there’s no difference at all. Under the hood however, we’re now encoding messages as CBOR, and no longer as JSON.
Conclusion
With RSocket, we have a proper alternative to WebSockets or Server Sent Events when it comes to sending data reactively over the network. The support within Spring boot is already working properly to cover most aspects, though it hasn’t matured yet.
As usual, the code can be found on GitHub. There are a few differences between this project and the code mentioned in this tutorial, as the GitHub project contains both the producer and the consumer within the same Maven project. Additionally, the data comes from a database rather than using Flux.just(...).