
Recently I wrote an article about writing modern webapps with Spring Data REST and AngularJS. It’s not that hard to write, but it can be done even easier with Spring Boot. I already planned on trying out Spring Boot after some amazing articles about Spring Boot by my colleague, Driss. So now it’s time to write an article about using Spring Boot myself.
In this tutorial I’m going to show you how you can write a good looking, responsive full CRUD application in less than 150 lines of code (100 lines of Java code and 50 lines of JavaScript), all thanks to a great Java framework (Spring) and a great JavaScript framework (AngularJS).
Setting up your application
You might have seen a lot of my other tutorials and you probably know that setting up usually takes a lot of time and is kinda repetitive and dull. With Spring Boot this is no more! Spring Boot will configure stuff for you, it will look at the dependencies you’re using, so it knows what common configuration it should use.
For example, if you add HSQLDB to your classpath and add a single property, it will automatically create a datasource, an in memory database and create a scheme for you. If you add spring-boot-starter-web to your classpath, it will automatically scan for controllers and set a default view resolver if necessary.
So, all we need to do is to declare some dependencies. In this case I want to create a web application using Spring Data JPA and an in memory HSQLDB, so I have to add the following dependencies:
<dependency>
  <groupId>org.springframework.boot</groupId>
  <artifactId>spring-boot-starter-web</artifactId>
</dependency>
<dependency>
  <groupId>org.springframework.boot</groupId>
  <artifactId>spring-boot-starter-data-jpa</artifactId>
</dependency>
<dependency>
  <groupId>org.hsqldb</groupId>
  <artifactId>hsqldb</artifactId>
  <scope>runtime</scope>
</dependency>
And now we only have to tell Maven that this application should be using Spring Boot, and to do that we define spring boot as the parent POM, by writing:
<parent>
  <groupId>org.springframework.boot</groupId>
  <artifactId>spring-boot-starter-parent</artifactId>
  <version>1.2.0.RELEASE</version>
</parent>
Now we have to write a single class to bootstrap our Spring boot application, the main class. Spring Boot allows you to run your application using an embedded webcontainer like Tomcat, so that makes it even easier for running the application itself.
The main class should look like this:
@SpringBootApplication
public class Application {

  public static void main(String[] args) {
    SpringApplication.run(Application.class, args);
  }
}
And yes, that should do the trick. You now have a completely configured web application with Spring data JPA, Web MVC and an in memory HSQLDB. No more hassle with defining AppConfig, WebAppIntializer, defining entity managers, … .
Just make sure that the Application class is located into the parent folder of all your classes, because by default Spring will scan all components beneath it.
Adding some front-end libraries
I’m a huge fan of using front-end dependency managers like Bower, because it really makes things easier, even if you’re developing Java apps (because nowadays you no longer have webapps that only contain Java).
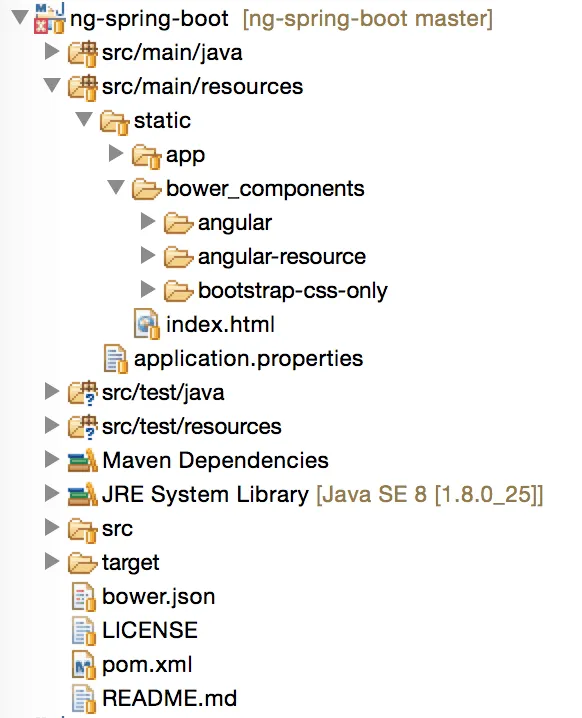
To configure Bower, you simply have to add two files in the root folder of your project, a .bowerrc file and a bower.json file. The .bowerrc file is not required, but it allows you to configure in what directory the dependencies should be placed. By default it creates a bower_components folder into the current directory, but I would like to put it inside src/main/resources/static, because Spring will pick up all static resources on that location by default, and make them available for use.
The contents of the .bowerrc file are the following:
{
  "directory": "src/main/resources/static/bower_components",
  "json": "bower.json"
}
Then finally we have to add the bower.json configuration:
{
  "name": "ng-spring-boot",
  "dependencies": {
    "angular": "~1.3.0",
    "angular-resource": "~1.3.0",
    "bootstrap-css-only": "~3.2.0"
  }
}
I will only need three frameworks. AngularJS for creating the application itself, Angular resource for handling my REST resource and finally I will be using Twitter Bootstrap for easily writing the user interface without having to spend a lot of time writing CSS, which is ideal for setting up prototypes or proof of concepts.
Running Bower requires you to install it though the Node.js package manager:
npm install -g bower
And then you will be able to install your dependencies by entering the following command:
bower install
When it’s finished loading, you should see a new folder called bower_components in your resources, containing the libraries we need.
Working with Spring Data JPA
In my previous tutorial I used Spring Data REST. While Spring Data REST allows you to create RESTful webservices quite easily, it makes it a bit harder to retrieve the contents using AngularJS because it uses HATEOAS. In this example I will be using Spring Data JPA together with a REST controller. But before we start writing repositories or controllers, we have to create our entity:
@Entity
public class Item {
  @Id
  @GeneratedValue(strategy=GenerationType.IDENTITY)
  private Integer id;
  @Column
  private boolean checked;
  @Column
  private String description;

  public Integer getId() {
    return id;
  }

  public void setId(Integer id) {
    this.id = id;
  }

  public boolean isChecked() {
    return checked;
  }

  public void setChecked(boolean checked) {
    this.checked = checked;
  }

  public String getDescription() {
    return description;
  }

  public void setDescription(String description) {
    this.description = description;
  }
}
Quite a simple class, and the funniest thing is that we now already wrote 50% of the Java code you will be writing this tutorial. Even better, the Item class is probably the largest class we will be using.
Creating the JPA repository is quite easy with Spring Data. You write an empty interface that extends from JpaRepository and you’re done:
public interface ItemRepository extends JpaRepository<Item, Integer> {

}
You can create extra methods, but the JpaRepository already allows you to do most basic operations like creating, updating, deleting and retrieving items.
Now, to finish the data-part of our application we have to add a file called application.properties inside the src/main/resources folder and we have to add a single property to tell Spring to create a scheme on starting the application:
spring.jpa.hibernate.ddl-auto=create-drop
Providing the data using @RestController
The last class we have to write is the controller for providing the data by using REST. The implementation is quite easy though, because we can simply use the ItemRepository to retrieve all data:
@RestController
@RequestMapping("/items")
public class ItemController {
  @Autowired
  private ItemRepository repo;

  @RequestMapping(method = RequestMethod.GET)
  public List findItems() {
    return repo.findAll();
  }

  @RequestMapping(method = RequestMethod.POST)
  public Item addItem(@RequestBody Item item) {
    item.setId(null);
    return repo.saveAndFlush(item);
  }

  @RequestMapping(value = "/{id}", method = RequestMethod.PUT)
  public Item updateItem(@RequestBody Item updatedItem, @PathVariable Integer id) {
    updatedItem.setId(id);
    return repo.saveAndFlush(updatedItem);
  }

  @RequestMapping(value = "/{id}", method = RequestMethod.DELETE)
  public void deleteItem(@PathVariable Integer id) {
    repo.delete(id);
  }
}
And yes, we now made a full working REST service and by running the application you will be able to create, delete, update and retrieve our items.
Trying out the REST service
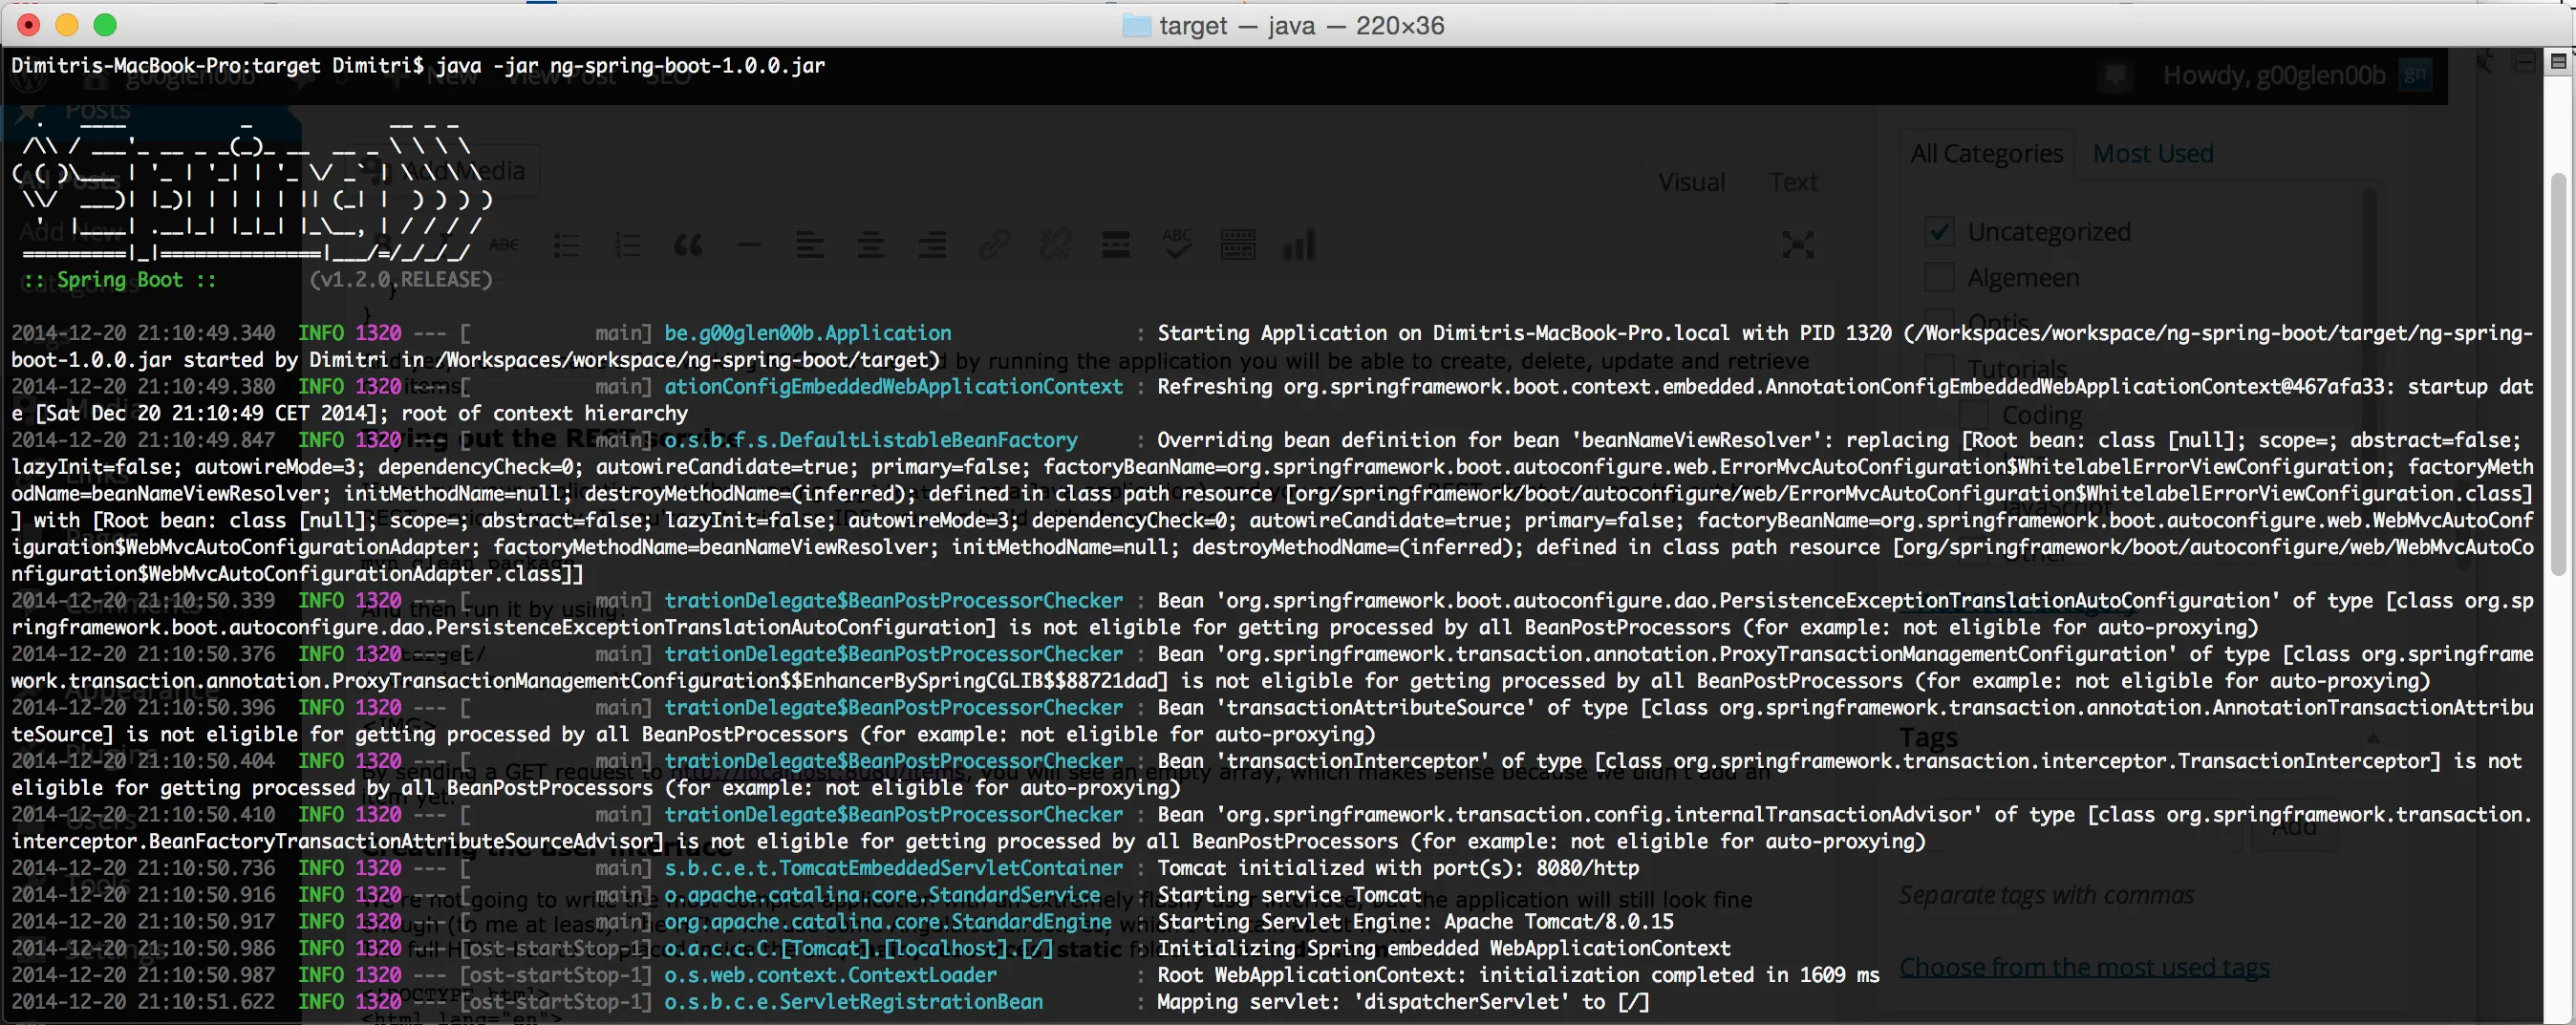
If you run your application now (by running Application as a Java application), and you open up a REST client, you can try out the REST service already. If you’re not using an IDE, you can build with Maven using:
mvn clean package
And then run it by using:
cd target/
java -jar ng-spring-boot-1.0.0.jar
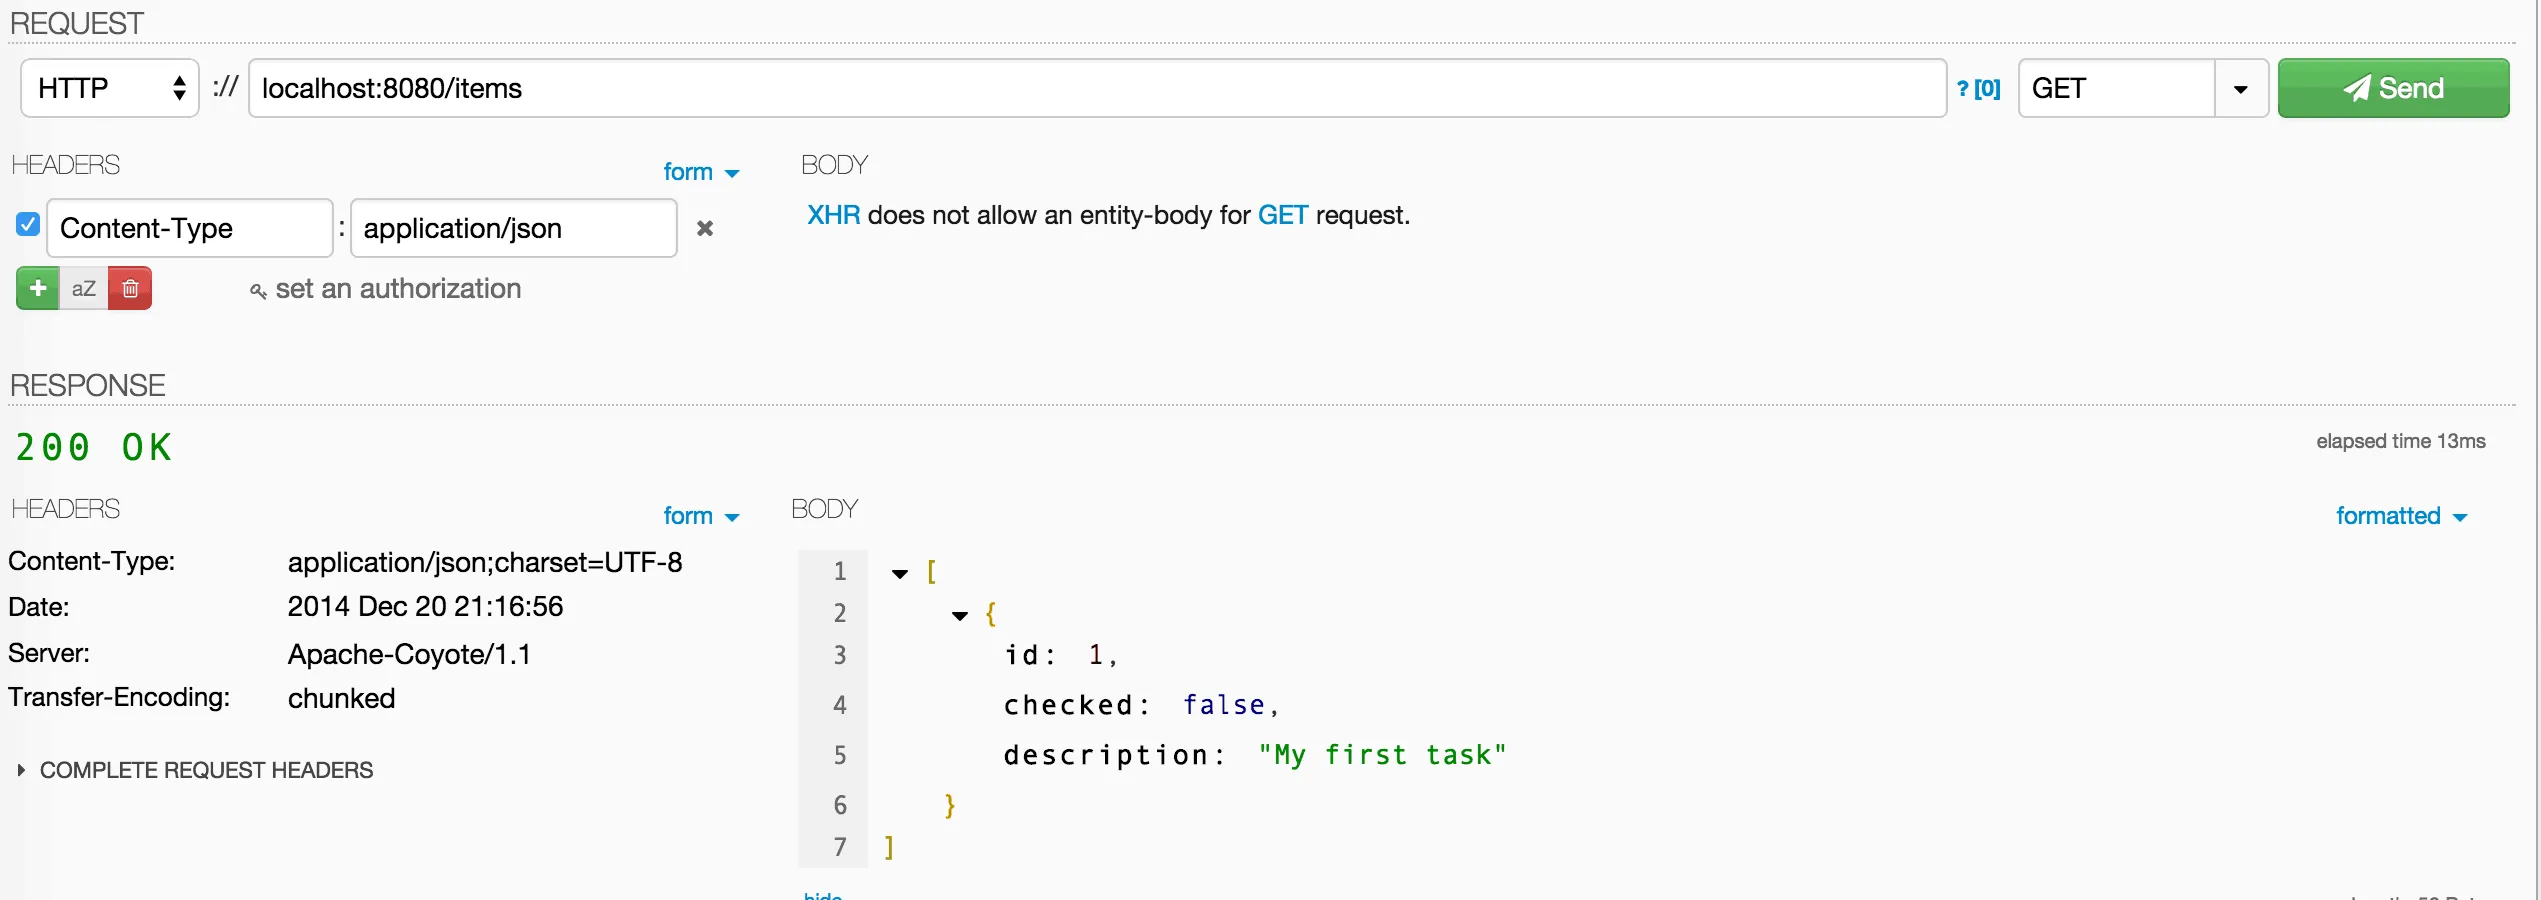
By sending a GET request to http://localhost:8080/items, you will see an empty array, which makes sense because we didn’t add an item yet.

Now, to add an item, you will have to set the method to POST and pass a JSON body like in the image below.
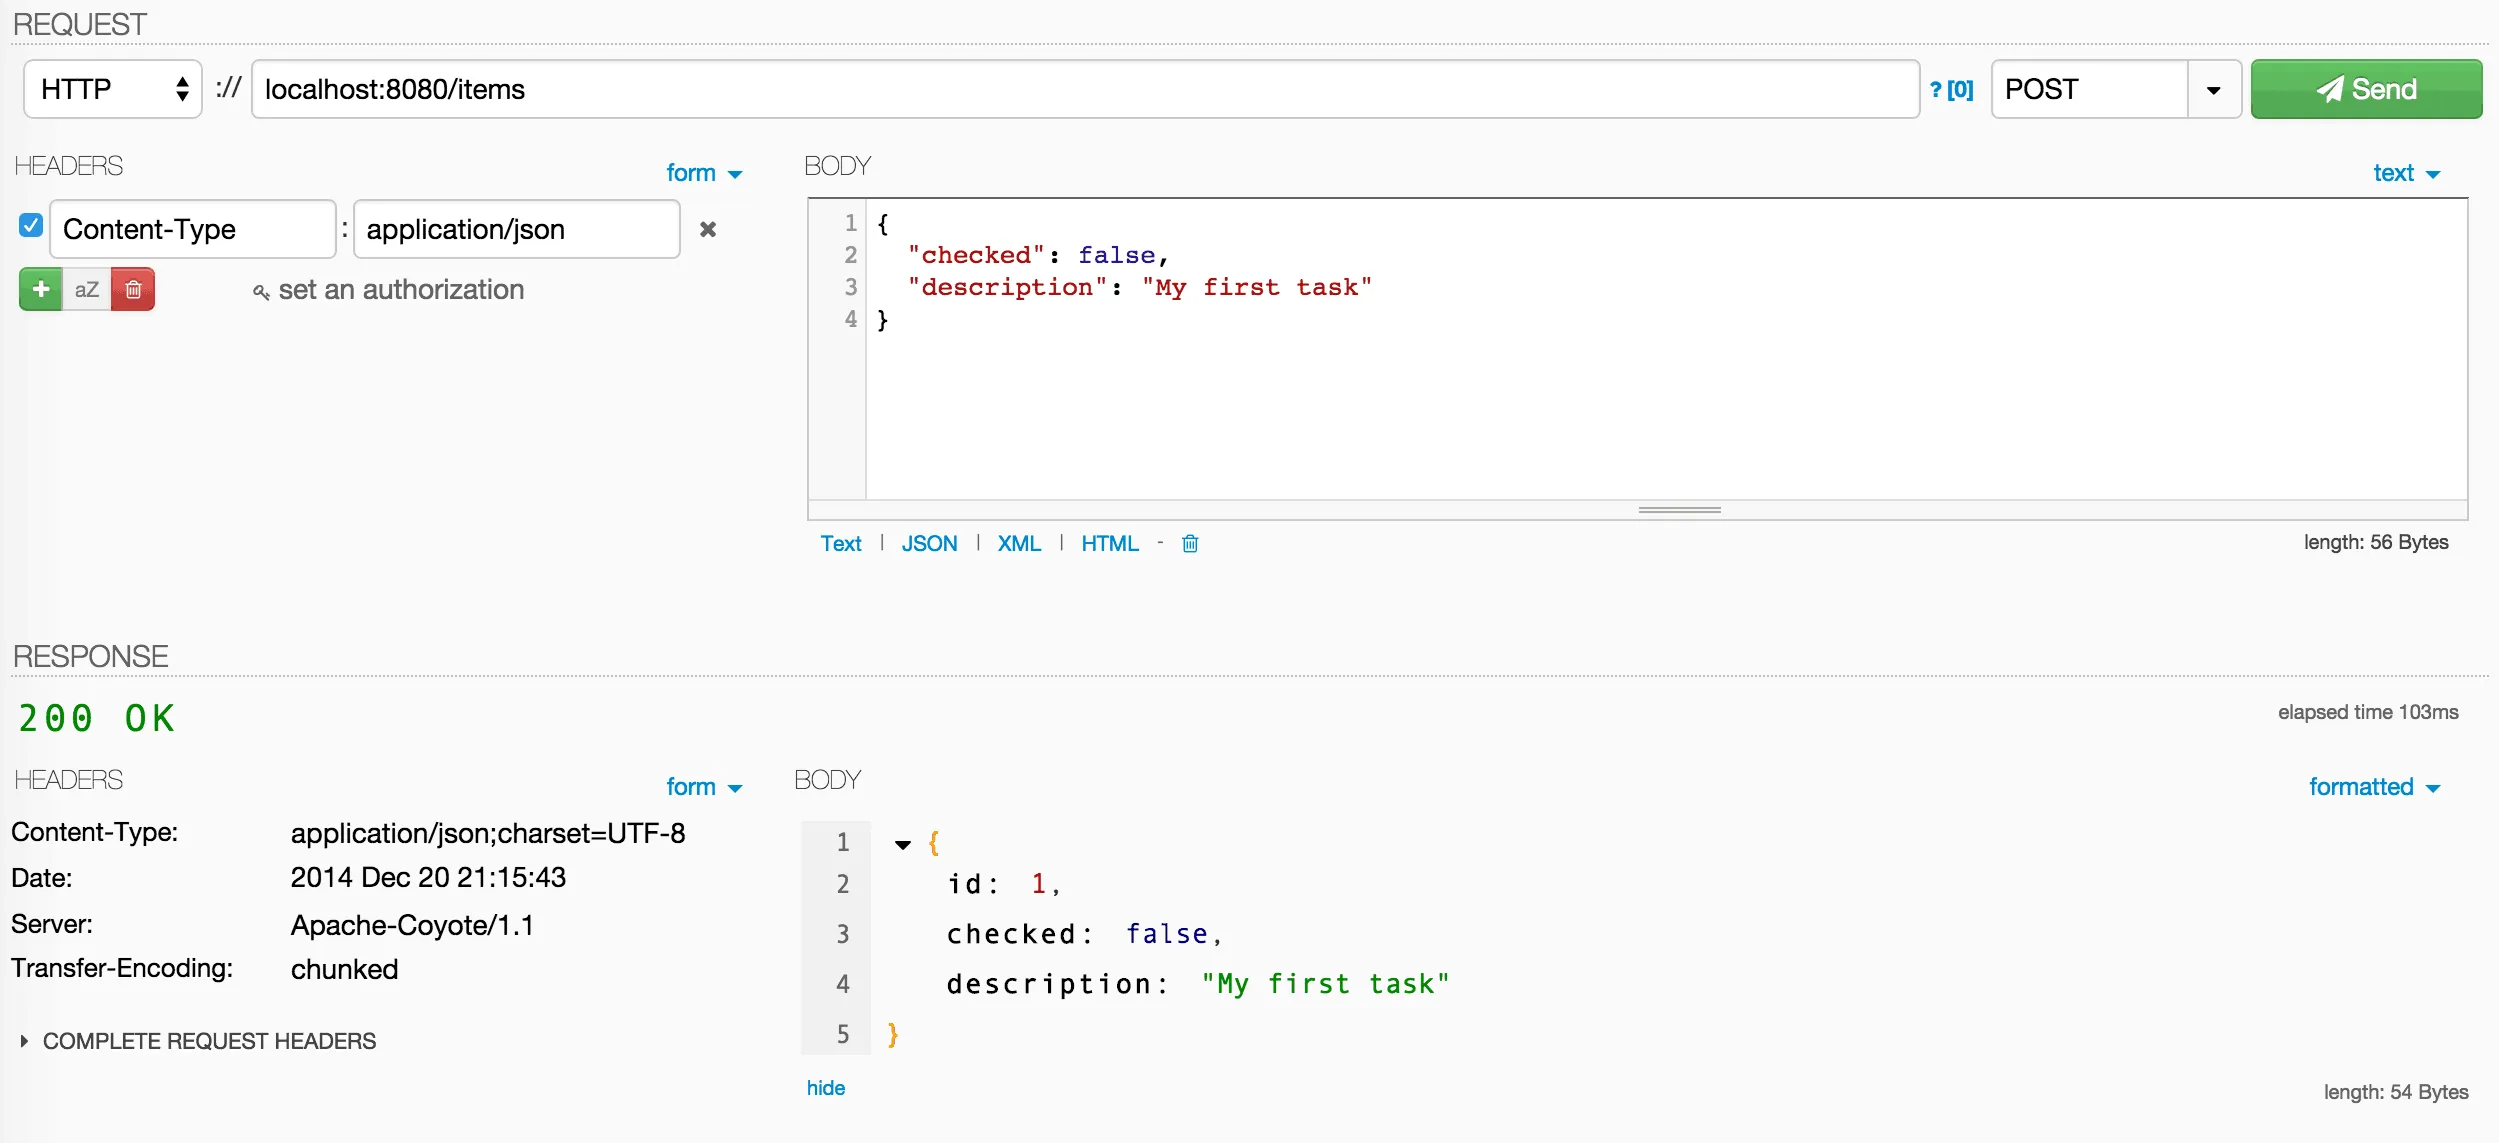
If you execute the same GET request now as before, you should see that the list is no longer empty now.
In the next part we’re going to create a small web application using these REST services.
Creating the user interface
We’re not going to write the most complex application with an extremely flashy user interface, but the application will still look fine enough (to me at least). The HTML will use some AngularJS directives, which I will talk about next. The full HTML has to be placed inside the src/main/resources/static folder as the index.html file:
<!DOCTYPE html>
<html lang="en">
  <head>
    <link rel="stylesheet" href="./bower_components/bootstrap-css-only/css/bootstrap.min.css" />
  </head>
  <body ng-app="myApp">
    <div class="container" ng-controller="AppController">
      <div class="page-header">
        <h1>A checklist</h1>
      </div>
      <div class="alert alert-info" role="alert" ng-hide="items && items.length > 0">
        There are no items yet.
      </div>
      <form class="form-horizontal" role="form" ng-submit="addItem(newItem)">
        <div class="form-group" ng-repeat="item in items">
          <div class="checkbox col-xs-9">
            <label>
              <input type="checkbox" ng-model="item.checked" ng-change="updateItem(item)"/> {{item.description}}
            </label>
          </div>
          <div class="col-xs-3">
            <button class="pull-right btn btn-danger" type="button" title="Delete"
              ng-click="deleteItem(item)">
              <span class="glyphicon glyphicon-trash"></span>
            </button>
          </div>
        </div>
        <hr />
        <div class="input-group">
          <input type="text" class="form-control" ng-model="newItem" placeholder="Enter the description..." />
          <span class="input-group-btn">
            <button class="btn btn-default" type="submit" ng-disabled="!newItem" title="Add">
              <span class="glyphicon glyphicon-plus"></span>
            </button>
          </span>
        </div>
      </form>
    </div>
    <script type="text/javascript" src="./bower_components/angular/angular.min.js"></script>
    <script type="text/javascript" src="./bower_components/angular-resource/angular-resource.min.js"></script>
    <script type="text/javascript" src="./bower_components/lodash/dist/lodash.min.js"></script>
    <script type="text/javascript" src="./app/app.js"></script>
    <script type="text/javascript" src="./app/controllers.js"></script>
    <script type="text/javascript" src="./app/services.js"></script>
  </body>
</html>
Let’s start from the top and see what’s going on here. First of all we have the <head> element, in which we’re loading the CSS files we need (Bootstrap). Then, on our <body> tag you can find a special attribute called ng-app. By using this attribute you’re telling AngularJS that it should be bootstrapped. We can pass it a name so we can tell which application (in this case "myApp") should be bootstrapped.
An AngularJS application is in fact a collection of controllers, services, factories, … . To load a controller, we have to tell which part of the application it “controls”, by using the ng-controller attribute. In this case we added this attribute to a <div> element, and we told it to load the controller named "AppController".
As I just said, an AngularJS application is a collection of several modules, the most basic module is a directive. An example of such a directive is the ng-hide directive. With this directive we’re telling AngularJS that that part of the HTML should be hidden as soon as the expression ("items && items.length > 0") turns to be valid. In this case, it means that we’re showing an alert if there are no items.
There are several types of directives, some of them are simple event wrappers like the ng-submit directive. In this case we’re calling the function addItem() as soon as we submit the form (this allows us to create new items). Speaking about these items, to list them all, we can use the ng-repeat directive, which will repeat the HTML for each item inside the list, allowing us to show both a checkbox and the description of the item.
The power of AngularJS lies within the capability to bind your model to your view in both ways. For example, by using the ng-model directive, the checkbox will always have the same state as the item.checked model. If the item.checked model is true, the checkbox will be checked. If we uncheck the checkbox, item.checked will also follow and become false.
To simply show your model in your view, you can use these handlebars placeholders, like {{item.description}}. If you understand all this, then it’s also pretty easy to understand what ng-click or ng-change does.
Initializing AngularJS
Just like Spring Boot we have to create a small application file. In this case, we will be using src/main/resources/static/app/app.js. But just like Spring Boot, configuring the application is rather easy:
(function(angular) {
  angular.module("myApp.controllers", []);
  angular.module("myApp.services", []);
  angular.module("myApp", ["ngResource", "myApp.controllers", "myApp.services"]);
}(angular));
What we’re doing here is that we’re defining three modules here, the controllers, the services and the application module. Remind that the name of the application module should be the same as the name used inside the ng-app attribute ("myApp").
Between the square brackets we can define any dependencies we need. For the application module we will depend on the controllers and the services, and also the AngularJS resource framework.
Creating a resource factory
Yeah, we defined our modules now, but having empty modules makes no sense. So, let’s start by adding a factory to the services module. To define this factory, I’m going to create a file called services.js, located in the same directory as app.js:
(function(angular) {
  var ItemFactory = function($resource) {
    return $resource('/items/:id', {
      id: '@id'
    }, {
      update: {
        method: "PUT"
      },
      remove: {
        method: "DELETE"
      }
    });
  };

  ItemFactory.$inject = ['$resource'];
  angular.module("myApp.services").factory("Item", ItemFactory);
}(angular));
By using the $resource service, it will automatically make it possible to retrieve and add new items. If you need additional actions (like we did for update and remove) you can simply add those.
The AngularJS controller
The last part of the application is the controller itself. If you look back at the HTML page, you will notice that we talk about items, addItem(), … . We obviously still have to define these functions, and we will do that now by creating a file called controllers.js inside the same src/main/resources/static/app folder.
The implementation of this controller isn’t too hard:
(function(angular) {
  var AppController = function($scope, Item) {
    Item.query(function(response) {
      $scope.items = response ? response : [];
    });

    $scope.addItem = function(description) {
      new Item({
        description: description,
        checked: false
      }).$save(function(item) {
        $scope.items.push(item);
      });
      $scope.newItem = "";
    };

    $scope.updateItem = function(item) {
      item.$update();
    };

    $scope.deleteItem = function(item) {
      item.$remove(function() {
        $scope.items.splice($scope.items.indexOf(item), 1);
      });
    };
  };

  AppController.$inject = ['$scope', 'Item'];
  angular.module("myApp.controllers").controller("AppController", AppController);
}(angular));
You can find the functions addItem(), updateItem() and deleteItem() here, which are just using the resource factory we made earlier. Also, if you look at the addItem() function you see that at the end of that function we set the content of $scope.newItem to an empty string. Thanks to the two-way binding of AngularJS which I explained earlier, this will automatically wipe the value from the textbox as well.
Trying it out
By finishing our controller we completed the entire application. If you look at the code, we have around 100 lines of Java code and 50 lines of JavaScript code, which isn’t too bad considering that one of the largest file is actually our model. Of course, in a real situation you will almost never have some simple CRUD based applications, but even then, a lot of the code used in this approach is reuasable in bigger projects. You might have to write some services as well, but just think about the time you can save by not having to write complex trial-and-error configuration.
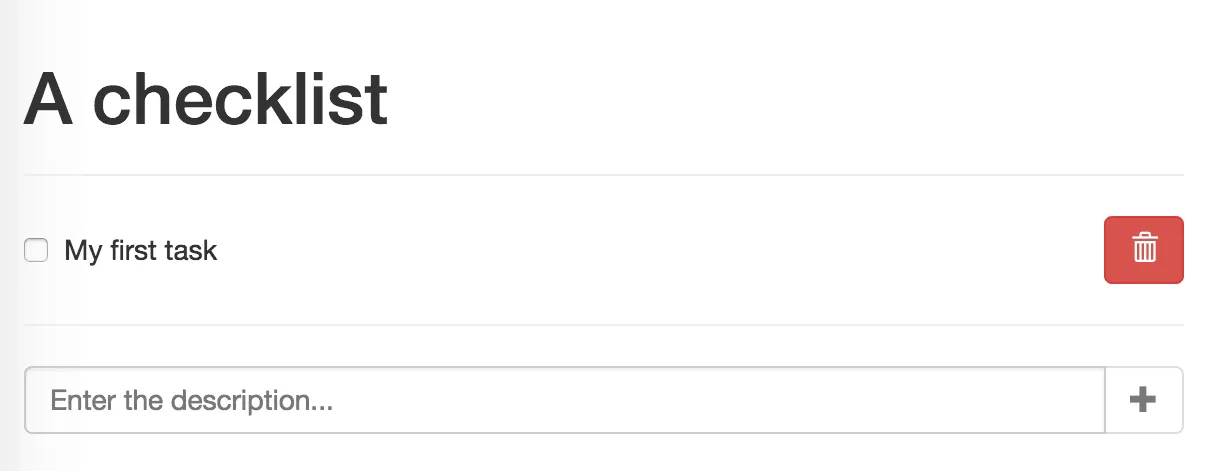
If you run the application now, and go to http://localhost:8080, you should see your application now. If you’re running the application from the previous time when we checked the REST service, then you should be able to see the item we added before:
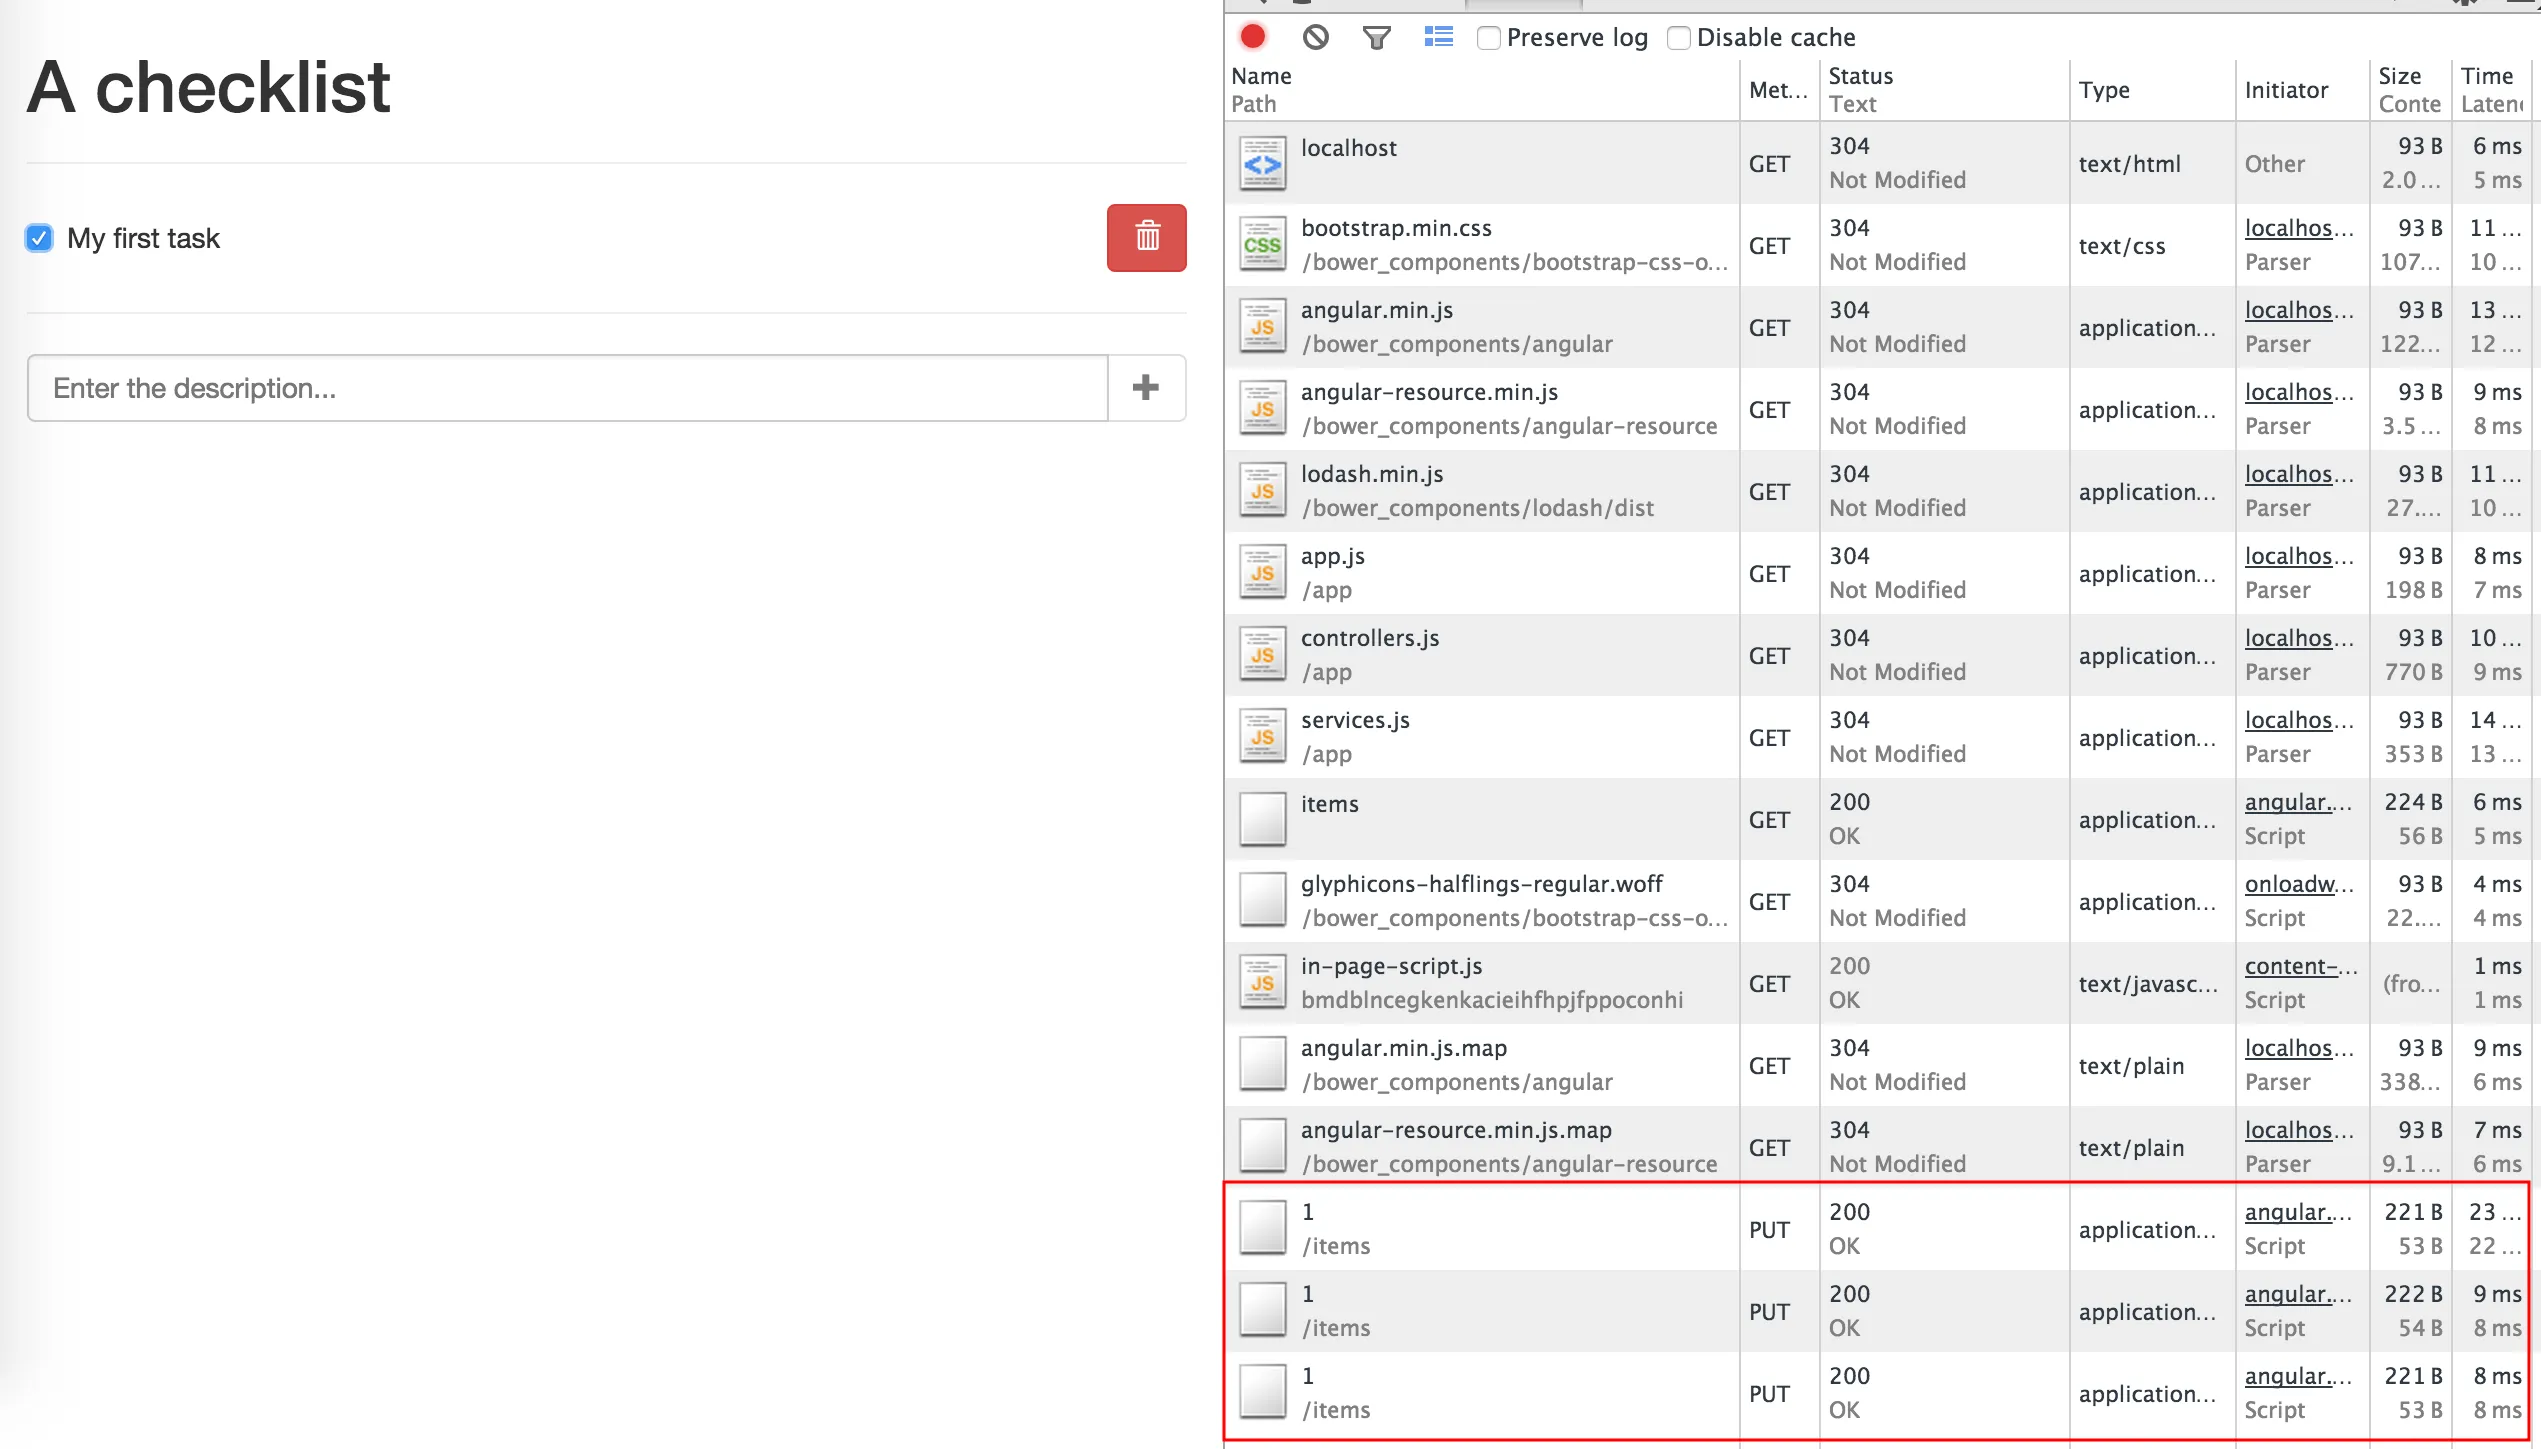
Checking and unchecking the item will result in a PUT request on the REST service, meaning that the item should be updated.
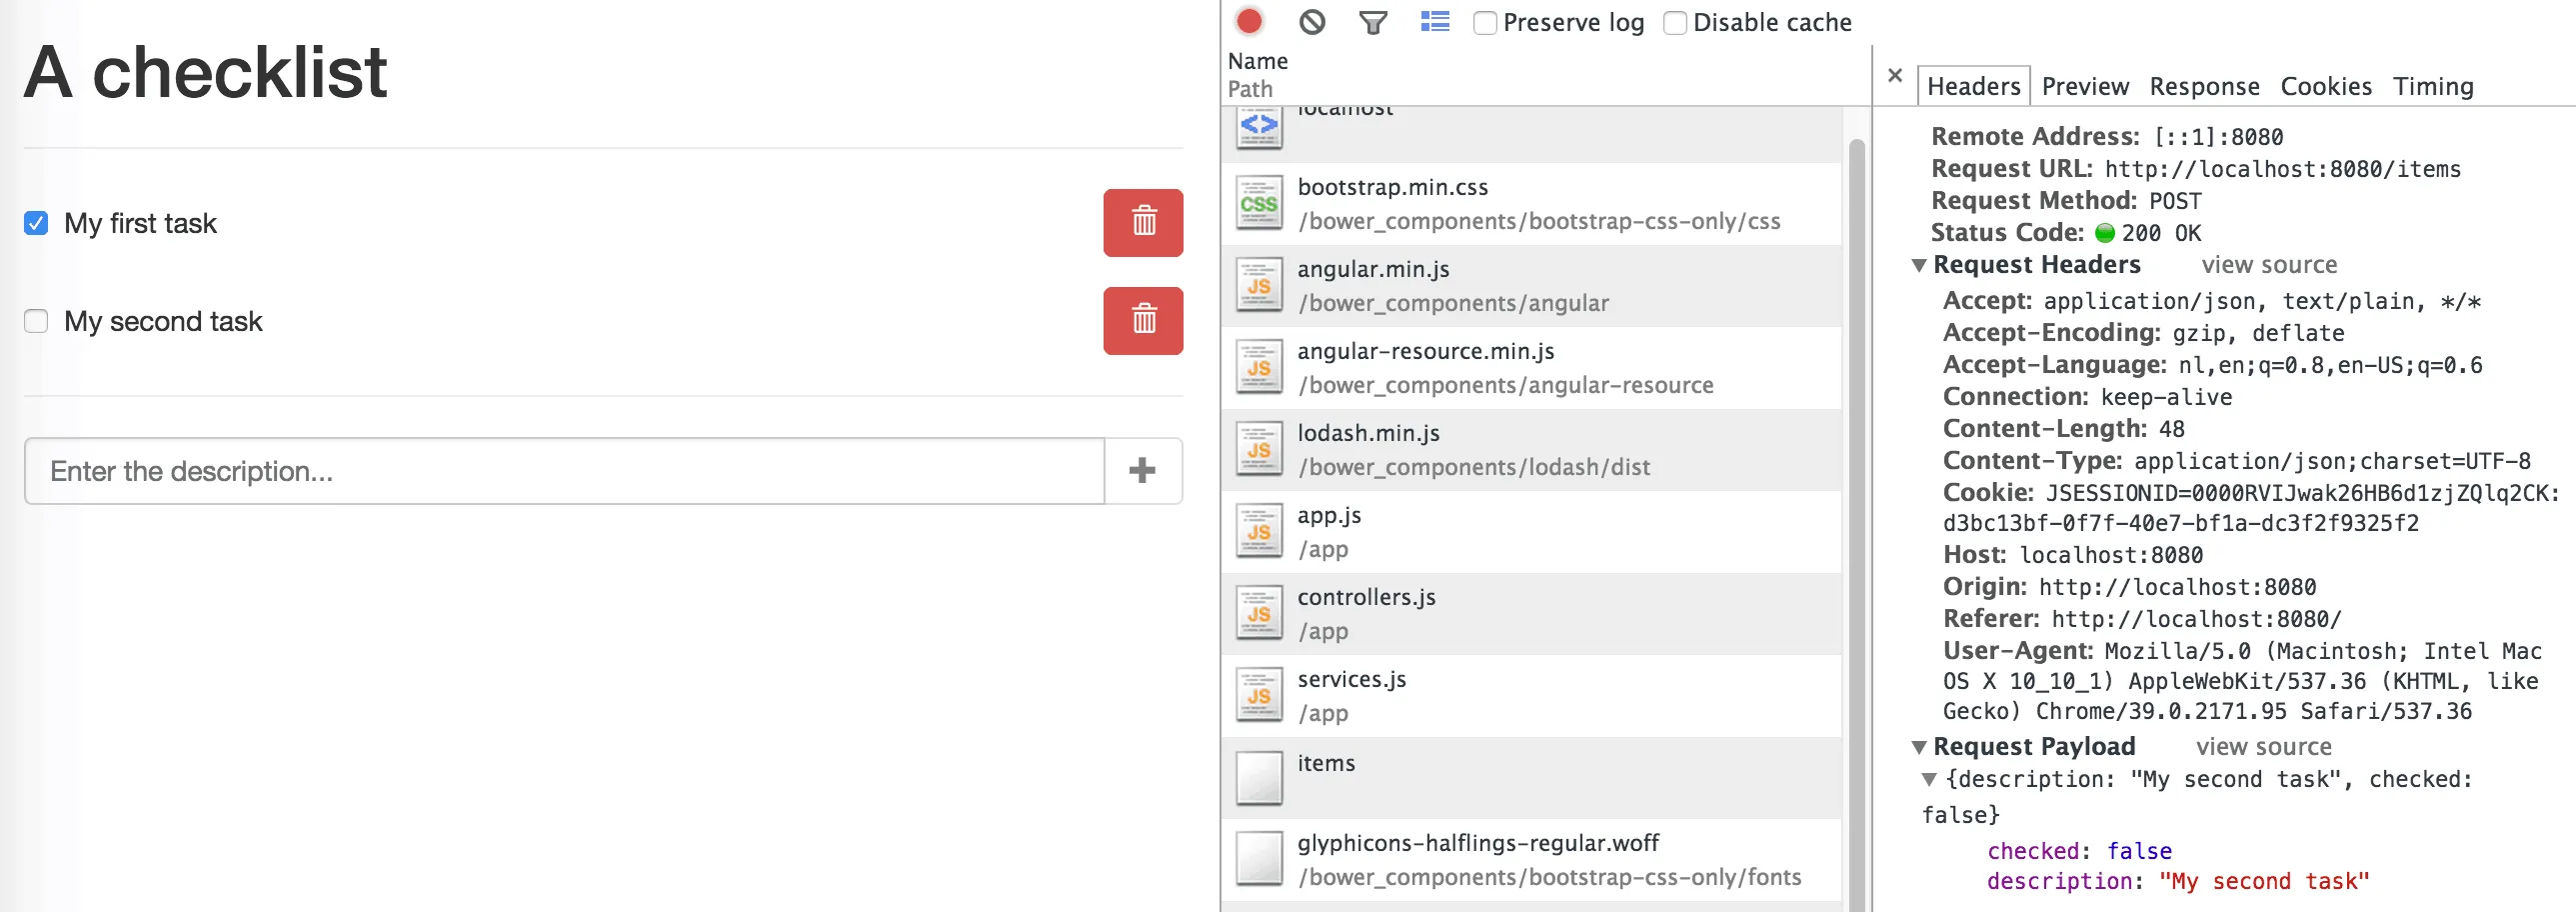
You can also add new items. This will execute the same POST request we used earlier in this tutorial.
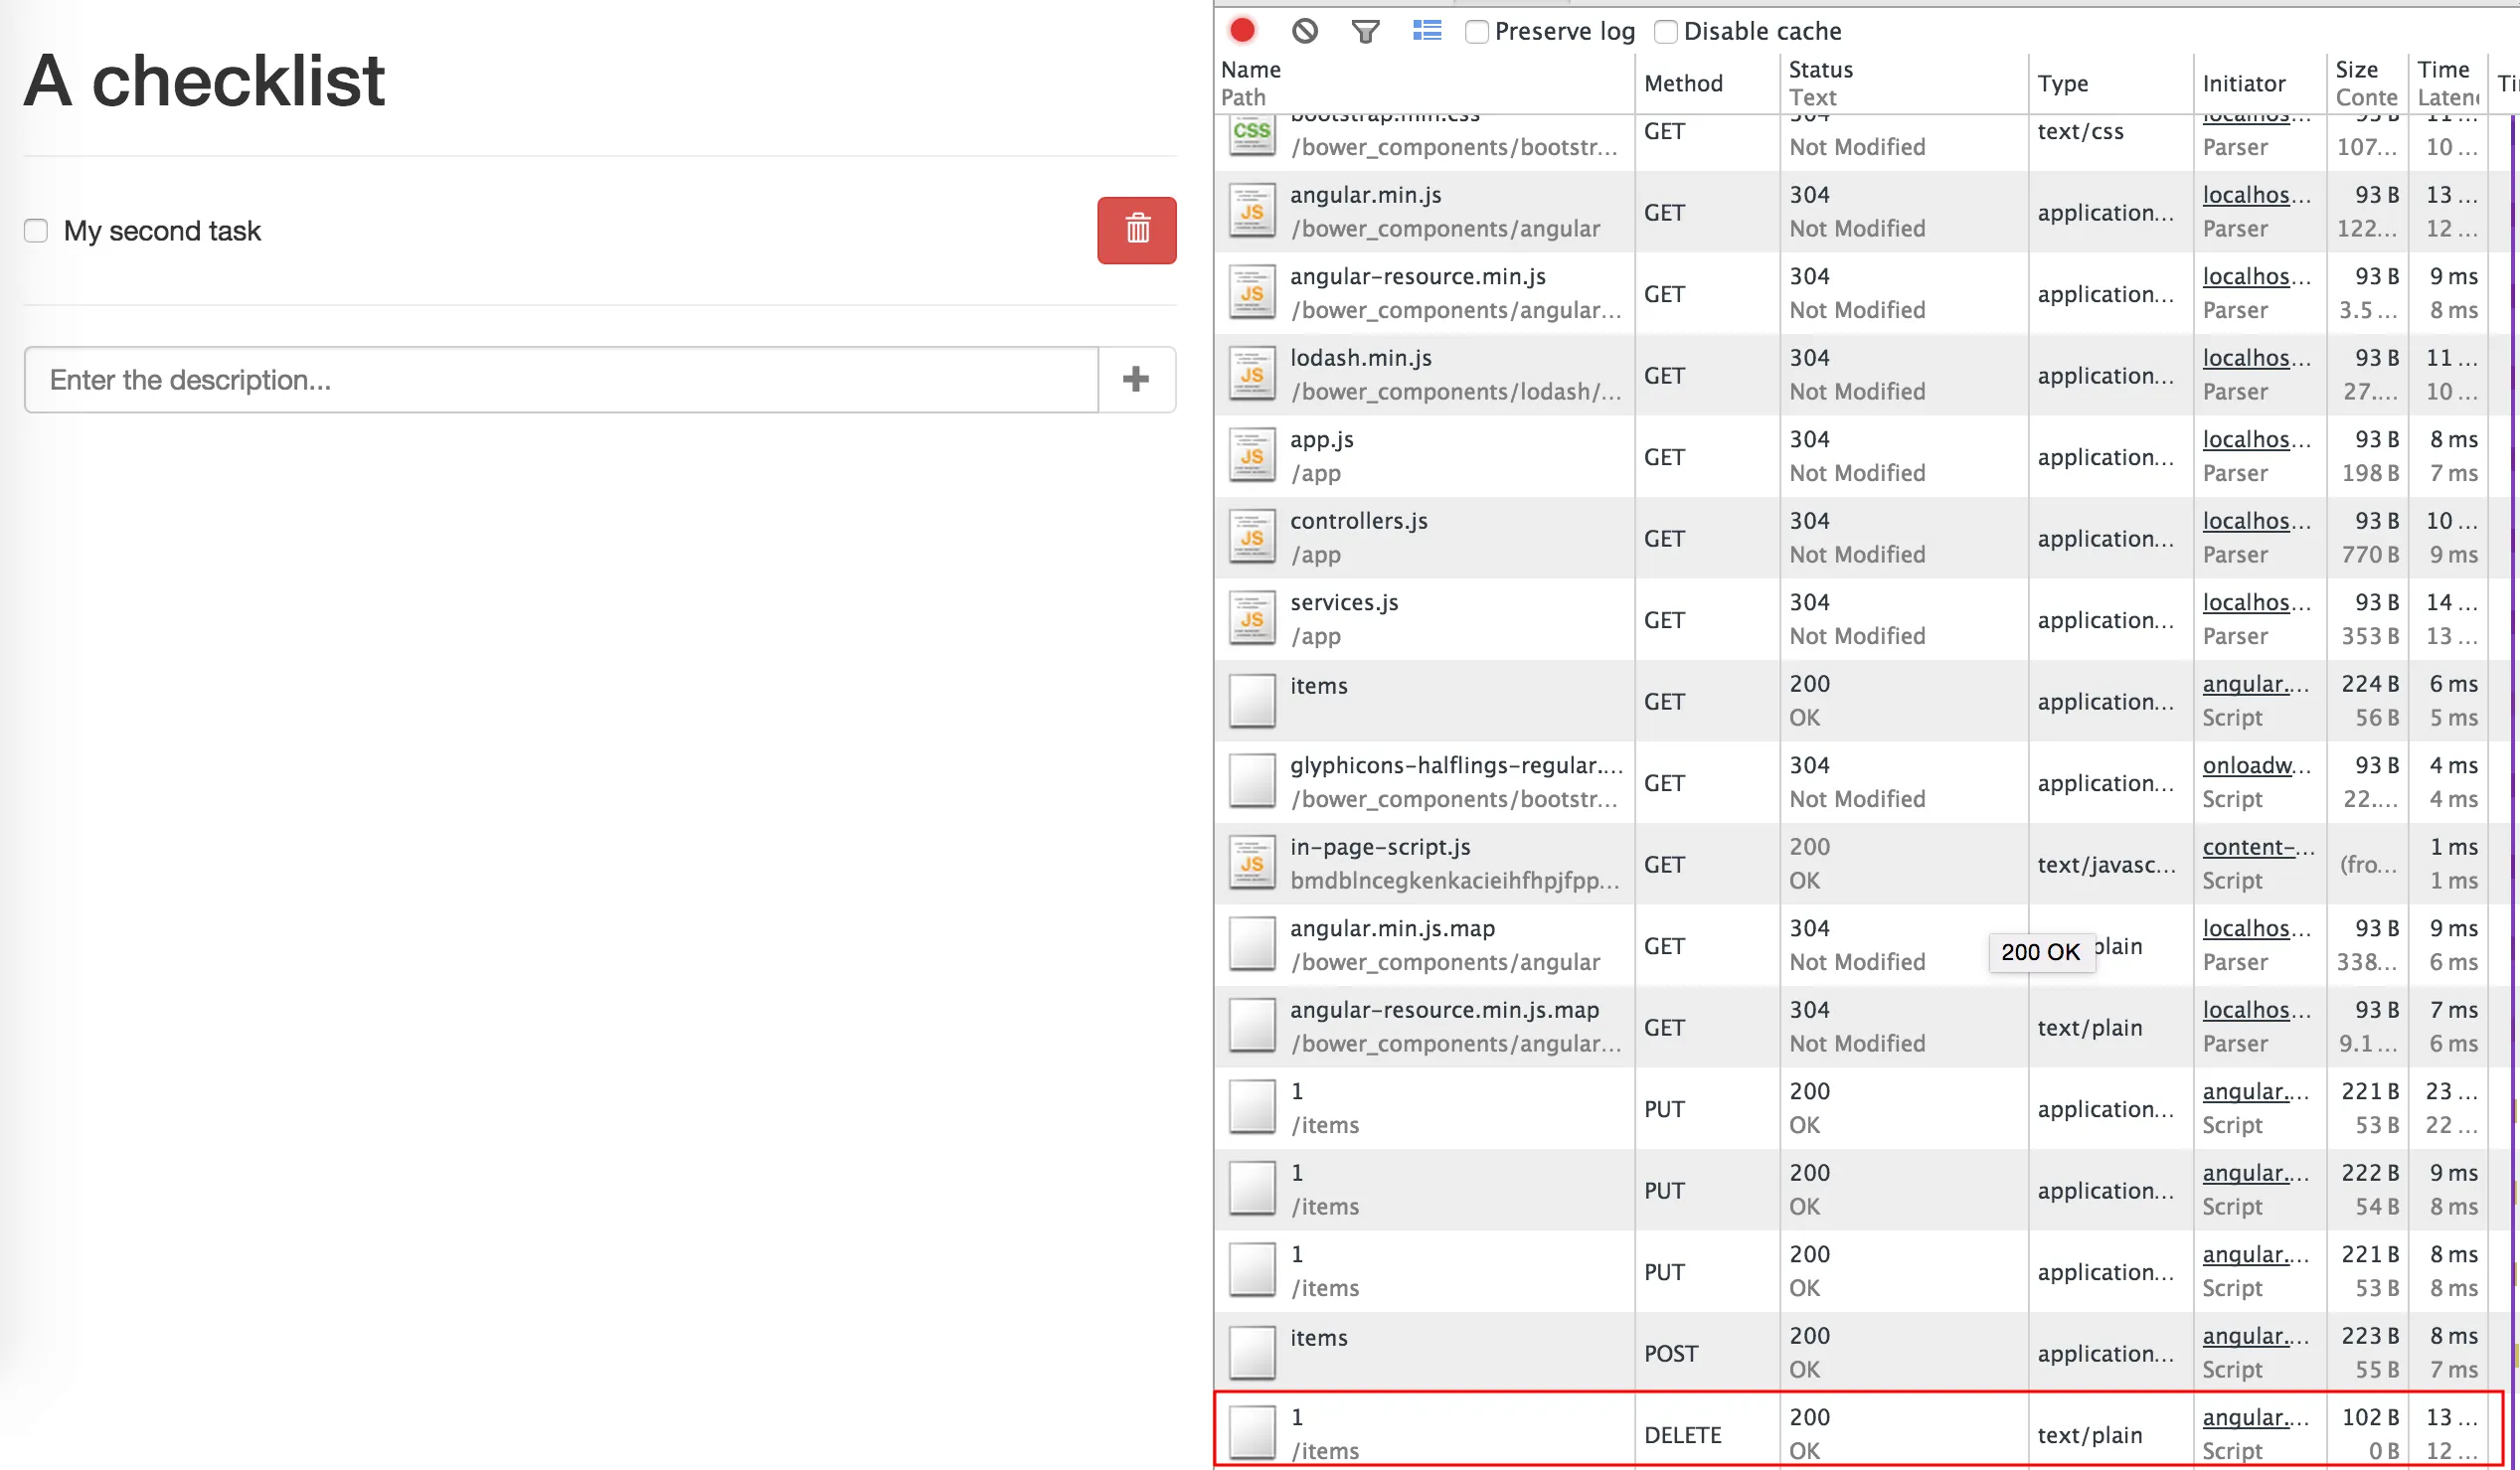
And finally, after removing the item, a DELETE request will be sent to our REST service.
Achievement: Rapid prototyping with Spring Boot and AngularJS
Seeing this means you managed to read through the entire tutorial about rapid prototyping using Spring Boot and AngularJS. If you’re interested in the full code example, you can find it on GitHub. If you want to try out the code yourself, you can download an archive from GitHub.