
Executing Jasmine tests with Maven
- February 7th, 2015
- 6 minute read
- AngularJS Jasmine JavaScript Maven Testing
A while ago I wrote my very first Spring Boot application and I showed you how fast it could be using Spring Boot and AngularJS. I also thought about testing all sides of the application, so I started with writing some integration tests for my REST API, then I wrote some unit tests using Mockito and JUnit, and now it’s time to write some unit tests for my JavaScript code.
Setting up the tests
One of the most popular testing frameworks for JavaScript is Jasmine. It has been integrated in a lot of testing platforms like Karma, but there is also a Maven plugin for running Jasmine tests as well. I’m not going into too much detail, but if you’re interested in how to use Jasmine together with AngularJS, I recommend you to read one of my earlier tutorials about testing your AngularJS application with Jasmine.
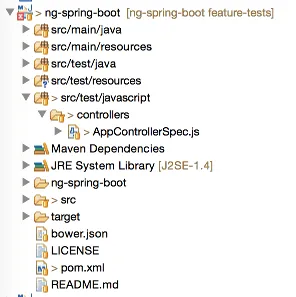
The setup is quite similar in this example, except that we’re in a Java-project. First of all, create a folder called src/test/javascript. This will be the root folder of all our specs. Inside this folder, create a folder called controllers with our testfile inside, called AppControllerSpec.js.
To write a Jasmine test, you first start with declaring what you’re going to test, for example:
describe('The application controller', function() {
  // ...
});
Then we can start creating some variables containing our controller scope, mocks and test data:
var $scope, factory, saveCallback, queryCallback;

var ITEM1 = {
  id: 1,
  description: 'My first item',
  checked: false,
  $remove: function(callback) {
    callback();
  }
}, ITEM2 = {
  id: 2,
  description: 'My second item',
  checked: true,
  $remove: function(callback) {
    callback();
  }
}, DESCRIPTION = "A description";
The final preparation before writing tests is to setup AngularJS using the mocking framework of AngularJS:
beforeEach(module('myApp.controllers'));
beforeEach(inject(function($controller, $rootScope) {
  factory = function() { };
  factory.prototype.$save = function(cb) {
    saveCallback = cb;
  };
  factory.query = function(cb) {
    queryCallback = cb;
  };

  $scope = $rootScope.$new();
  $controller('AppController', {
    '$scope': $scope,
    'Item': factory
  });
}));
This will set up our resource factory as a mock, and inject it inside the controller.
Writing some Jasmine tests
Now we have injected a mock inside the controller, and we prepared everything so we can test the controller using the $scope variable.
An example test would be:
it('should clear the textfield when adding a new item', function() {
  // When the new description is entered inside the textbox
  $scope.newItem = DESCRIPTION;
  $scope.addItem(DESCRIPTION);

  expect($scope.newItem).toBe("");
});
What happens here is that we verify that if we add an item to the list, we can clear the model used for filling the textfield.
The other tests are quite similar, sometimes we have to mock some action (for example querying the resource should return items), but it’s not too hard:
it('should have correct items', function() {
  // When item1 and item2 are returned from service
  queryCallback([ITEM1, ITEM2]);

  expect($scope.items).toContain(ITEM1);
  expect($scope.items).toContain(ITEM2);
  expect($scope.items.length).toBe(2);
});

it('should save the item when adding a new item', function() {
  // When saving an item returns the persisted result
  $scope.items = [];
  $scope.addItem(DESCRIPTION);
  saveCallback(ITEM1);

  expect($scope.items).toContain(ITEM1);
  expect($scope.items.length).toBe(1);
});

it('should remove the item from the list when it's deleted', function() {
  // When there are two items and ITEM1 is removed
  $scope.items = [ITEM1, ITEM2];
  $scope.deleteItem(ITEM1);

  expect($scope.items.length).toBe(1);
  expect($scope.items).toContain(ITEM2);
  expect($scope.items).not.toContain(ITEM1);
});
We can also use Jasmine to verify that specific methods have been called on a mock, for example:
it('should update the item when changing it', function() {
  // When an item is changed
  var changedItem = jasmine.createSpyObj('Item', ['$update']);
  $scope.updateItem(changedItem);

  expect(changedItem.$update).toHaveBeenCalled();
});
So, first we setup the item to have a $update() function, which is made available as a spy by Jasmine. Later on, we can verify if that function has been called by using the toHaveBeenCalled() function.
Configuring Maven
To configure Maven, we will be using two additional plugins, first of all we need a plugin to run our Jasmine tests. However, Jasmine requires you to run your tests on a platform supporting JavaScript. This could either be your web browser, or a platform like PhantomJS. I’m going for the second option, but that means we also have to setup PhantomJS, and that’s why I’m going to need another plugin.
But before we start, I’m also going to add some additional properties for enabling/disabling the Jasmine tests (and PhantomJS), so that we don’t have to run them each time. The other property will be useful for the Jasmine configuration. We will often have to refer to our libraries, so it’s a lot easier if we can store the path to the libraries (Bower components folder) into a property:
<js-tests.skip>false</js-tests.skip>
<bower-components>${basedir}/src/main/resources/static/bower_components</bower-components>
Now the configuration of the PhantomJS plugin:
<plugin>
  <groupId>com.github.klieber</groupId>
  <artifactId>phantomjs-maven-plugin</artifactId>
  <version>0.4</version>
  <executions>
    <execution>
      <goals>
        <goal>install</goal>
      </goals>
    </execution>
  </executions>
  <configuration>
    <version>1.9.8</version>
    <skip>${js-tests.skip}</skip>
  </configuration>
</plugin>
The setup is quite simple, just look at the examples at the plugin website.
Now, the next plugin is the Jasmine plugin. The configuration of this plugin is a bit more complex, because we have to configure all sources, PhantomJS and testing files:
<plugin>
  <groupId>com.github.searls</groupId>
  <artifactId>jasmine-maven-plugin</artifactId>
  <version>1.3.1.5</version>
  <executions>
    <execution>
      <goals>
        <goal>test</goal>
      </goals>
    </execution>
  </executions>
  <configuration>
    <skipJasmineTests>${js-tests.skip}</skipJasmineTests>
    <webDriverClassName>org.openqa.selenium.phantomjs.PhantomJSDriver</webDriverClassName>
    <webDriverCapabilities>
      <capability>
        <name>phantomjs.binary.path</name>
        <value>${phantomjs.binary}</value>
      </capability>
    </webDriverCapabilities>
    <jsSrcDir>${basedir}/src/main/resources/static/app</jsSrcDir>
    <jsTestSrcDir>${basedir}/src/test/javascript</jsTestSrcDir>
    <preloadSources>
      <source>${bower-components}/angular/angular.js</source>
      <source>${bower-components}/angular-resource/angular-resource.js</source>
      <source>${bower-components}/angular-mocks/angular-mocks.js</source>
      <source>${basedir}/src/main/resources/static/app/app.js</source>
    </preloadSources>
  </configuration>
</plugin>
So, as you can see, the configuration of this plugin is a bit more complex. First of all we tell it which webdriver we’re going to use (which will be PhantomJS). The PhantomJS plugin will set a property called ${phantomjs.binary}, so we can reference it in this plugin. Then we tell it where our source files and test source files are and finally we also have to tell it where our additional source files are. These are mainly our libraries and test-libraries, but we will also add app.js to this list, so that the application itself is always bootstrapped for our tests.
Testing it out
Testing it out is quite simple, the next time you build using Maven, you will see that the Jasmine tests will be executed as well. So, when executing the following command:
mvn clean install
You should see something like this:
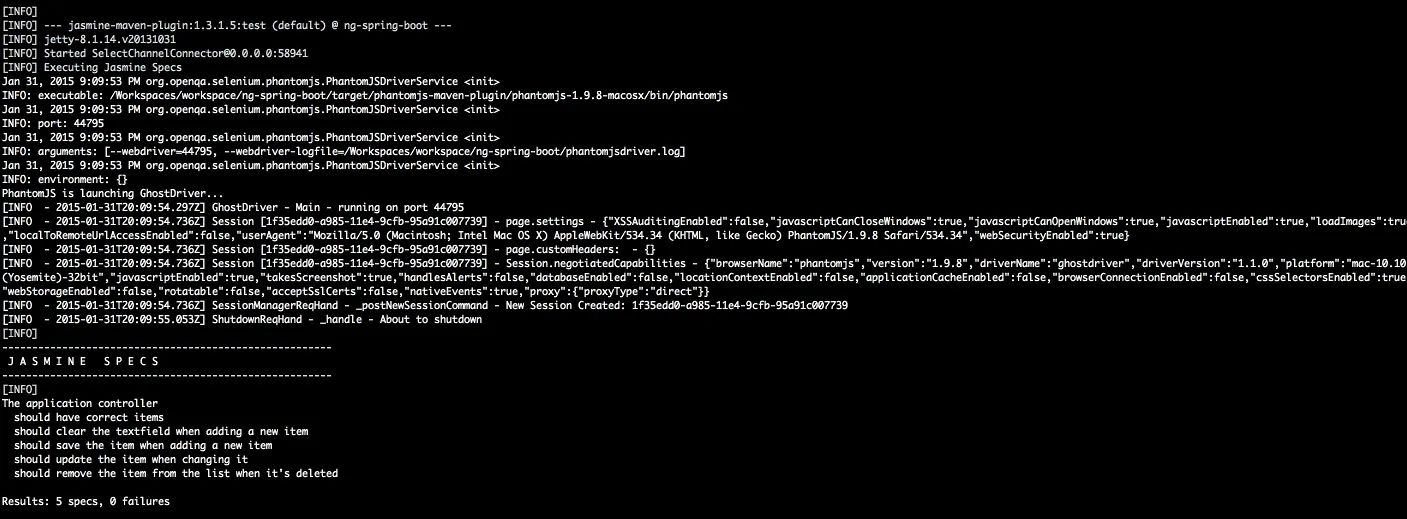
You can also run the Jasmine test runner, by using the following command:
mvn jasmine:bdd
After executing the command, you can go to http://localhost:8234 which will launc the Jasmine Spec Runner.

Achievement: Wrote Jasmine tests and used Maven to execute them
Seeing this means you read this short tutorial about unit testing your JavaScript code in a Java/Maven environment. If you’re interested in the full code example, you can find it on GitHub. If you want to try out the code yourself, you can download an archive from GitHub.