
Exploring contract first options with Swagger
- September 27th, 2016
- 8 minute read
- REST Spring Spring boot Swagger
In my latest tutorial I documented a simple REST API with Swagger and Springfox. While this approach certainly showed how valuable documenting your REST API can be, we aren’t really “done” yet. In the great world of SOA we know something like “contract first development”, in which we initially describe the web service (using WSDL) and later on implement the service based on that definition. In this article I will explore the options we have with Swagger.
Writing the Swagger definition
We already wrote our REST API, but let’s summarize which operations we would like in our task API:
- Retrieving a list of tasks
- Creating a task
- Updating a task
- Deleting a task
All these operations have one thing in common, they’re all about “a task”. Now, within the Swagger definition there is also room to describe your model, in this case “a task”. Our task will have three properties:
- An identifier or ID
- A description
- An indication if the task was completed or not
So now, let’s create our Swagger definition! Swagger actually has a very nice online editor that allows you to validate and preview your definition on the fly.
General info
A Swagger definition consist out of a few sections, some general info, the paths, the parameters and the definitions (= models). Let’s start of by adding the general info for our REST API:
swagger: '2.0'

################################################################################
#                              API Information                                 #
################################################################################
info:
  version: v1
  title: Simple task API
  description: API for managing user tasks

################################################################################
#                  Host, Base Path, Schemes and Content Types                  #
################################################################################
host: localhost
schemes:
  - http
basePath: /
consumes:
  - application/json
produces:
  - application/json
The Swagger definition file tends to be long, so I try to make every section as visible as possible, in this case by using some comment header sections. As you can see here, we have defined the general information about our REST API, like the title, description, what language it consumes/produces, … . As you can see, this file is quite easy to read, which is one of the goals of the Swagger definition, being readable by both humans and systems.
Paths
The next part is the part where you describe each path and the operations behind it. For our case, we have two paths:
- The collection path (used for finding all tasks and creating a new task)
- The detail path (used for updating or deleting a single task, referenced by its identifier)
The YAML definition for this is the following:
################################################################################
#                                           Paths                              #
################################################################################
paths:
  /api/tasks:
    get:
      description: Retrieving the collection of user tasks
      produces:
        - application/json
      responses:
        "200":
          description: Success
          schema:
            type: array
            items:
              $ref: '#/definitions/Task'
    post:
      description: Creating a new user task
      consumes:
        - application/json
      produces:
        - application/json
      parameters:
        - $ref: '#/parameters/task'
      responses:
        "200":
          description: Success
          schema:
            $ref: '#/definitions/Task'
        "400":
          description: Bad request
          schema:
            $ref: '#/definitions/Message'
  /api/tasks/{id}:
    put:
      description: Updating an existing user task
      parameters:
        - $ref: '#/parameters/id'
        - $ref: '#/parameters/task'
      consumes:
        - application/json
      produces:
        - application/json
      responses:
        "200":
          description: Success
          schema:
            $ref: '#/definitions/Task'
        "400":
          description: Bad request
          schema:
            $ref: '#/definitions/Message'
        "404":
          description: Task not found
          schema:
            $ref: '#/definitions/Message'
    delete:
      description: Deleting an existing user task
      parameters:
        - $ref: '#/parameters/id'
      produces:
        - application/json
      responses:
        "204":
          description: Success
        "404":
          description: Task not found
          schema:
            $ref: '#/definitions/Message'
As you can see here, we have two paths, and for each path we described the operations. In the operation we describe it, the parameters, what is consumes and produces and what the responses are. As you can see for the parameters and the responses, we use the $ref property. This means we are referencing a parameter (#/parameters/...) or a definition (#/definitions/...), which we’ll define later. You don’t have to do it this way though, you can also define your model or your parameter inline, but since it tends to grow pretty quickly, it’s far easier to read when you separate the parameters and the definitions from the paths. For the get operation you can see that I did a part of the schema inline:
schema:
  type: array
  items:
    $ref: '#/definitions/Task'
Since we’re returning a collection of tasks here, I made the array part inline, while using a reference to the task definition.
Parameters
if you look at the paths, you see that we use two parameters called #/parameters/id and #/parameters/task. This means you have to create two parameters, like this:
################################################################################
#                                   Parameters                                 #
################################################################################
parameters:
  id:
    name: id
    in: path
    description: ID of the task you want to update or delete
    type: integer
    format: int64
    required: true
  task:
    name: task
    in: body
    description: Representation of the task you want to create or update
    required: true
    schema:
      $ref: '#/definitions/Task'
The ID parameter is the easiest one. It is a simple path parameter that only allows numeric values (integer in Swagger). You can also define the format (int32, int64, …) where int64 matches a Long in Java (64 bit). The name of the parameter (id) has to match the name of the placeholder in the path. So, since we used /api/tasks/{id}, you have to create a path parameter called id.
Since the input task body is the same as the task definition, we’re referencing to the definition itself within our parameter, by using the $ref again.
Definitions
The definitions or models section is the last one we have to provide, in here, you define the models and their properties. In our case we have a task (#/definitions/Task) and a message for error purposes (#/definitions/Message):
################################################################################
#                                 Definitions                                  #
################################################################################
definitions:
  Task:
    description: A user task
    properties:
      id:
        type: integer
        format: int64
        description: The unique identifier of the given task
      description:
        description: Description of the task
        type: string
      completed:
        type: boolean
        description: Indication if the task was completed or not
  Message:
    description: A message containing more info why the operation failed
    properties:
      message:
        type: string
        description: The message itself
As you can see, we defined three properties for the task, an ID, a description and the completed status. For the message definition we added a single property called message. The reason I didn’t chose to use a string is because now it’s easily extendible with other properties like an error code, … .
Swagger code generation
Now that we have our Swagger definition, it’s time to look at the possibilities we have to write code based on our definition. The first thing I’m going to look at is code generation. Swagger has its own code generation tool called swagger-codegen. It supports several languages and frameworks, including Spring MVC and they’re working on code generation for Spring boot.
However, the downside about the code generation is that if you generate your application skeleton with the tool, and you would update/change your Swagger definition and you would have to regenerate the application skeleton,then you will lose all the changes you made, for example, if you make the controller call a service (like we did with TaskServiceImpl) you would lose that part.
Anyhow, code generation can be done by building the codegen library by yourself or by downloading an existing JAR (for example from the Maven repository). Then you have to execute the following command:
java -jar swagger-codegen-cli.jar generate \
  -i swagger.yml \
  -l spring-mvc \
  -o project-name
Using an assertion library
Another possibility is to write the annotations by yourself like I did in my previous article. However, by using an assertion library like assertj-swagger you can make it so that it compares the generated Swagger definition to the Swagger definition we just defined. So, I’m going to add the library as a dependency to my project:
<dependency>
    <groupId>io.github.robwin</groupId>
    <artifactId>assertj-swagger</artifactId>
    <version>0.4.0</version>
</dependency>
And I also created a file called swagger.yml inside src/main/resources containing the Swagger definition we just made. After that I opened the default test that is created by the Spring initializr and edited it like this:
@RunWith(SpringJUnit4ClassRunner.class)
@SpringApplicationConfiguration(classes = SpringBootSwaggerApplication.class)
@WebAppConfiguration
@IntegrationTest("server.port:0")
public class SpringBootSwaggerApplicationTests {

}
This is going to be an integration test that runs the application with Springfox/Swagger and compares the version that Springfox provides to the one on the classpath (our self-made definition). So first of all, we need to know where the Swagger definition is located, which I’m going to set as a field in our test using the @Value annotation:
@Value("http://localhost:${local.server.port}/v2/api-docs?group=task-api")
private String swaggerApi;
After that I wrote a single test:
@Test
public void apiMatchesDefinition() throws IOException {
SwaggerAssertions.assertThat(swaggerApi).isEqualTo(new ClassPathResource("swagger.yml").getFile().getPath());
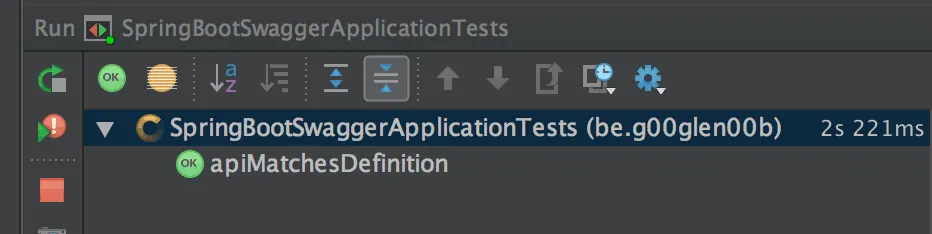
}If you run this test, it will launch the application, compare the Swagger definitions and that’s it. Normally, this test should already succeed:
However, if we change the code a bit, for example by adding another property to TaskDTO, you’ll see that the test fails:
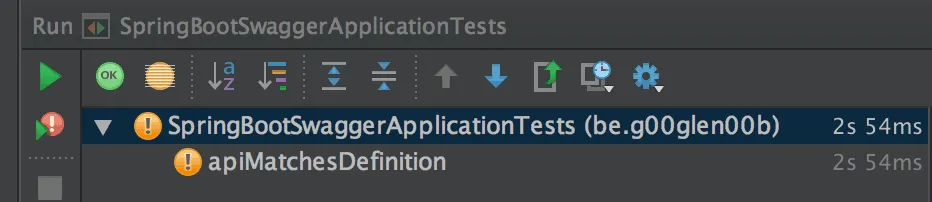
It should throw the following error:
org.assertj.core.api.SoftAssertionError:
The following assertion failed:
1) [Checking properties of definition 'Task']
Expecting:
  <["completed", "description", "id", "test"]>
to contain only:
  <["description", "id", "completed"]>
elements not found:
  <[]>
and elements not expected:
  <["test"]>
As you can see, this test allows us to quickly verify if our implementation (using Swagger + Springfox) matches our definition (Swagger + AssertJ). This allows you to work to in a more test driven approach as well. When you need to change or create a new endpoint, you can simply update the Swagger YAML configuration file, and when you run your test, it should fail. After properly implementing your endpoint, your test should succeed.
Achievement: Explored contract first options with Swagger
If you’re seeing this, then it means you successfully managed to make it through this tutorial. If you’re interested in the full code example, you can find it on GitHub.