
In my previous tutorial I mentioned how to write unit tests for Meteor using Jasmine and Sinon.js on the Velocity platform.
In this tutorial I will write some end to end (E2E) tests for the same application, but with some different frameworks. I will still be using Velocity, but as I mentioned in my previous article, Velocity allow you to integrate more than one testing framework for testing your Meteor application and one of them is Cucumber.
Cucumber and Gherkin
First it may be a bit confusing, because Cucumber isn’t a testing framework at all. Cucumber is actually a way to collaborate on software using a markup language, which is called Gherkin. Cucumber itself is a framework written in various languages to handle these Gherkin documents.
Now you may ask, why? Well, when someone asks you to write a specific application, there’s often a gap between the business side and the IT guys, simply because they do not speak the same language. The same gap exists when you’re going to write E2E tests, who knows what a specific feature should do? The developer? No, the only problem is that the people that know how a feature should work, are not the guys who end up writing these tests, all they can provide you with is a detailed description of all features, and that’s what Cucumber allows you to do.
With Cucumber, anyone capable of reading/writing human language (English or any other supported language) can write a feature, and Cucumber allows developers to write code depending on this description. I know this sounds vague now, but I hope it will become more clear when I start writing these tests.
Anyways, Cucumber is not a testing framework, you still have to implement the code by yourself, meaning that you may need additional frameworks. In this case I’m going to use WebdriverIO, which is a Selenium based framework for Node.js and Chai, a fluent BDD/TDD assertion library.

The combination of Cucumber, WebdriverIO and Chai is what Velocity offers when you choose for “Cucumber”. They also separated this part from Velocity and called it Chimp.
Setting up project
Before we can start writing tests, we’ll have to add some folders and packages. First of all, add the Cucumber package by using the following command:
meteor add xolvio:cucumber
Then we’ll also have to add some folders. Our feature files (the English description of the features) will be placed in the tests/cucumber/features folder. The programmatic definition of these features will be put in a subfolder, called tests/cucumber/features/step_definitions and finally, to add some fixtures we’re also going to create a folder called tests/cucumber/fixtures.
Fixtures
For our E2E tests it would be interesting to be able to insert some test data from outside the application. To do that, we’ll have to add some additional code to our Meteor application, but rather than putting it in the production code, we’re going to write a fixture, which Velocity will insert into a mirror of the application, used only for testing.
Our application involves only a few things, inserting messages and having the capability to log in with a specific user, so I’m going to create a fixture file called testData.fixture.js and this will be the content:
Meteor.methods({
  "testData": function(messages) {
    messages.forEach(function(data) {
      Messages.insert({
        message: data['Message'],
        username: data['Username'],
        owner: data['User ID'],
        time: moment(data['Time'], "HH:mm:ss").toDate()
      })
    });
  },
  "reset": function() {
    Messages.remove({});
  },
  "testUser": function(user, password) {
    try {
      Accounts.createUser({
        username: user,
        password: password,
        email: 'noop@example.org'
      });
    } catch (err) {
      if (err.reason !== 'Username already exists.') {
        throw err;
      }
    }
  }
});
By using Meteor.methods() this function will be available on the client as well, so we can use WebdriverIO to call these methods to insert specific data. I created three functions, one to insert testdata, one to remove all testdata and one to create a test user. I’ve added a try/catch block around it, because I do not want it to fail if the user already exists (due to another test).
Writing our first feature
After preparing the application to be tested it’s time to finally write our first feature. Create a file called messages.feature within the features folder.
A feature usually starts of by describing what it does, so the first line of the file should be:
Feature: As an anonymous user I can see the posted messages
The “as … I can …” syntax is pretty common in BDD, because we’re describing the feature/behaviour pretty well using these kind of sentences.
A feature can contain one, but usually more scenarios, so let’s write a simple scenario:
@dev
Scenario: The persisted messages are displayed
  Given there are the following messages:
    | Message     | Username | Time     | User ID |
    | Hi everyone | Person1  | 08:00:00 | 1       |
    | Hi          | Person2  | 07:00:00 | 2       |
  When I visit the application
  Then I should see 2 messages
A scenario in Cucumber/Gherkin always starts of in the same manner, first we describe the scenario, then we have the BDD Given … When … Then … syntax. The Given state should usually contain some preconditions, in this case we have 2 existing messages. The When state describes the action(s) the user will take and the Then state describes what the result should be.
We also annotated the scenario using the @dev annotation. This annotation makes clear that the scenario should be executed when we’re in development mode (running the application using meteor).
So in this case we have three statements to implement, so let’s start by creating a file called messages.steps.js inside the step_definitions folder.
The first thing to do is to have the file export everything as a module:
module.exports = function() {
  // Your step definitions will come here
};
Then we can start writing our first step, in this case “Given there are the following mesages”. The syntax below this line, looking like a table is a feature of Cucumber called data tables. They allow us to pass a table of data to the steps themself, for example:
this.Given(/^there are the following messages:$/, function(messages, callback) {
  // Step implementation
});
As you can see here, we have converted the English text of the feature file to a regular expression, then additionally we have a callback function containing two parameters, messages and callback. The messages parameters contains a JavaScript representation of the data table (containing the messages), while the callback is something specific to the JavaScript implementation of Cucumber.
Since JavaScript is usually quite asynchronous, you should tell Cucumber that a specific step is finished, to do that, you call the callback() function.
Now, the implemention of this function is quite simple, we created a fixture that can insert the messages, so that’s actually all we have to do:
this.Given(/^there are the following messages:$/, function(messages, callback) {
  this.server.call('testData', messages.hashes(), callback);
});
In this case we’re directly calling the testData Meteor method, providing two additional parameters, the first one is an array of messages and the second one is the callback. Meteor always uses the last argument as a callback function, so the function will be executed as soon as the call has been executed on our Meteor application and the messages have been inserted.
The next step in the scenario is the “When I visit the application” step. Since this step is not related to the messages themself, but to the application, I’m going to create a new step definition file called application.steps.js and similar to before, we start by this:
module.exports = function() {
 // Step implementations
};
Our step implementation will be quite easy again:
this.When(/^I visit the application$/, function(callback) {
  this.client.url(process.env.ROOT_URL).call(callback);
});
This will open a specific URL, namely the ROOT_URL which has been added to the environment variables and after opening that URL we will call the callback to tell Cucumber to proceed to the next step.
Our final step is the “Then I should see 2 messages”. So let’s go back to the messages.steps.js file and add our step:
this.Then(/^I should see (\d+) messages$/, function(nrStr, callback) {
  // Implementation
});
As you can see, we used a wildcard regular expression for the number, so that we can reuse this step definition for other tests (that may need to see 3, 4 or 100 messages in stead of 2).
For the implementation we will rely on WebdriverIO:
this.Then(/^I should see (\d+) messages$/, function(nrStr, callback) {
  var nr = parseInt(nrStr);
  this.client
    .waitForVisible('.container .message')
      .elements('.container .message')
      .then(function(res) { return res.value.length; })
    .should.become(nr)
      .and.notify(callback);
});
So, what happens here? First of all we parse the amount of messages from a string to a number, then we tell the client to wait for a DOM element that matches the .container .message selector to become visible. The reason for this is that Meteor asynchronously populates the DOM with the data from the collections, so we have to wait for the data to be loaded.
Then we retrieve all elements matching the .container .message selector using the elements() function and we return the length of it (return res.value.length). The value of this should be equal to the amount of messages, and thus 2.
After the assertion we should notify Cucumber to continue with the steps, or in this case finish the scenario and start with the next one.
Testing the messages template
Unfortunately, this one scenario does not cover the entire behaviour of the messages template. We also have to check whether or not the time, message and username are displayed and the order of the messages.
To do that, I wrote the following scenarios:
@dev
Scenario: The messages are ordered by time
  Given there are the following messages:
    | Message     | Username | Time     | User ID |
    | Hi everyone | Person1  | 08:00:00 | 1       |
    | Hi          | Person2  | 07:00:00 | 2       |
  When I visit the application
  Then message 1 should be "Hi everyone"
    And message 2 should be "Hi"

@dev
Scenario: The messages contain the author
  Given there are the following messages:
    | Message     | Username | Time     | User ID |
    | Hi everyone | Person1  | 08:00:00 | 1       |
    | Hi          | Person2  | 07:00:00 | 2       |
  When I visit the application
  Then the author of message 1 should be "Person1"
    And the author of message 2 should be "Person2"

@dev
Scenario: The messages have a timestamp
  Given there are the following messages:
    | Message     | Username | Time     | User ID |
    | Hi everyone | Person1  | 08:00:00 | 1       |
    | Hi          | Person2  | 07:00:00 | 2       |
  When I visit the application
  Then the timestamp of message 1 should be "08:00:00"
    And the timestamp of message 2 should be "07:00:00"
As you can see I’m reusing some of the steps we already implemented, and we’re also using a new keyword, called And. This keyword means that we have an additional step for Given/When/Then depending on where we put it, for example, if we say Then ... And ..., then it means we have an additional Then step.
So let’s start by implementing the first missing step, called “Then message 1 should be “Hi everyone"":
this.Then(/^message (\d+) should be \"(.+)\"$/, function(nr, value, callback) {
  this.client
    .waitForVisible('.container .message')
      .element('.container .message:nth-child(' + nr + ')')
      .getText('p > span:nth-child(2)')
    .should.become(value)
      .and.notify(callback);
});
We can retrieve two parameters from this step, the nr of the message (in this case 1) and the message itself (“Hi everyone”). So we used some other wildcards inside the regular expression this time. The implementation of it is quite similar to what we’ve seen before. We’re first waiting again for the messages to be loaded using waitForVisible(), then we retrieve the nth message, using nr as a parameter. Finally we retrieve the text of the element that contains the message itself (p > span:nth-child(2)) and verify if it is equal to the value that was provided in the step itself.
The .should.become() syntax is part of the Chai library, to be more precise, the Chai as Promised library.
The implementation of the other steps are quite similar:
this.Then(/^the author of message (\d+) should be \"(.+)\"$/, function(nr, value, callback) {
  this.client
    .waitForVisible('.container .message')
      .element('.container .message:nth-child(' + nr + ')')
      .getText('p > .author')
    .should.become(value)
      .and.notify(callback);
});

this.Then(/^the timestamp of message (\d+) should be \"(.+)\"$/, function(nr, value, callback) {
  this.client
    .waitForVisible('.container .message')
      .element('.container .message:nth-child(' + nr + ')')
      .getText('time')
    .should.become(value)
      .and.notify(callback);
});
Remember that we also made a reset Meteor method in the fixture we defined earlier? It would be easy if we could automatically execute it after each scenario. Cucumber allows us to do that using this.After():
this.After(function(callback) {
  this.server.call('reset', callback);
});
Testing the newMessage template
For the new message template we’re also going to define some scenarios, but in a separate feature file, so let’s create a file called newMessage.feature. For this template there are a lot more scenarios that could be tested, for example:
Feature: As a user I can post new messages

@dev
Scenario: The new message form is not displayed for anonymous users
  Given there are the following messages:
    | Message     | Username | Time     | User ID |
    | Hi everyone | Person1  | 08:00:00 | 1       |
    | Hi          | Person2  | 07:00:00 | 2       |
  When I visit the application
  Then I should see 2 messages
    And I should not see the message form

@dev
Scenario: The new message form is displayed
  Given a user exists with the name "Person1"
  When I visit the application
    And I log in as "Person1"
  Then I should see the message form

@dev
Scenario: The new message form counter is displayed
  Given a user exists with the name "Person1"
  When I visit the application
    And I log in as "Person1"
  Then the message form counter should be 140

@dev
Scenario: The counter counts down when typing a new message
  Given a user exists with the name "Person1"
  When I visit the application
    And I log in as "Person1"
    And I enter a new message of 5 characters
  Then the message form counter should be 135

@dev
Scenario: The counter becomes red when the message is too long
  Given a user exists with the name "Person1"
  When I visit the application
    And I log in as "Person1"
    And I enter a new message of 141 characters
  Then the message form counter should be -1
    And the counter should be red

@dev
Scenario: The button is disabled if there is no new message
  Given a user exists with the name "Person1"
  When I visit the application
    And I log in as "Person1"
  Then the submit button should be disabled

@dev
Scenario: The button is enabled if there is a valid message
  Given a user exists with the name "Person1"
  When I visit the application
    And I log in as "Person1"
    And I enter a new message of 10 characters
  Then the submit button should be enabled

@dev
Scenario: The button is disabled if the message is too long
  Given a user exists with the name "Person1"
  When I visit the application
    And I log in as "Person1"
    And I enter a new message of 141 characters
  Then the submit button should be disabled

@dev
Scenario: A message is added to the list of messages
  Given a user exists with the name "Person1"
  When I visit the application
    And I log in as "Person1"
    And I enter a message "hello"
    And I submit the message
  Then I should see 1 messages

@dev
Scenario: The message field becomes empty after submitting
  Given a user exists with the name "Person1"
  When I visit the application
    And I log in as "Person1"
    And I enter a message "hello"
    And I submit the message
  Then the message form counter should be 140
    And the message field should be empty
There are quite some steps to implement as well, so let’s create a newMessage.steps.js file. The first unimplemented step we encounter is “And I should not see the message form”. The “And” keyword in this case means “Then”, so let’s create the step:
module.exports = function() {
  this.Then(/^I should not see the message form$/, function(callback) {
    this.client
      .waitForVisible('.container')
      .elements('form[name=message]')
      .then(function(res) { return res.value.length; })
    .should.eventually.equal(0)
      .and.notify(callback);
  });
};
Just like before we have to wrap all steps inside a function which we export as a Node.js module using module.exports.
Checking if an element exists using Selenium or WebdriverIO is usually quite easy, checking if an element does not exist is a lot harder, because it’s hard to guarantee that it will never pop up. So in this scenario we’ve made a precondition, namely that if there are messages and those messages are visible, but there is no form element, then we can conclude that the message form will never be visible. To implement that, we’re using the elements() again, but now we’re checking if the length equals zero.
To show the difference, this is the implementation of the opposite, checking if the form is visible:
this.Then(/^I should see the message form$/, function(callback) {
  this.client
    .waitForVisible('form[name=message]')
    .should.eventually.notify(callback);
});
But before we come to that, we also need to log in using Webdriver first (and create a user). Just like opening the application, these steps do not depend on a specific feature, but they’re global for the application, so let’s open application.steps.js again and add the following steps:
this.Given(/^a user exists with the name \"(.+)\"$/, function(name, callback) {
  this.server.call('testUser', name, DEFAULT_PASSWORD, callback);
});

this.When(/^I log in as \"(.+)\"$/, function(name, callback) {
  this.client
    .waitForVisible('.login-link-text')
      .click('.login-link-text')
    .waitForVisible('#login-dropdown-list')
      .setValue('#login-username', name)
      .setValue('#login-password', DEFAULT_PASSWORD)
      .click('#login-buttons-password')
    .waitForVisible('#login-name-link')
      .getText('#login-name-link')
    .should.eventually.contain(name)
      .and.notify(callback);
});
The first step is quite easy, we’re just calling a Meteor method again (a fixture we defined earlier) and are providing it with a username and password. I’m going to use a default password here, so add the following line to the start of this file:
var DEFAULT_PASSWORD = 'p4ssw0rd';
The second step is a bit more complex, first of all it’s waiting for the login link at the top right corner to become visible (.login-link-text). If it’s visible, it’s going to click on it and wait until the popup (#login-dropdown-list) is visible. Then it will fill in the username and password (#login-username and #login-password) and click on the login button (#login-buttons-password).
After that’s done, we have to wait until the user is logged in and the username is visible at the top right corner (#login-name-link). To have an additional check we could see if that element contains the provided username.
After each scenario the user should also log out, so we’re also going to add the following:
this.After(function(callback) {
  this.client.execute(function() {
    Meteor.logout();
  }).should.eventually.notify(callback);
});
Back to the newMessage.steps.js. With these steps implemented, the first two scenario’s will already be working. The other steps are actually not that special anymore, we’ve seen how to enter values in a form (with the log in step) and how to check for specific elements/text/… . Below you can find the implementation of all other steps:
this.Then(/^the message form counter should be (-?\d+)$/, function(nr, callback) {
  this.client
    .waitForVisible('form[name=message]')
      .getText('.count')
    .should.eventually.equal(nr)
      .and.notify(callback);
});

this.When(/^I enter a new message of (\d+) characters$/, function(nr, callback) {
  this.client
    .waitForVisible('form[name=message]')
      .setValue('input[name=message]', createString(nr))
    .should.eventually.notify(callback);
});

this.Then(/^the counter should be red$/, function(callback) {
  this.client
    .waitForVisible('form[name=message] .count.danger')
    .should.eventually.notify(callback);
});

this.Then(/^the submit button should be disabled$/, function(callback) {
  this.client
    .waitForVisible('form[name=message] button[disabled]')
    .should.eventually.notify(callback);
});

this.Then(/^the submit button should be enabled$/, function(callback) {
  this.client
    .waitForVisible('form[name=message] button')
      .elements('form[name=message] button[disabled]')
      .then(function(res) { return res.value.length; })
    .should.become(0)
      .and.notify(callback);
});

this.When(/^I enter a message \"(.+)\"$/, function(message, callback) {
  this.client
    .waitForVisible('form[name=message]')
      .setValue('input[name=message]', message)
    .should.eventually.notify(callback);
});

this.When(/^I submit the message$/, function(callback) {
  this.client
    .waitForVisible('form[name=message]')
      .submitForm('form[name=message]')
    .should.eventually.notify(callback);
});

this.Then(/^the message field should be empty$/, function(callback) {
  this.client
    .waitForVisible('form[name=message]')
      .getText('input[name=message]')
    .should.become('')
      .and.notify(callback);
});
You only need one more thing. To create a message of X characters I used a function that creates a string like “01234567890123…”. The function I used should be placed on top of the newMessage.steps.js file:
function createString(nr) {
  var data = [];
  for (var idx = 0; idx < nr; idx++) {
    data.push(idx % 10);
  }
  return data.join('');
}
Testing it out
Now we tested both features, so we’re ready to run our tests. Run the application like you usually do:
meteor
After waiting a while, you’ll see that a browser window pops up, executing all your steps. You’ll see that it starts entering values in fields, clicking buttons, but it goes pretty fast. After everything is finished, you’ll see the status of the executed tests.
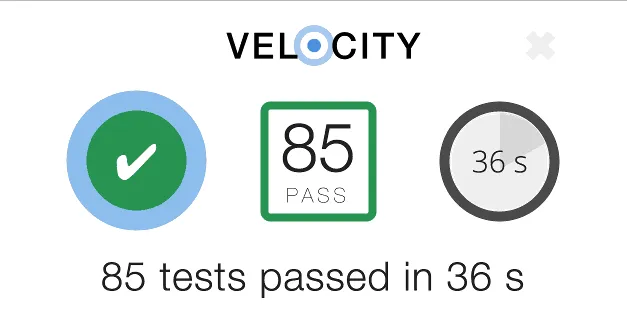
Even though the tests went pretty fast, it’s still significantly slower than unit tests, so be aware when running all E2E tests for bigger applications.
If you scroll down a bit, you’ll see that all features and scenarios are listed properly.

Conclusion
E2E testing is pretty neat, but it’s a slow process. To show you a quick comparison, we have about 70 lines of JavaScript code in our application, but it took us more than the double amount of lines of code to test everything (around 160 lines). E2E testing will usually consume around 1/3th or 1/2th of the total time of implementing a feature (which means that the total duration of implementing a feature might double). So it’s necessary to primarily test key features of the application.
Also, the documentation of how to use these frameworks is a bit scarce, but I hope that this example can be used as a reference guide to help you with implementing E2E tests for your Meteor application.
Achievement: E2E tested Meteor applications using Velocity, Cucumber.js, WebdriverIO and Chai (Chimp)
If you’re seeing this, then it means you successfully managed to make it through this article. If you’re interested in the full code example, you can find it on GitHub. If you want to try out the code yourself, you can download an archive from GitHub.