
Configuration as a microservice
- November 9th, 2017
- 5 minute read
- Git Microservices Spring boot Spring cloud Web
In my last few tutorials, I’ve covered some aspects that are really important with microservice, such as a discovery service like Eureka and a circuit breaker like Hystrix. Another thing that might be useful when working with microservices is to provide your application configuration as a microservice as well.
For example, let’s say that we have 10 Spring boot applications or microservices. Every application has its own configuration, such as the port number, database settings, … . The issue with that approach is that you sometimes have configuration that has to be applied to more than just one application, and that the decentralized approach doesn’t work that great for configuration.
Another issue with configuration in general is that those properties files can be changed by anyone, so if someone changes something, and it fails, it’s fairly difficult to track back what happened and why. But what if we would use version control for our configuration, like Git? That would allow us to roll back changes easily, it would allow us to easily migrate changes to other environments by merging commits to other branches, and you can see who changed something and why he or she did that using the commit message.
Also, if you start using containers like Docker for your applications, then you would have to add a separate volume for your configuration. If you manage it through Git, you no longer need that extra volume.
Setting up a Spring boot application
Luckily of us, Spring already has done quite a job to get this thing ready to use. All you need to do is to create a new Spring boot project. As usual, the best place to do that is by using the Spring Initializr.
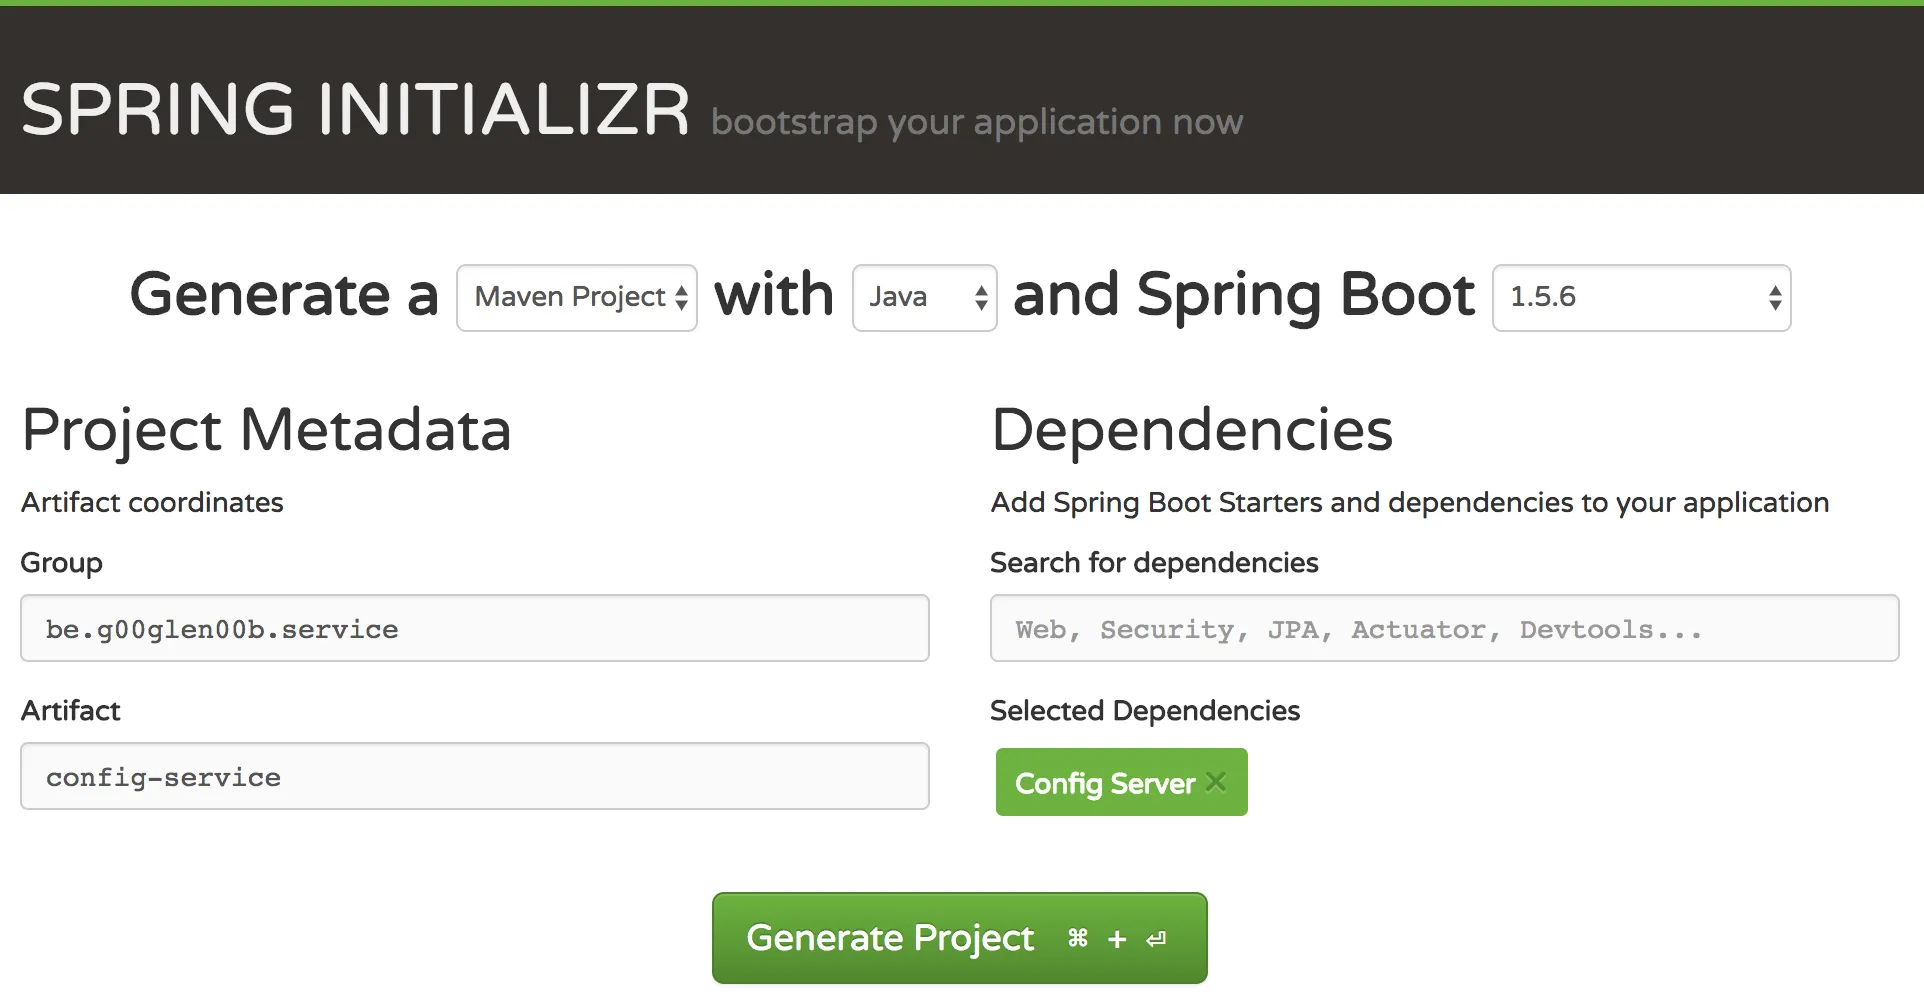
All you have to do is add the Config Server dependency. If you decide not to use the Spring Initialzr, you can just add the following dependency:
<dependency>
    <groupId>org.springframework.cloud</groupId>
    <artifactId>spring-cloud-config-server</artifactId>
</dependency>
Configuring the service
After you created your project and imported it into your IDE, it’s time to configure it. To do that, you need to edit the application.properties file in the src/main/resources folder. There are two things to configure:
- The location of the Git repository
- The structure you want to follow within that repository
To configure the location, you have to change the spring.cloud.config.server.git property. In this case, I created a repository on GitHub, so I added the following property:
spring.cloud.config.server.git=git@github.com:g00glen00b/microservice-demo-config.git
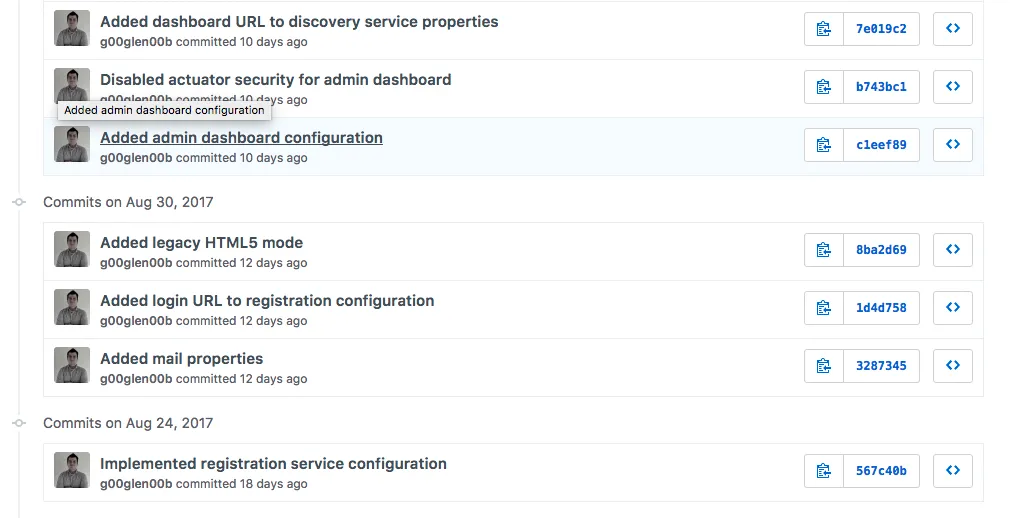
The structure I chose is to have a folder for every application. And within each folder there will be an application.yml file (or application.properties) for every profile.
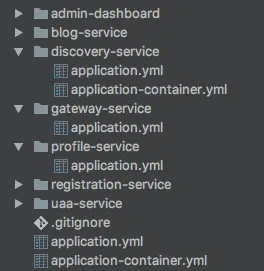
Every folder contains an application.yml file with the configuration for that specific application. The application.yml file in the root folder contains the global configuration that applies to all applications.
Additionally to that, we can have profile-specific configuration in both the root folder and the application-specific folders. In the screenshto above you can see that the discovery-service has configuration specific for the container profile. However, in the root folder there is also a file called application-container.yml that will apply to all applications using the container profile.
To configure that we’ll use a separate folder for every application, you need to add the following property:
spring.cloud.config.server.git.searchPaths={application}
If you would be using YAML, you would have the following:
spring:
  cloud:
    config:
      server:
        git:
          uri: git@github.com:g00glen00b/microservice-demo-config.git
          searchPaths: '{application}'
In this case, {application} is a placeholder referring to the name of the application, which can be set using the spring.application.name property (I’ll show that later!).
Next to that, there are also a few other placeholders you can use, which you can find in the documentation.
Testing out the config service
To test the configuration, you can run the application and call the REST API directly. The REST API has the following structure: /{application}/{profiles}. So, if we would retrieve the configuration for an application called uaa-service with the profile dev, we should call http://localhost:8000/uaa-service/dev (I’m using port 8000 here).
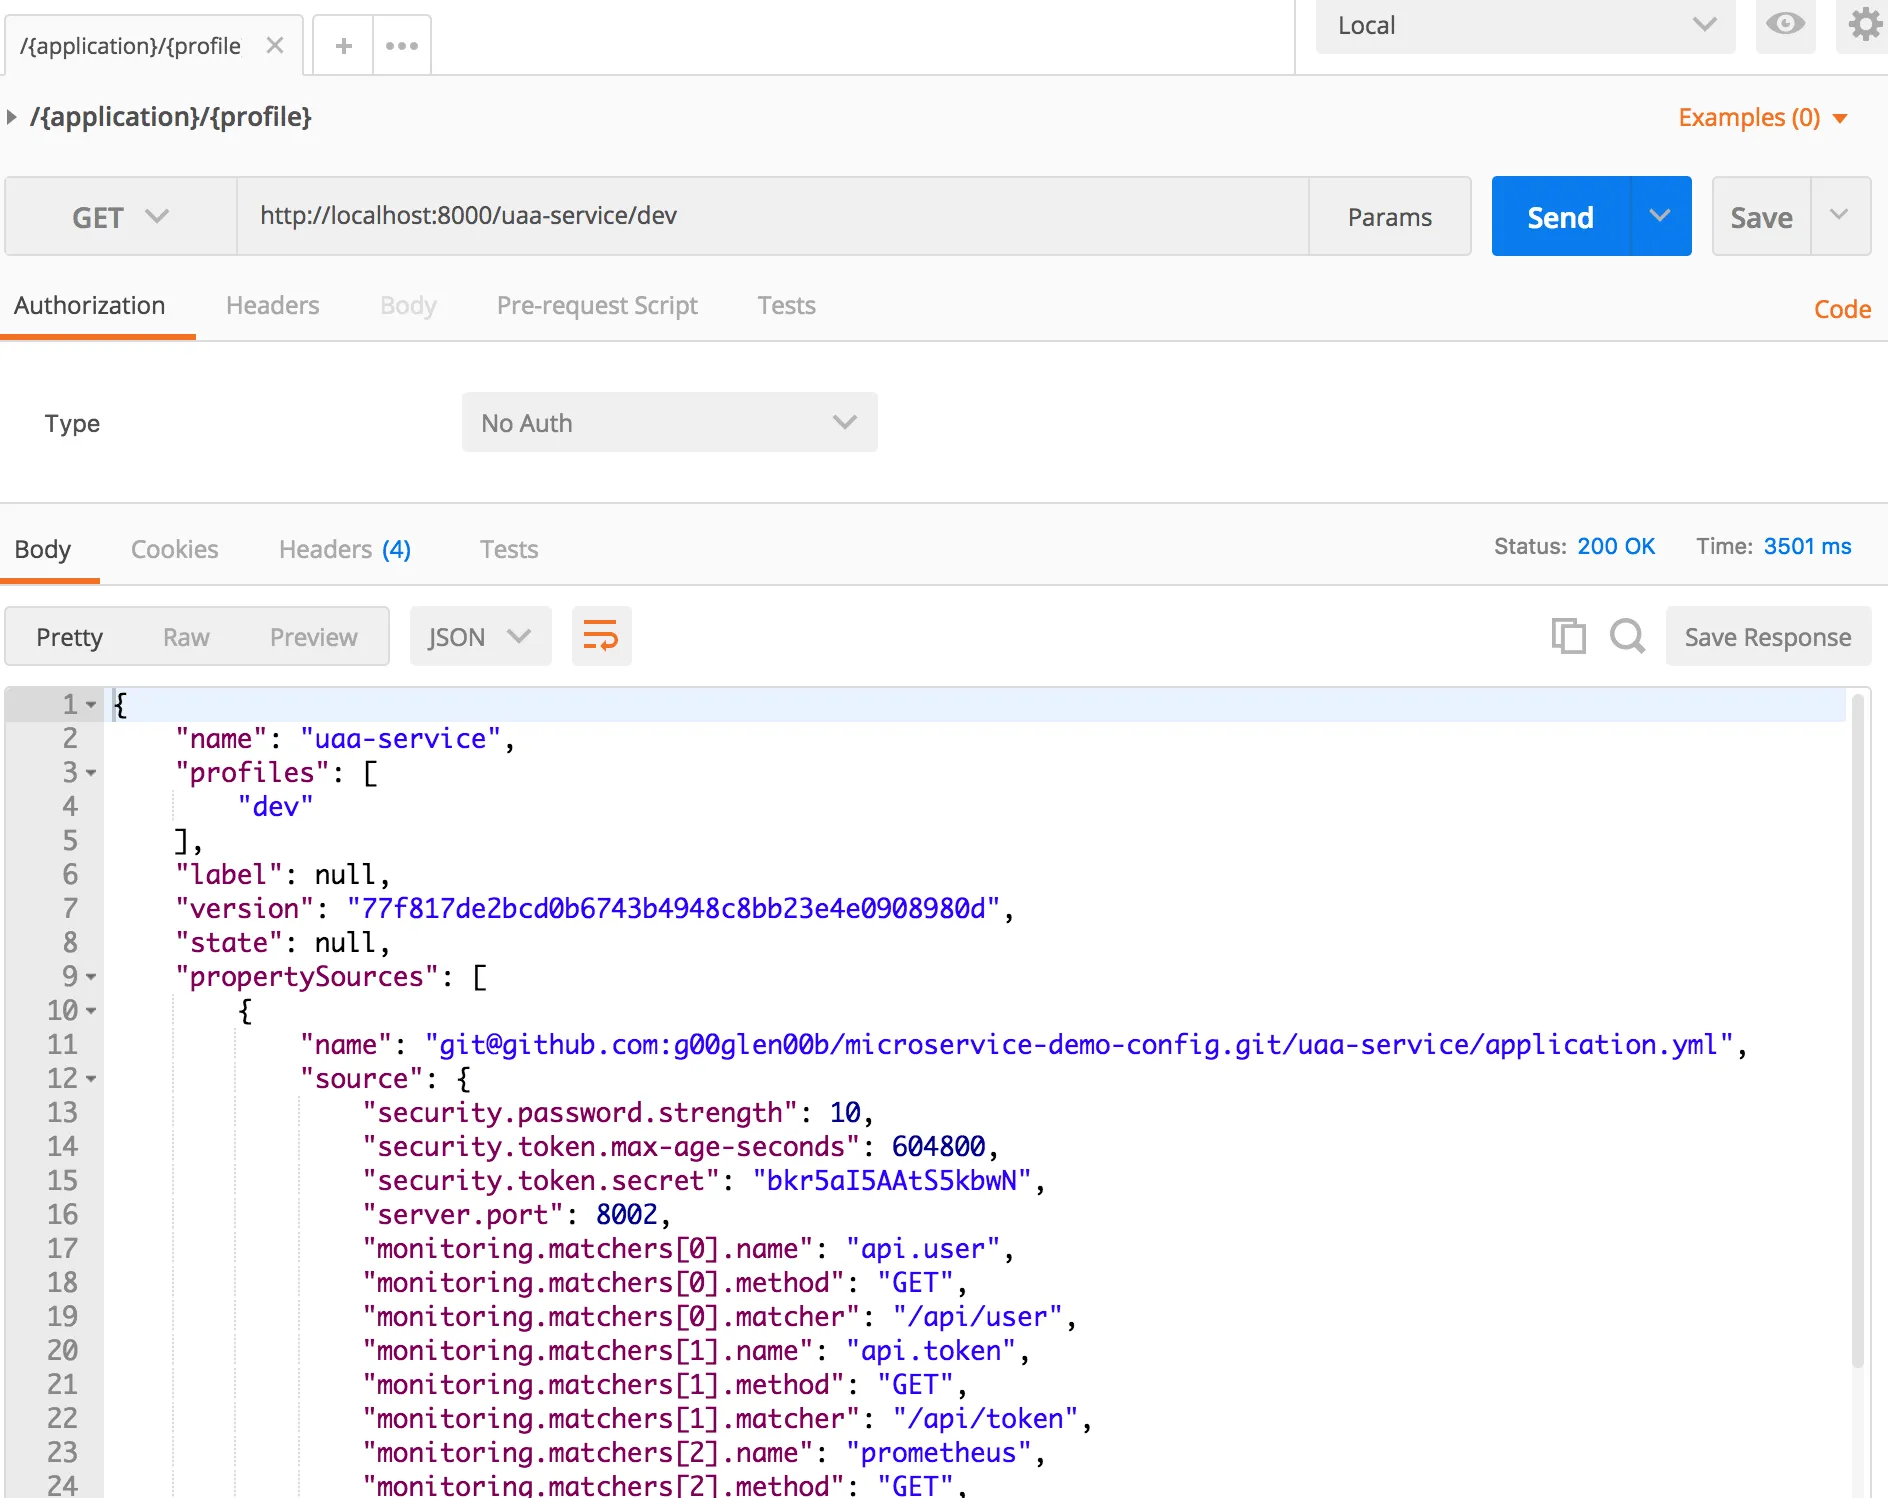
The result will be a list of property sources. In this case, it will retrieve the following property sources:
- uaa-service/application.yml
- application.yml
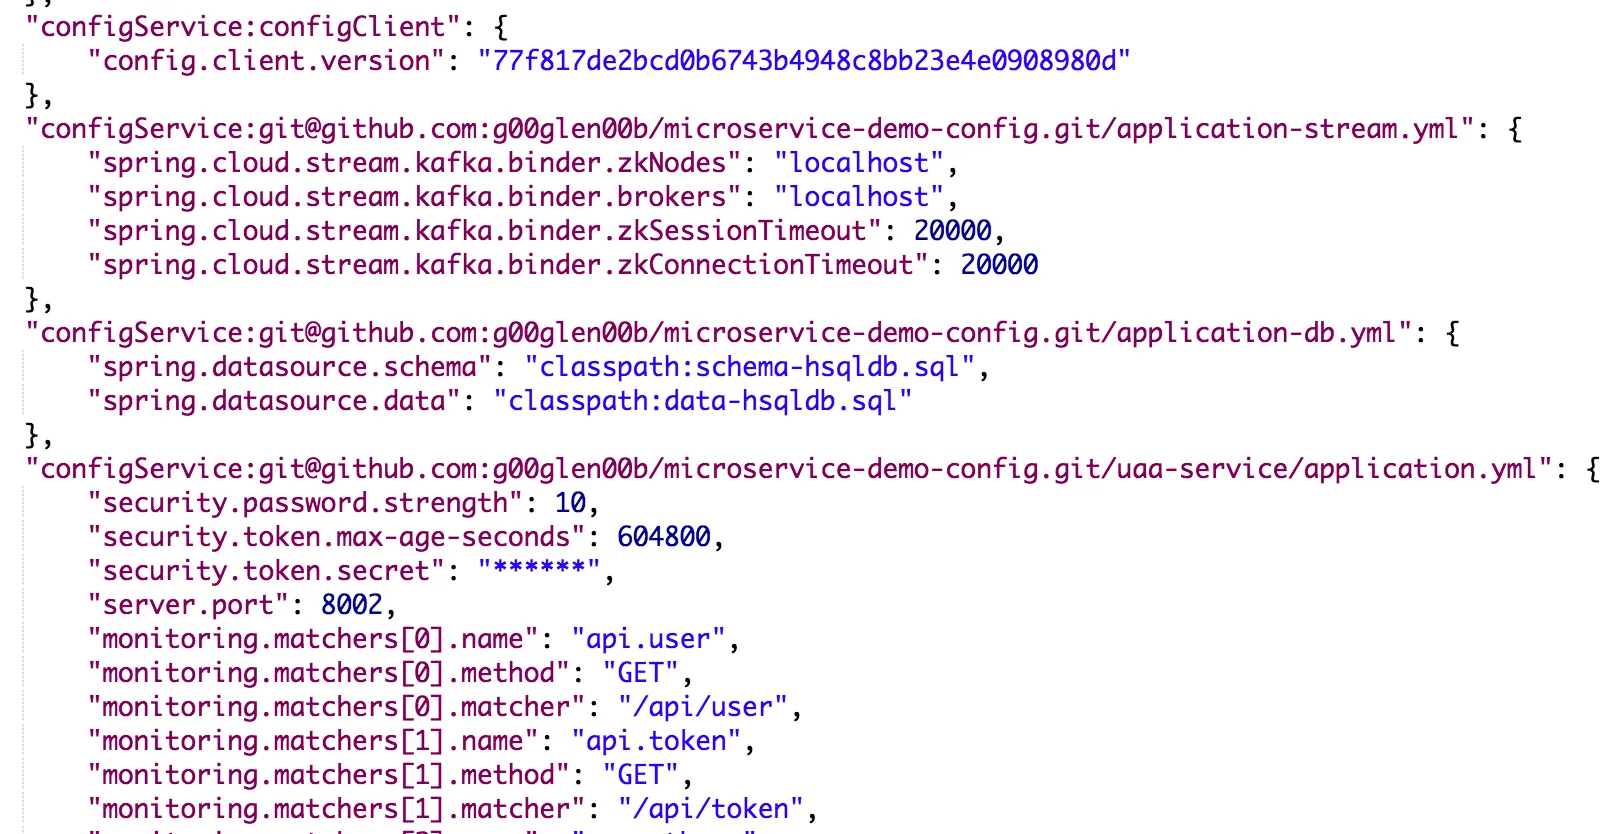
If you would run an application with multiple profiles and you want to see what configuration would apply, you have to separate all pofiles with a comma, for example http://localhost:8000/uaa-service/dev,db,stream.
Using the configuration service
No worries, you don’t have to call these APIs by yourself if you’re using Spring boot. You just have to add the Config client dependency and you’re ready.

Once you’ve set up your project, you need to create a file called bootstrap.yml (or bootstrap.properties) and add the spring.application.name property there. This name should be the same as the configuration folder you want to use. Additionally to that, you also need to configure the location of the config service, which can be done with the spring.cloud.config.uri property:
spring:
  application:
    name: uaa-service
  cloud:
    config:
      uri: http://localhost:8000
If you run the application now, you’ll see that it will fetch the configuration from the config service during startup. So make sure to run your config service before you run the other applications.

If you added the Actuator to your application, you can also view the result by going to the /env endpoint on your application.
With this, we’ve completely set up both the config service and we’re able to set up applications using the config service. This allows us to get more control of what’s happening, and you also don’t need to deploy an external application.properties file with each application. Just let them refer to the config service!
If something doesn’t work, you simply reverse the commit, restart the applications (or use the @RefreshScope annotation) and you’re done.
Achievement: Configuration as a service
If you’re seeing this, then it means you successfully managed to make it through this tutorial. If you’re interested in the full code example, you can find it on GitHub.