
When we write applications nowadays, we often use a separate toolkit for both the backend and frontend. When deploying these applications, we can either choose to deploy both the backend and frontend separately, or we can combine them into a single artifact. In this tutorial I’ll explore the latter, with Spring boot being the backend framework, and a React app as the frontend.
Building a multi-module Maven project
If you created your React app with create-react-app, then you can build your application with npm run build.
Our backend application on the other hand uses Maven or Gradle, for example by using the mvn package command.
To make it easy to integrate these parts of our application, I’m going to create a multi-module Maven project. This allows me to build both the frontend and backend with the same tool (being Maven).
So, to make this happen, I’m using the following directory structure:
my-project/
  my-project-frontend/
    package.json
    pom.xml
  my-project-backend/
    pom.xml
  pom.xml
The next step is to define the parent pom.xml file, which will look like this:
<project xmlns="http://maven.apache.org/POM/4.0.0" xmlns:xsi="http://www.w3.org/2001/XMLSchema-instance"
         xsi:schemaLocation="http://maven.apache.org/POM/4.0.0 http://maven.apache.org/maven-v4_0_0.xsd">
    <modelVersion>4.0.0</modelVersion>

    <groupId>be.g00glen00b.apps</groupId>
    <artifactId>my-project</artifactId>
    <version>1.0.0-SNAPSHOT</version>
    <name>my-project</name>
    <packaging>pom</packaging>

    <modules>
        <module>my-project-frontend</module>
        <module>my-project-backend</module>
    </modules>
</project>
Please note that I’m building the frontend before the backend. This is important, so that the frontend assets can be copied later on to the backend module, where they will be combined within a single artifact.
If you generated your Spring boot project through spring initializr, you can also move the Maven wrapper to the root folder.
This Maven wrapper is useful for building your project if you don’t have Maven installed locally.
To move it to the root folder, move both the mvnw and mvnw.cmd executables and the .mvn folder as well.
Using the frontend-maven-plugin
To trigger npm scripts with a Maven context, you can use the frontend-maven-plugin. This plugin not only executes those scripts, but also installs a specific version of Node.js and npm (or Yarn). Together with the Maven wrapper, that means that you can build your entire project as long as you have a proper JDK installed. There’s no need to install Maven, Node.js or npm.
To use it, we first have to configure the pom.xml within the frontend-project:
<?xml version="1.0" encoding="UTF-8"?>
<project xmlns="http://maven.apache.org/POM/4.0.0" xmlns:xsi="http://www.w3.org/2001/XMLSchema-instance"
         xsi:schemaLocation="http://maven.apache.org/POM/4.0.0 https://maven.apache.org/xsd/maven-4.0.0.xsd">
    <modelVersion>4.0.0</modelVersion>
    <parent>
        <groupId>be.g00glen00b.apps</groupId>
        <artifactId>my-project</artifactId>
        <version>1.0.0-SNAPSHOT</version>
    </parent>
    <artifactId>my-project-frontend</artifactId>
    <name>my-project-frontend</name>

    <build>
        <plugins>
            <!-- TODO: Add plugins here -->
        </plugins>
    </build>
</project>
This is quite similar to what we did for the root Maven descriptor.
The major differences are that we no longer need to define the modules, and that we use the <parent> tag to define what the parent project is.
The next step is to add the frontend-maven-plugin. The following code snippet should come exactly where the TODO comment was placed earlier.
If it doesn’t work out, no worries, I’ll provide a link to the repository at the end of the tutorial.
<plugin>
    <groupId>com.github.eirslett</groupId>
    <artifactId>frontend-maven-plugin</artifactId>
    <version>1.11.3</version>
    <!-- TODO: Add executions here -->
</plugin>
Installing Node.js execution
The next step is to configure which steps should exactly be executed. These steps are configured as separate executions within the plugin.
For example, the first execution is to install Node.js and npm. To do this, we add the following:
<plugin>
    <groupId>com.github.eirslett</groupId>
    <artifactId>frontend-maven-plugin</artifactId>
    <version>1.11.3</version>
    <executions>
        <execution>
            <id>install node and npm</id>
            <goals>
                <goal>install-node-and-npm</goal>
            </goals>
        </execution>
        <!-- TODO: Add more executions here -->
    </executions>
</plugin>
If you want to configure exactly which version of Node.js is installed, we can do so by adding a separate configuration:
<plugin>
    <groupId>com.github.eirslett</groupId>
    <artifactId>frontend-maven-plugin</artifactId>
    <version>1.11.3</version>
    <executions>
        <execution>
            <id>install node and npm</id>
            <goals>
                <goal>install-node-and-npm</goal>
            </goals>
        </execution>
        <!-- TODO: Add more executions here -->
    </executions>
    <configuration>
        <nodeVersion>v14.17.5</nodeVersion>
    </configuration>
</plugin>
In this example we’re installing Node.js version 14.17.5, which is the latest LTS version at the moment of writing this tutorial.
Installing dependencies execution
The next step or execution is to install the dependencies of your frontend project.
Normally we do this by using the npm install command. We can do something similar within the plugin:
<execution>
    <id>npm install</id>
    <goals>
        <goal>npm</goal>
    </goals>
    <phase>generate-resources</phase>
</execution>
The npm goal can be used for multiple things involving npm.
By default, when no configuration is passed, it will execute the npm install command.
In addition, we can define during which phase this execution should run. The generate-resources phase is one of these phases, which is commonly used for generating resources within a Java project. A full overview of the phases during the default lifecycle can be found within the documentation of Maven.
Generating the bundled static resources
The next step is to also include an execution to run the npm run build command, which invokes react-scripts build behind the screens.
To do so, we can add a similar execution as before:
<execution>
    <id>npm run build</id>
    <goals>
        <goal>npm</goal>
    </goals>
    <phase>generate-resources</phase>
    <configuration>
        <arguments>run build</arguments>
    </configuration>
</execution>
As mentioned earlier, the default argument passed to the npm command is install.
However, by configuring a separate <arguments>, we can tell Maven exactly which npm command should be invoked.
In this case we’re using run build arguments.
Now, with those executions implemented, we basically completed the pom.xml of our frontend project.
If we execute mvn package within our frontend module, we’ll see that a build-folder is being generated.
Generating a frontend JAR
Now that we have generated the build-folder, we have to somehow serve them by our backend application.
Spring boot automatically serves files within the classpath:static/ or classpath:public/ directory.
To automate this, we can move the resources of the build-folder to a static-folder in our frontend project, and include the frontend-project as a Maven dependency in our backend-project.
To move the resources to the static-folder, I added the following to the pom.xml of the frontend project:
<plugin>
    <artifactId>maven-resources-plugin</artifactId>
    <version>3.2.0</version>
    <executions>
        <execution>
            <id>copy-resources</id>
            <phase>process-classes</phase>
            <goals>
                <goal>copy-resources</goal>
            </goals>
            <configuration>
                <outputDirectory>${project.build.outputDirectory}/static</outputDirectory>
                <resources>
                    <resource>
                        <directory>${basedir}/build/</directory>
                        <filtering>false</filtering>
                    </resource>
                </resources>
            </configuration>
        </execution>
    </executions>
</plugin>
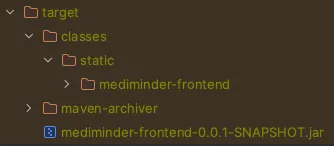
If we generate our JAR now, there should be a “static” folder in the target/classes folder of our frontend-project.
Now we only have to add the frontend-module as a dependency to our backend-module. This can be done by opening the pom.xml of our backend-project and adding:
<dependency>
    <groupId>be.g00glen00b.apps</groupId>
    <artifactId>my-project-frontend</artifactId>
    <version>${project.version}</version>
</dependency>
Fixing routing
With the maven-resources-plugin configured, we are basically done with bundling our backend and frontend together.
One thing you still want to configure is to redirect all calls back to /index.html.
This is necessary to make history pushstate routing work when refreshing the page.
There are several ways to implement this, as mentioned on this Stack Overflow post.
Personally, I prefer writing a filter that sends all webpage requests back to index.html.
To do so, we first need to create a new filter. Since some projects might use a context path, I’m also including the context path property and default it to an empty string if not given.
@Component
public class NotFoundIndexFilter extends OncePerRequestFilter {
    private final String contextPath;

    public NotFoundIndexFilter(@Value("${server.servlet.context-path:}") String contextPath) {
        this.contextPath = contextPath;
    }

    @Override
    protected void doFilterInternal(HttpServletRequest request, HttpServletResponse response, FilterChain filterChain) throws ServletException, IOException {
        // TODO: Implement
    }

}
The next step is to differentiate between webpage-requests (HTML pages) and other requests (JavaScript, CSS, API-calls, …).
To do this, I wrote an isHtmlRequest() method that checks the Accept header for text/html:
@Component
public class NotFoundIndexFilter extends OncePerRequestFilter {
    // ...

    @Override
    protected void doFilterInternal(HttpServletRequest request, HttpServletResponse response, FilterChain filterChain) throws ServletException, IOException {
        if (isHtmlRequest(request)) {
            // TODO: Implement
        } else {
            filterChain.doFilter(request, response);
        }
    }

    private boolean isHtmlRequest(HttpServletRequest request) {
        String acceptHeader = request.getHeader("Accept");
        return acceptHeader != null && acceptHeader.contains(MediaType.TEXT_HTML_VALUE);
    }
}
The next step is to forward our request. Since HttpServletRequestis immutable, we create a copy of the original request and override the getRequestURI() method:
@Component
public class NotFoundIndexFilter extends OncePerRequestFilter {
    // ...

    @Override
    protected void doFilterInternal(HttpServletRequest request, HttpServletResponse response, FilterChain filterChain) throws ServletException, IOException {
        if (isHtmlRequest(request)) {
            HttpServletRequest mutatedRequest = mutateRequestToIndexPage(request);
            filterChain.doFilter(mutatedRequest, response);
        } else {
            filterChain.doFilter(request, response);
        }
    }

    private HttpServletRequest mutateRequestToIndexPage(HttpServletRequest request) {
        return new HttpServletRequestWrapper(request) {
            @Override
            public String getRequestURI() {
                return contextPath + "/index.html";
            }
        };
    }

    // ...
}
We can also further expand the conditions to include other constraints. For example, let’s say our API also has an HTML-page, then we don’t want to forward these to the index.html page of our frontend.
To solve that, we can include an isAPI() method:
@Component
public class NotFoundIndexFilter extends OncePerRequestFilter {
    // ...

    @Override
    protected void doFilterInternal(HttpServletRequest request, HttpServletResponse response, FilterChain filterChain) throws ServletException, IOException {
        if (isHtmlRequest(request) && !isAPI(request)) {
            HttpServletRequest mutatedRequest = mutateRequestToIndexPage(request);
            filterChain.doFilter(mutatedRequest, response);
        } else {
            filterChain.doFilter(request, response);
        }
    }

    // ...

    private boolean isAPI(HttpServletRequest request) {
        return request.getRequestURI().startsWith(contextPath + "/api");
    }
}
Conclusion
Bundling the frontend and backend artifacts together has several benefits. First of all, you end up with less artifacts to deploy, and thus less components to keep running.
In addition, you won’t run into Cross-Origin Resource Sharing or CORS problems, since both the frontend and backend will be served from the same origin.
And last but not least, this approach is quite frictionless. It only affects the generated artifacts and has no impact on the developer experience. Both frontend and backend developers can keep using the tools they’re used to. For local development I recommend configuring a proxy with React, so that you don’t run into CORS issues either.
Does this approach have no downsides at all? No, certainly not. One of the downsides is that you won’t be able to separately scale the applications. For example, let’s say that our application gains popularity and we want to run two instances of the backend. Now, that means that there will be two instances of our frontend as well. However, since the frontend is nothing more than some static assets, duplicating them isn’t exactly a big problem.
Another downside is that you can’t change either the frontend or backend without having the rebuild both of them. Let’s say we found a small typo within the frontend, and we fix that. Well, that means we have to rebuild both the frontend and backend module and redeploy and restart the entire thing.
Would I use this approach myself? Yes. The reason why is that for the projects I work on, scalability and build times aren’t an issue. On the other hand, we do win a lot of time by not having to worry about how to build, deploy or maintain two applications, but just one. And finally, even if our approach doesn’t end up to be the right solution, refactoring it won’t be difficult.
If you’re interested in a complete example, you can find one on GitHub. This project was originally written with Spring Boot + React but I later refactored it to Spring Boot + Angular. The principles behind it are still the same though.